Lab 3a: Use DLP engine along Instance Awareness on [corporate] O365 instance
Estimated Time: 15 minutes
OVERVIEW
In this lab, you will explore how to ensure that company confidential data is only uploaded to [the] corporate OneDrive instance. Uploads to unmanaged cloud storage or to non-corporate OneDrive instances (intentional or unintentional) should be prevented.
Applicable Use Cases
-
Identify company confidential files and grant access to specific (corporate) application instance
-
Block any other upload to unmanaged or non-corporate cloud apps
Step 1 Retrieve sensitive file for this test
For this lab we will use a Microsoft Word file which was tagged with Azure Information Protected (AIP) labels (23-AIPLabel.docx). You will find this file here:
[https://app.box.com/s/jpvnd61i9piluld0chh4v6wu00685nz1]
Please download it.
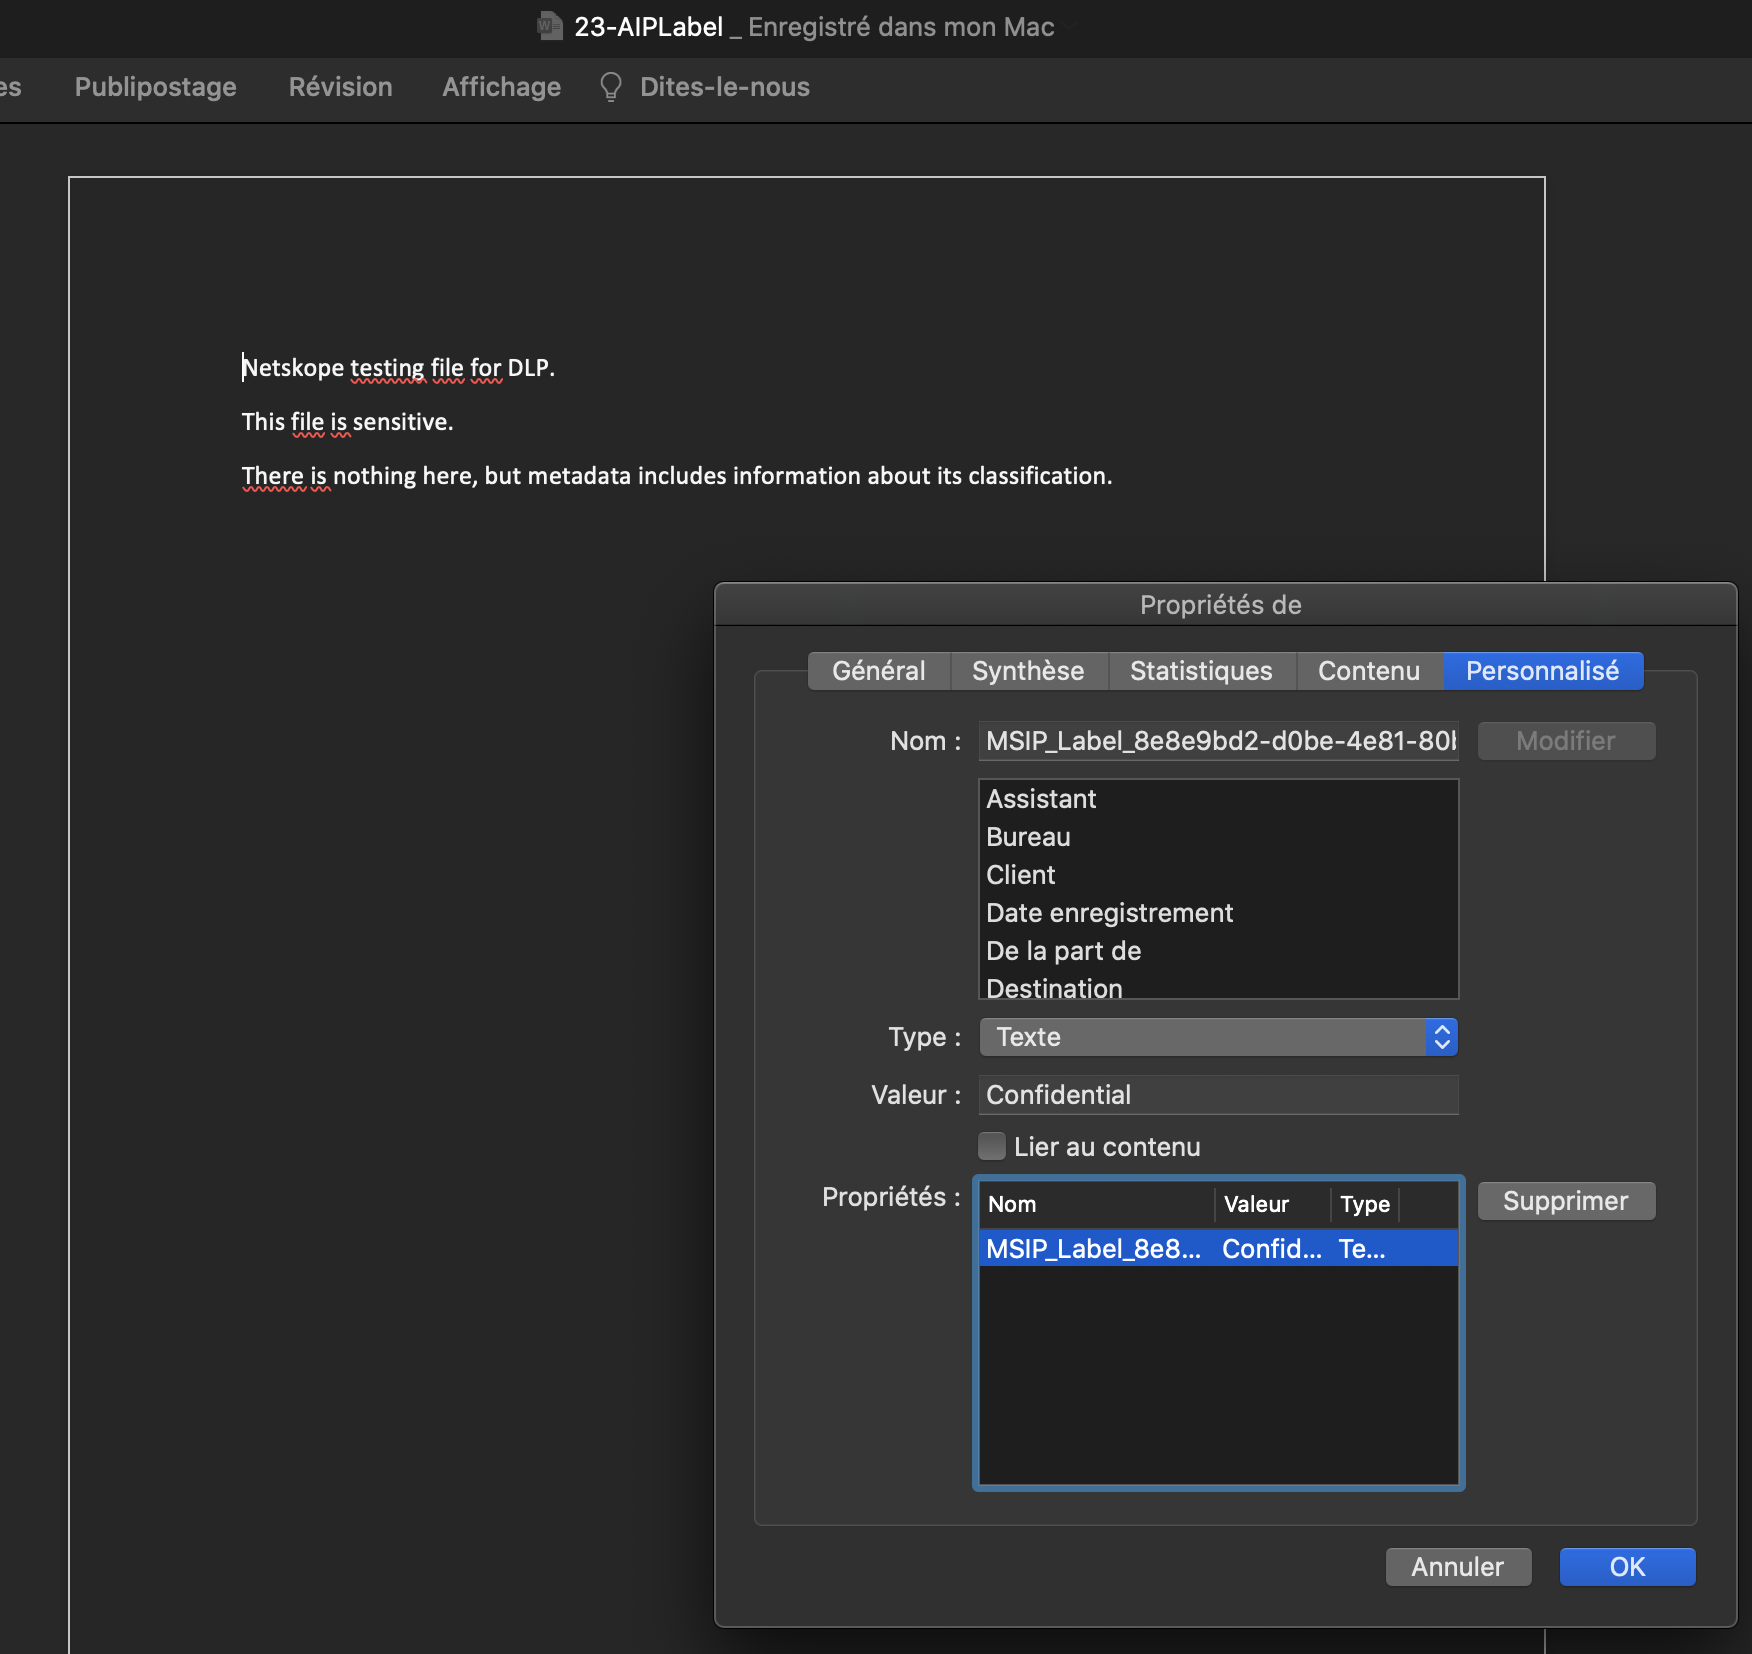
To detect that document we are looking for the following label / value:
- MSIP_Label_8e8e9bd2-d0be-4e81-80bb-728e9352a41d_Name: Confidential
You will be able to upload this file to corporate OneDrive, but should be blocked trying to upload to any other cloud storage app or private OneDrive instance.
Step 2 Login to your corporate OneDrive with the following professional user account
URL: [https://portal.office.com]
login: corporate.csw[X]@M365x04829816.onmicrosoft.com
Pa$$w0rd: Netskope_14-04
Make sure to use incognito mode (to avoid cache and re-authentication from a previous account with cookies)

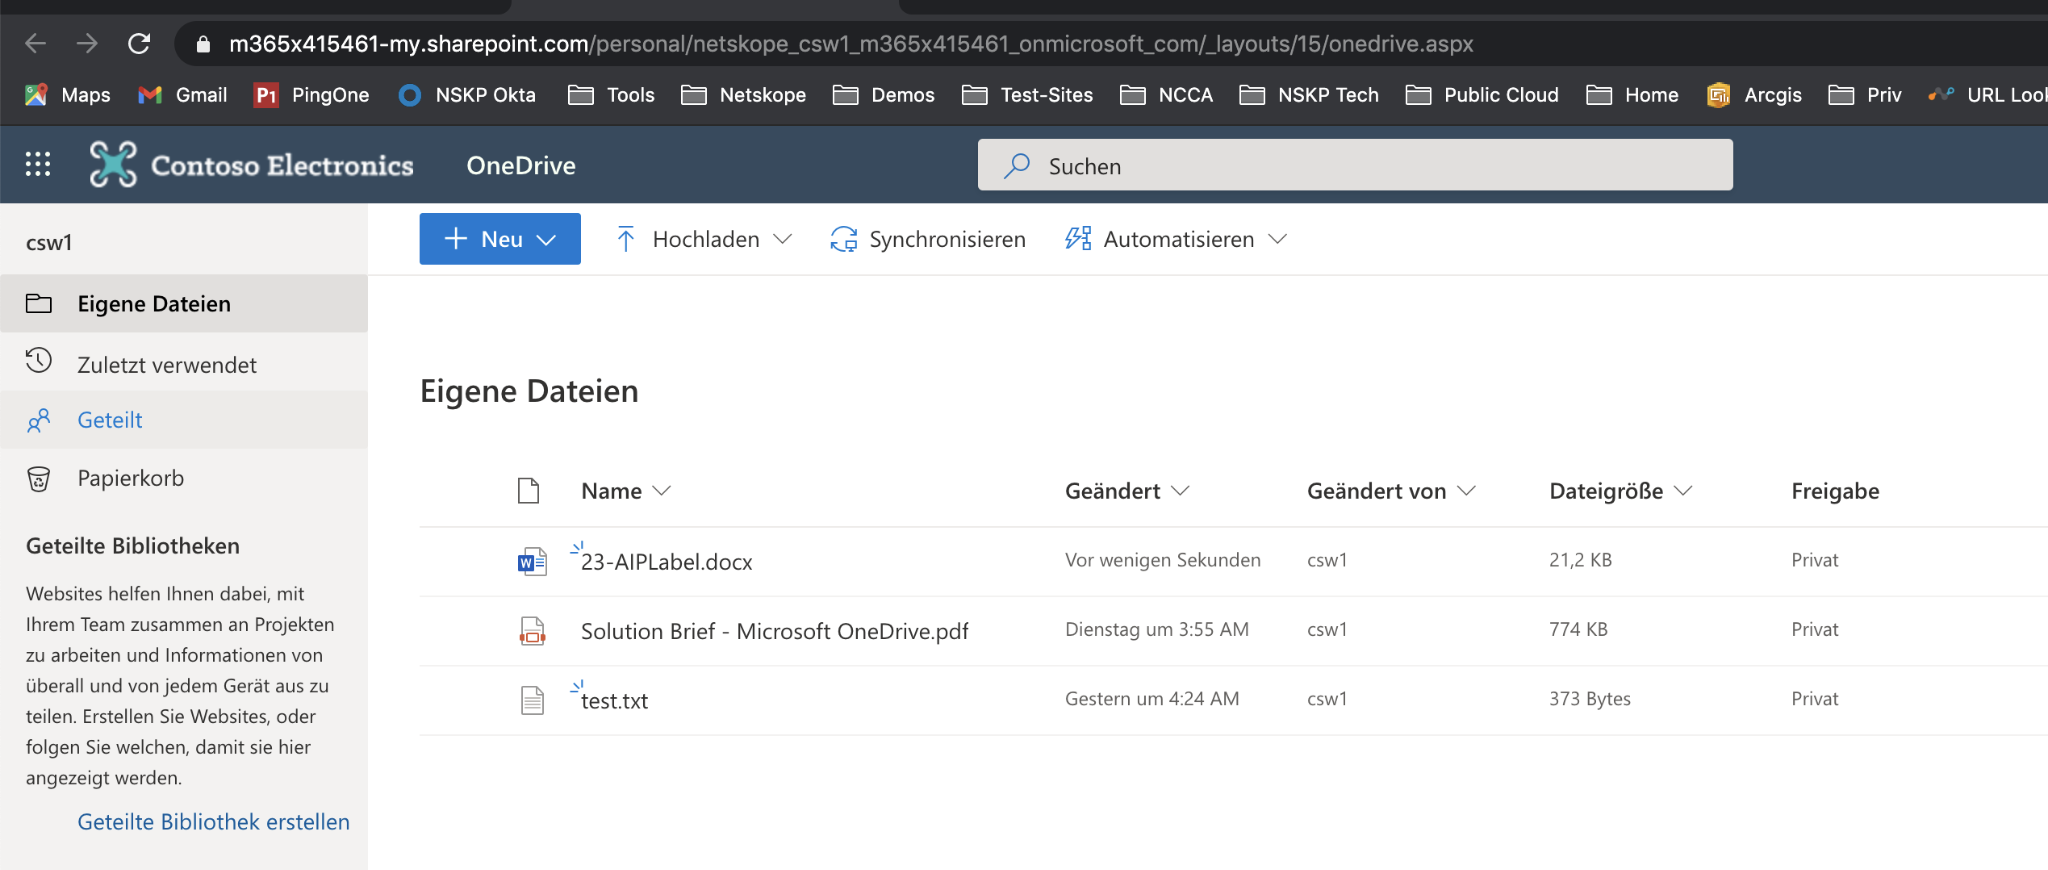
Step 3 Upload the AIPLabel file to your corporate OneDrive - that works fine.
(If the APILabel file is already there, you can delete it first.)
Step 4 Close all tabs in incognito window and open a new one - login into your "shadow-it" private / OneDrive account
login: private.csw[X]@M365x85864118.onmicrosoft.com
Pa$$w0rd: Netskope_14-04
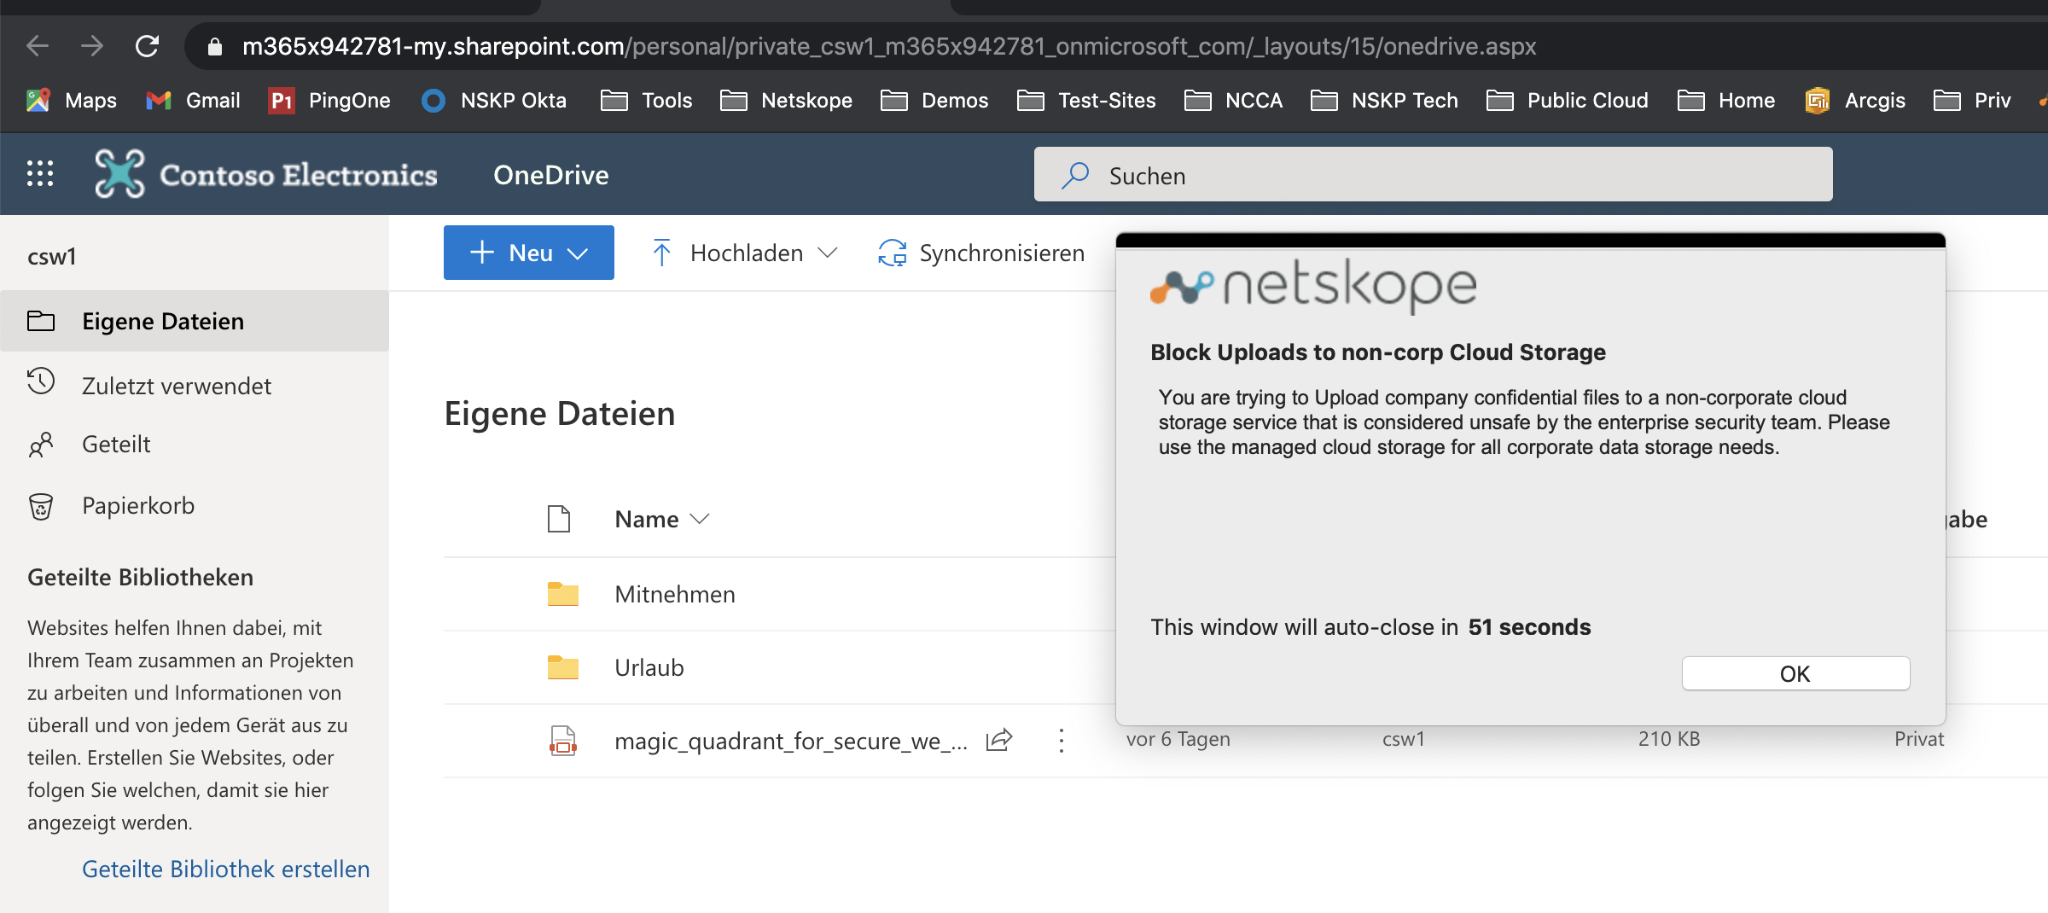
Step 4 Try upload AIPLabel file - this should be blocked
Step 5 Check Skope IT / Application Events to find the last two (2) logins, the one with corporate and short after the login with the private OneDrive account into the different instances and the appropriate actions.

Click on the spyglass again to find the policy which triggered here, as well as other details.

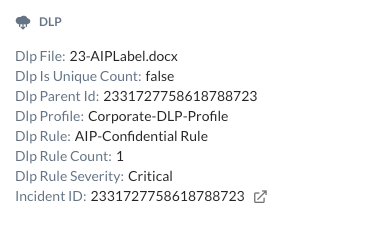
Within the DLP section of
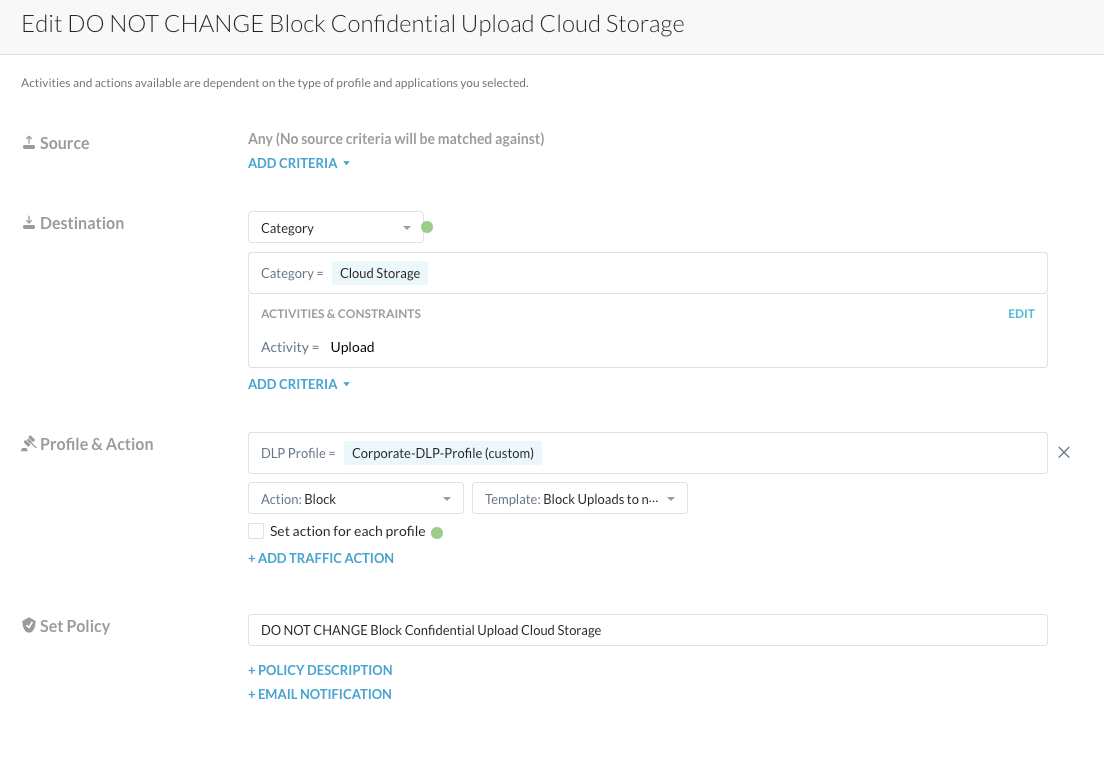
Step 6 Verify the policy including the used DLP profile and DLP rule. Go find the policy under Policies > Real-Time Protection:

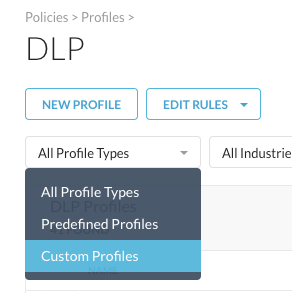
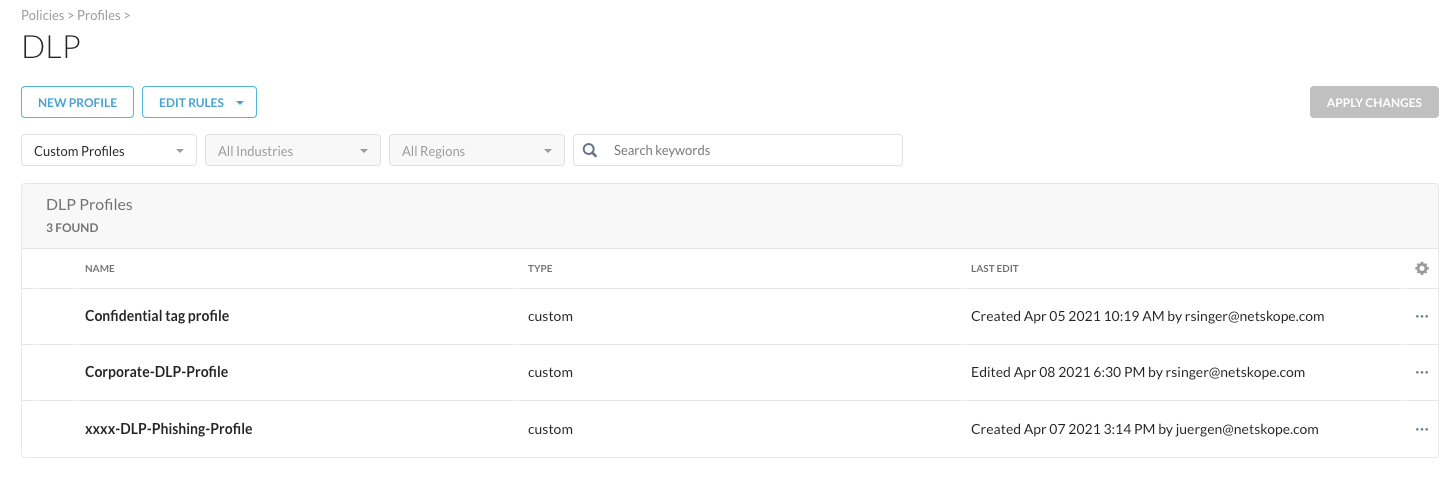
Step 7 From the Skope IT details and the policy configuration, you see that the used DLP Profile is called "Corporate-DLP-Profile". You will find that profile under Policies > Profiles > DLP.
Easiest way to access that one, is to filter for "Custom Profiles":
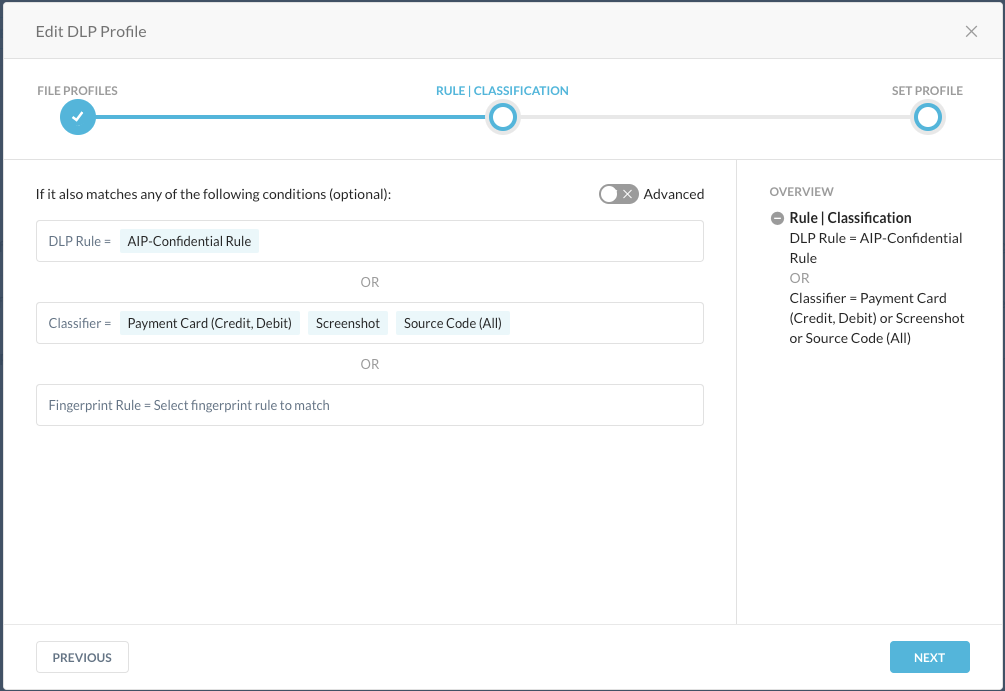
And finally, the DLP rule that was used here (API-Confidential Rule) can be found under Edit Rules > Data Loss Prevention:

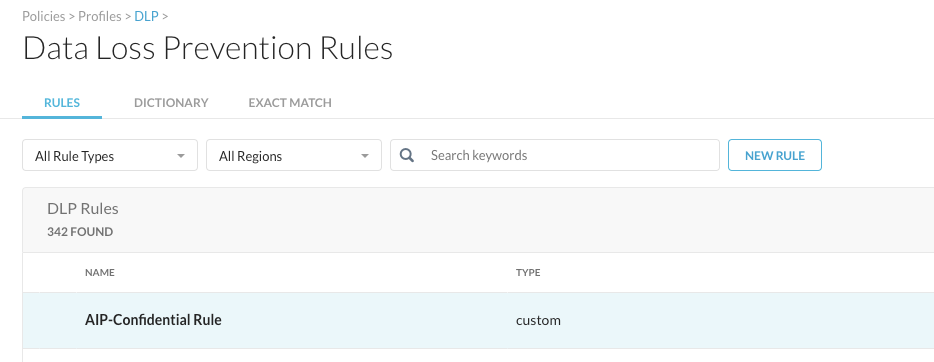
Click on the rule and walk through the rule to find the details about identifiers we look for:
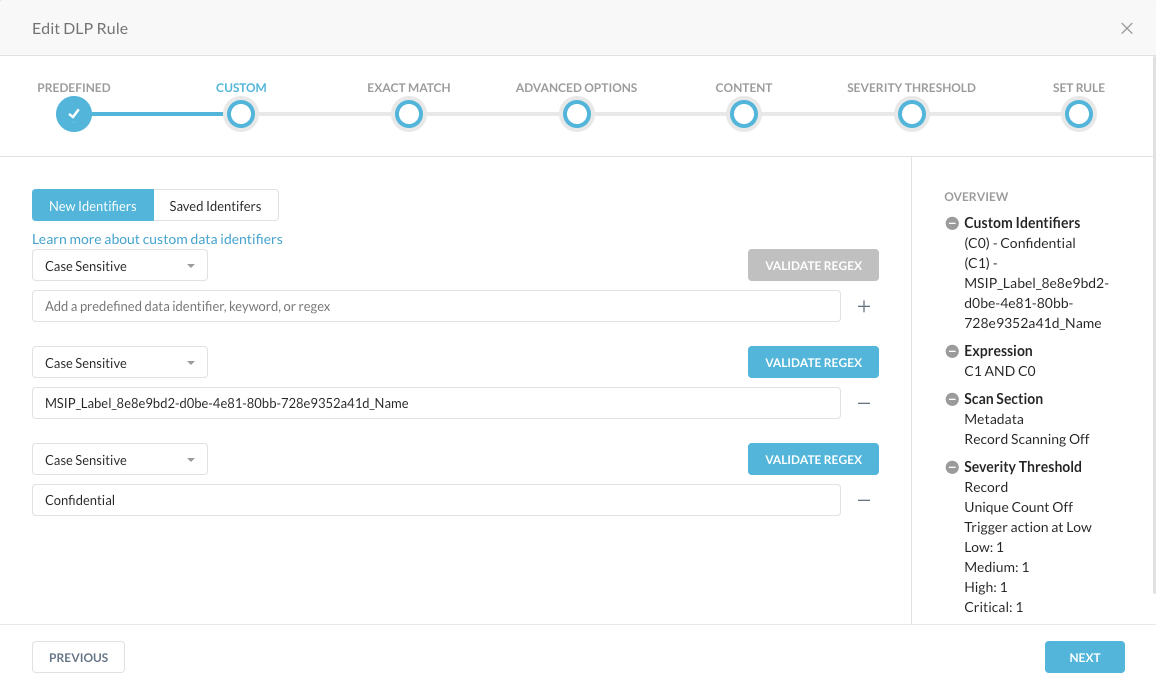
... together with all other details (on the right side), like the Expression, the Scan Selection and the Security Thresholds when that rule triggers.
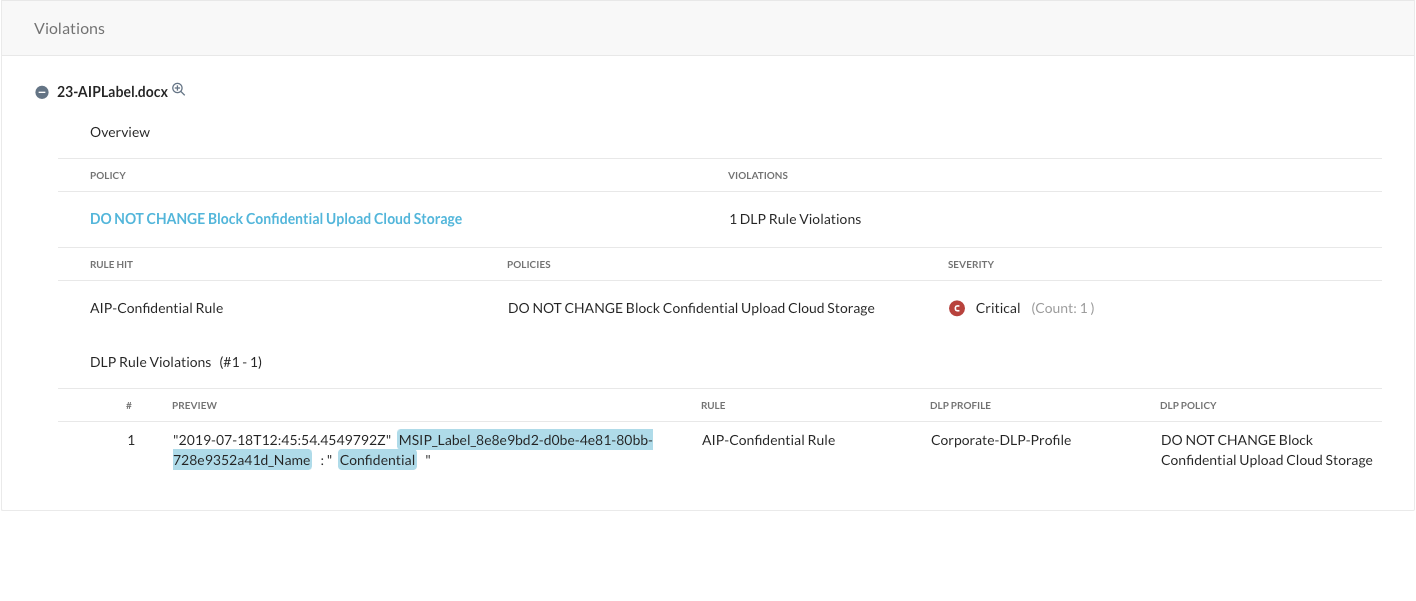
Step 8 Verify the forensic details of that incident. After the AIP file has been detected and blocked, you can have a closer look into details and forensics under Incidents > DLP:
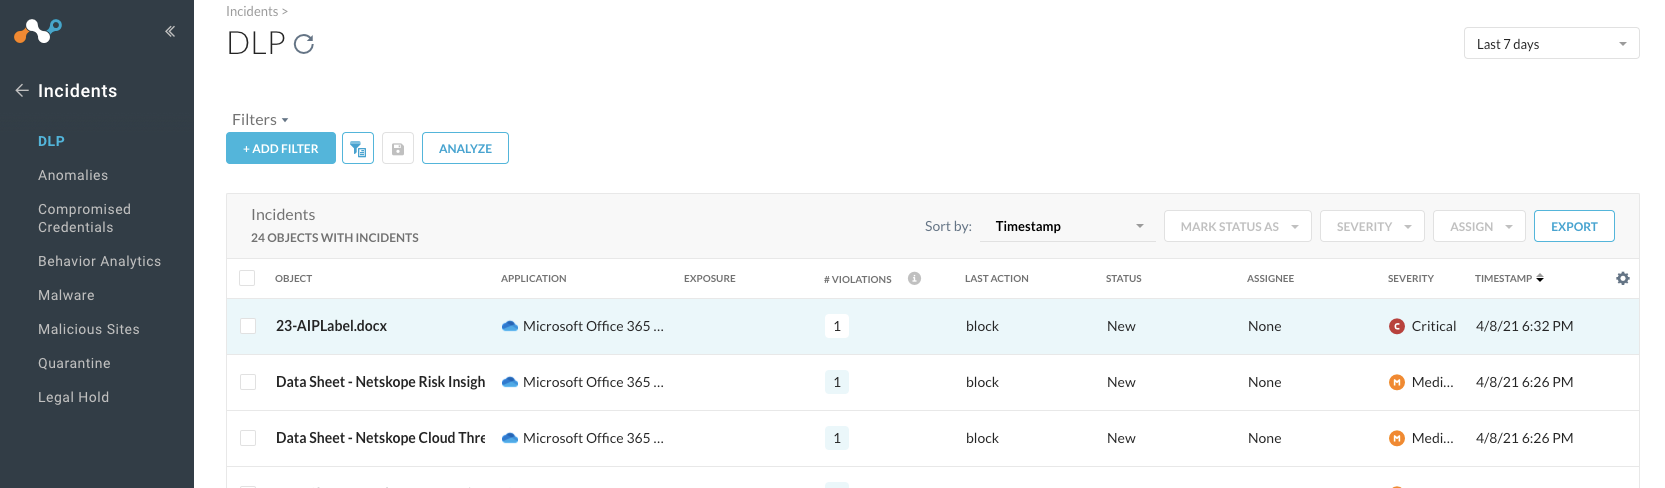
After you click on the appropriate filename, you can kick off a workflow on how to handle that incident, see more details...
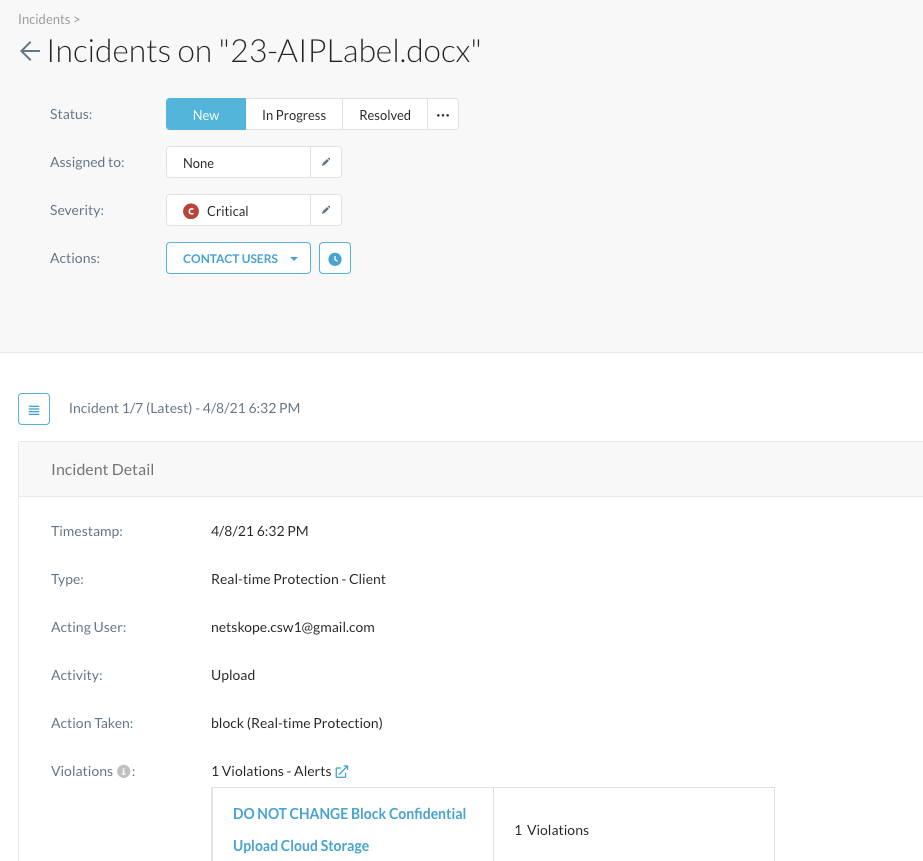
... all the way down, you can also find the forensics why this is a violation when you scroll down: