

Technical Lab Guide
A Step-by-Step Lab Guide to accompany the Cloud Security Workshop
Learning some basic Use Cases of the Netskope Security Cloud Platform
If you have any questions or suggestions, please report to author:
Table of contents
Lab 0: Let's realize how much we need to do (5min - optionnal) 3
Lab1a: Introduction to Netskope Home Screen (5min) 4
Lab 2: Safely Enable Cloud Applications 19
Lab 2a: Add Your User, Install and Verify Netskope Client 20
Lab 2b: Build your URL filter with Allow and Block lists (ca. 10min) 24
Lab 2c: Prevent usage of Cloud Storage Apps with bad reputation (ca. 10min) 30
Lab 2d: Prevent uploads to non-corporate cloud services 34
Lab 2e: Allow usage (incl. uploads) of corporate O365 instance 36
Lab 3: Prevent Corporate Confidential files leaving towards unmanaged Cloud Apps 42
Lab 3a: Use DLP engine along Instance Awareness on corporate O365 instance 42
Lab 3b: Use Machine-Learning DLP (optional - if you have time) 52
Lab 4: Verify Threat Protection 54
Lab 4a: Verify anti-malware real-time engine is preventing download 54
Conclusion 63
Lab 0: Modern Cloud
Lab 0: Let's realize how much we need to do (5min - optionnal)
Step 1 Open a browser from your computer or test machine and navigate to [https://netskopesecuritycheck.com]
Step 2 Click on "Run All Tests"
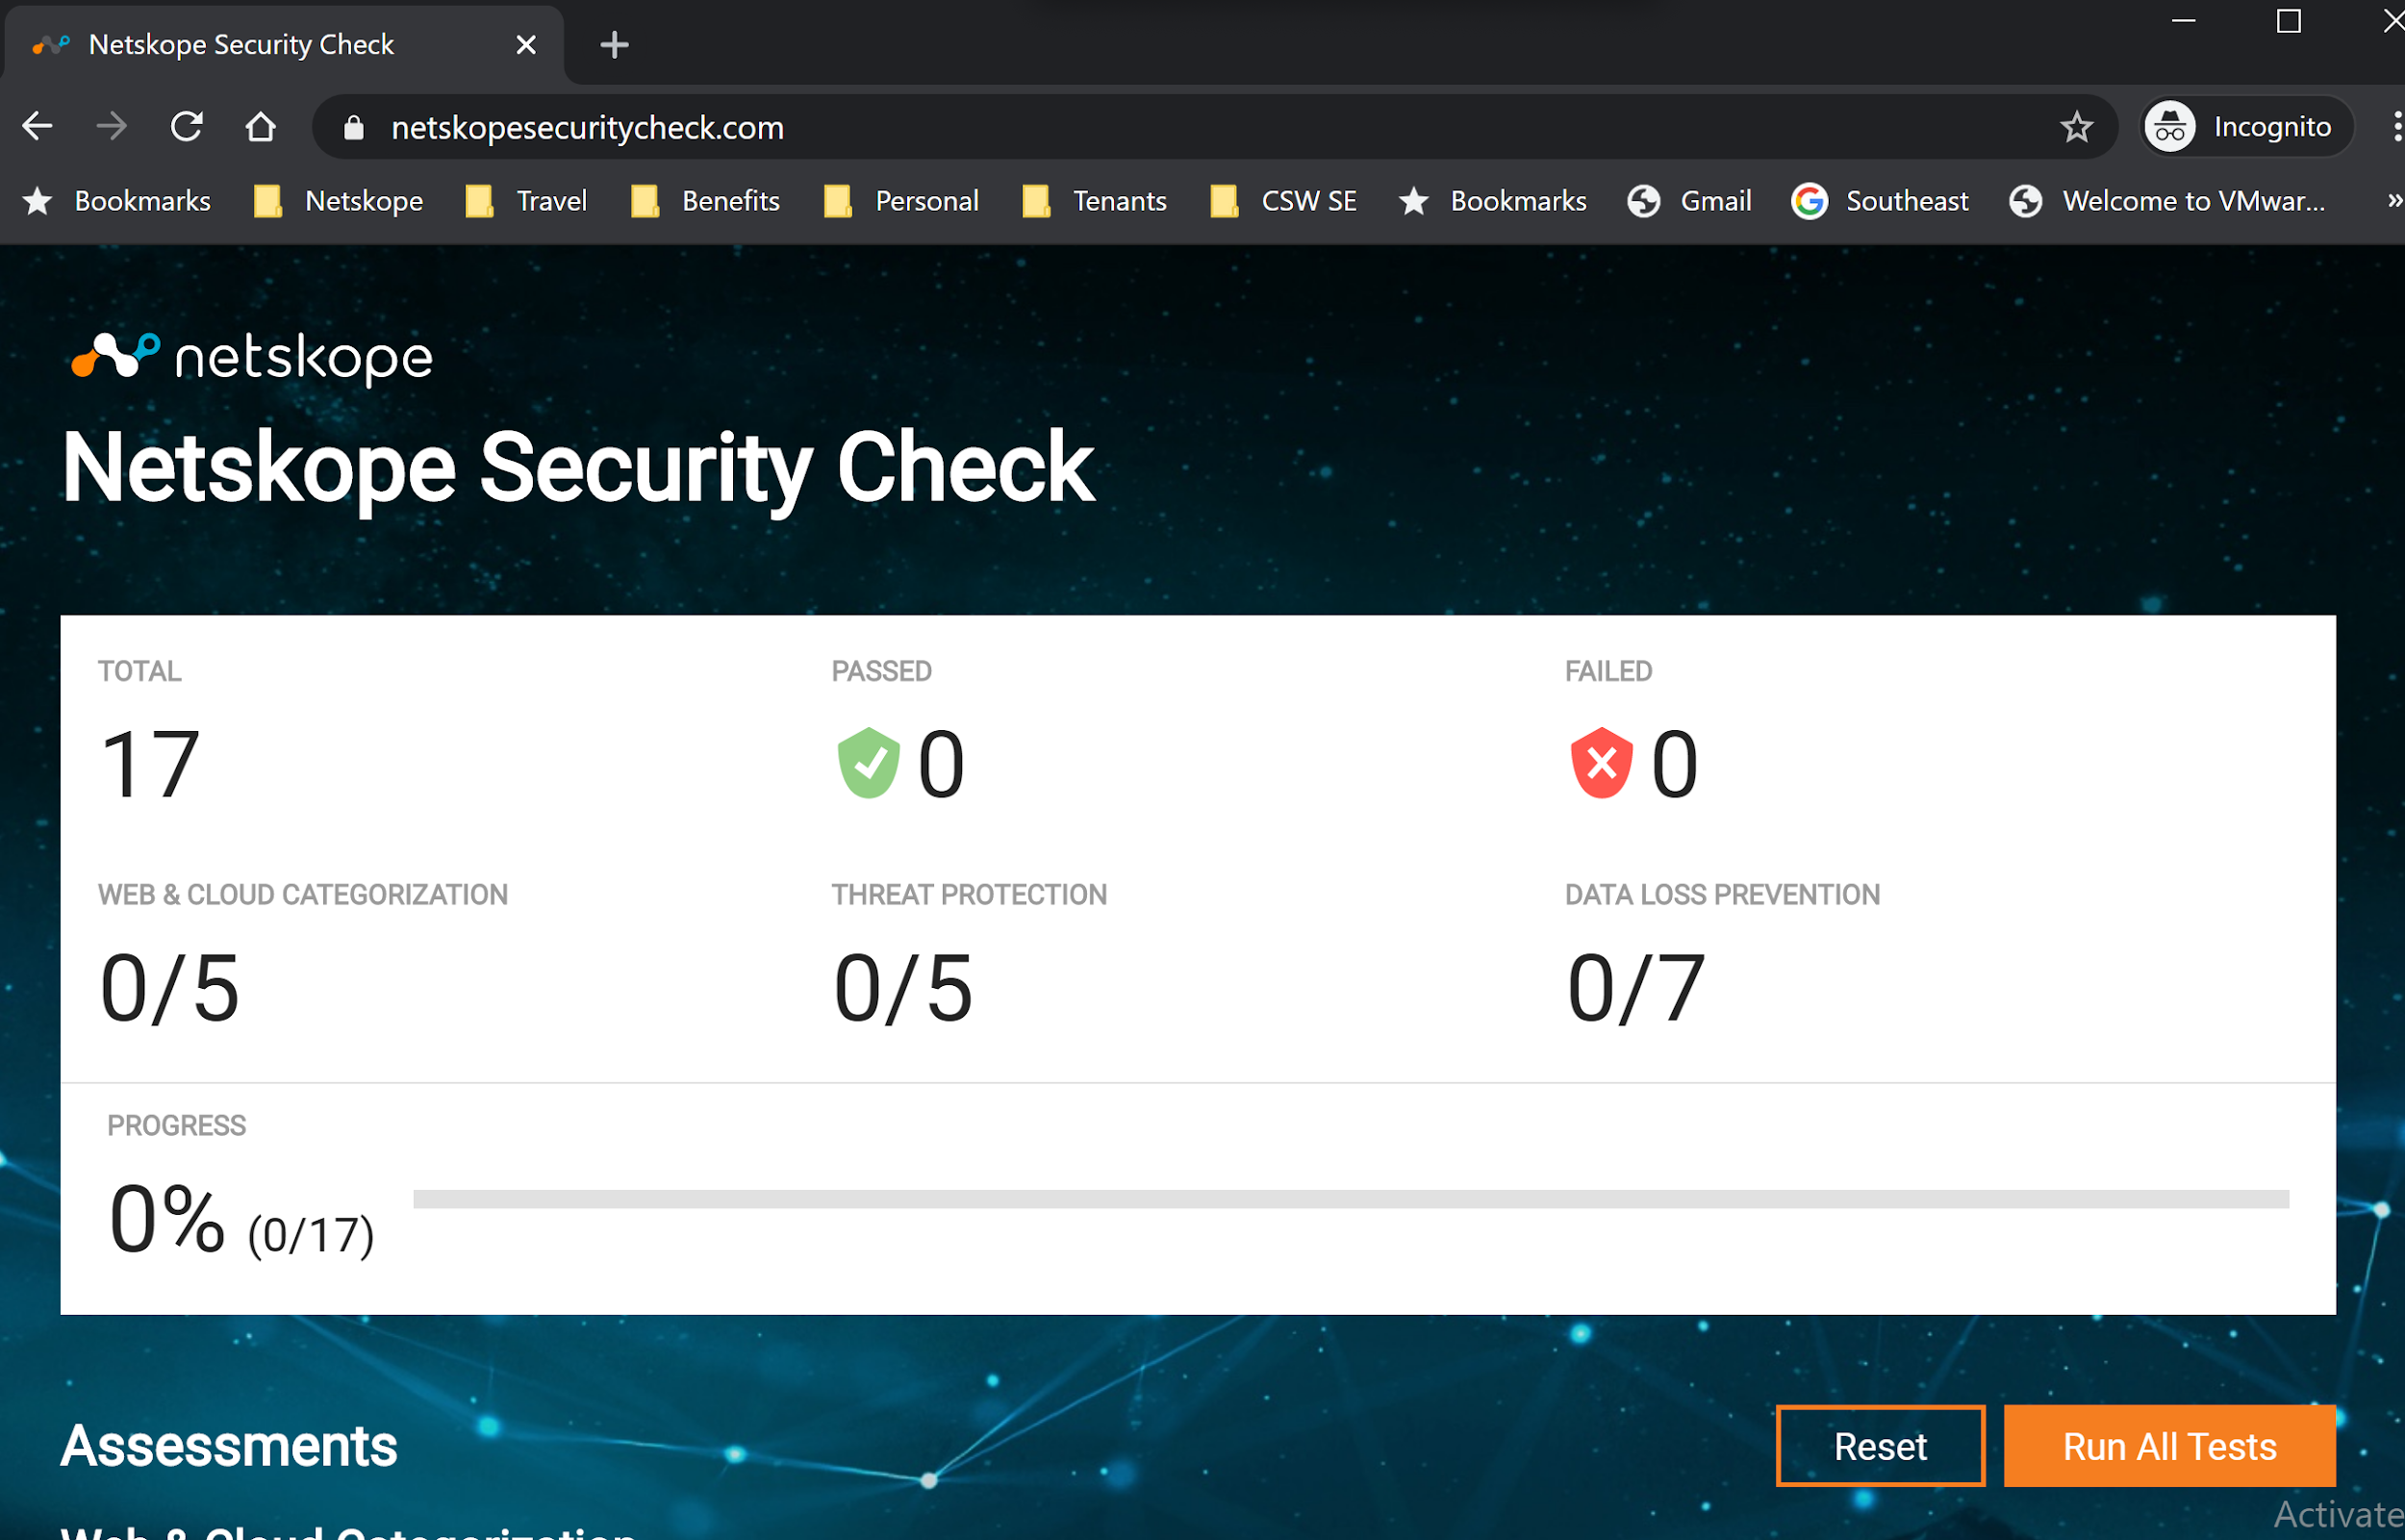
These tests look at seventeen different security risks of cloud and web usage. This is a good baseline of your existing security stack and how it protects you against today's challenges.
Depending on your browser, settings and existing web protection, your score may differ.
Especially when working remote, what are our first line of defenses ?
Review your results and overall score, and think about what can be improve.

Please continue onto the next LAB.
Lab 1: Cloud Visibility
See and analyze the (known and unknown) cloud, related activities and associates risks
Lab1a: Introduction to Netskope Home Screen (5min)
OVERVIEW
In this lab you will be introduced to the Netskope tenant home dashboard and how to create views of cloud application usage in your Enterprise that will be presented to you when you log in to the Netskope tenant. You will see how to customize the dashboard to display what is important to you, to quickly identify anomalies or risky behavior by users.
Applicable Use Cases
-
Enterprise level view of cloud use
-
Highlight risky activity
Prerequisites
- Your instructor should have given you a POD number: [X]
WALKTHROUGH
In this lab, as an administrator, you will be logging in to the Netskope Cloud Security Platform tenant and analyzing the data to assess the risk of the cloud applications in use.
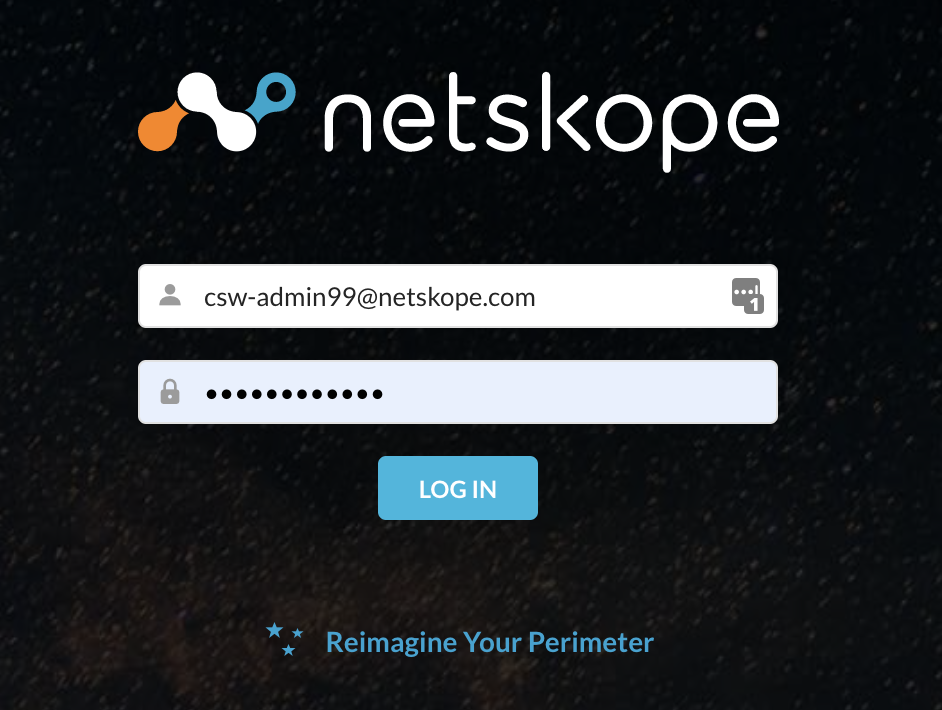
Step 1 Use your preferred web browser to navigate to the Netskope tenant (during this workshop, everybody uses the same Netskope tenant).
Go to the Netskope tenant ([https://csw2-emea.eu.goskope.com/])
Login to the Netskope tenant using the following credentials,
using your assigned POD number [X] as follow.
Username: csw-admin[x]@netskope.com (for example csw-admin99@netskope.com)
Temporary Pa$$w0rd: Netskope_1-1 (it should be the same for everyone)
If asked, please change your temporary password. You could use the same password that we use over the session also for the other accounts - Netskope_14-04
If login fails, report this to your instructor.
Please read and comply to the Netskope Service Operational Policy.
You can access the Netskope Use Policy from [https://www.netskope.com/terms-of-use] and Privacy Policy from [https://www.netskope.com/privacy-policy] if necessary.
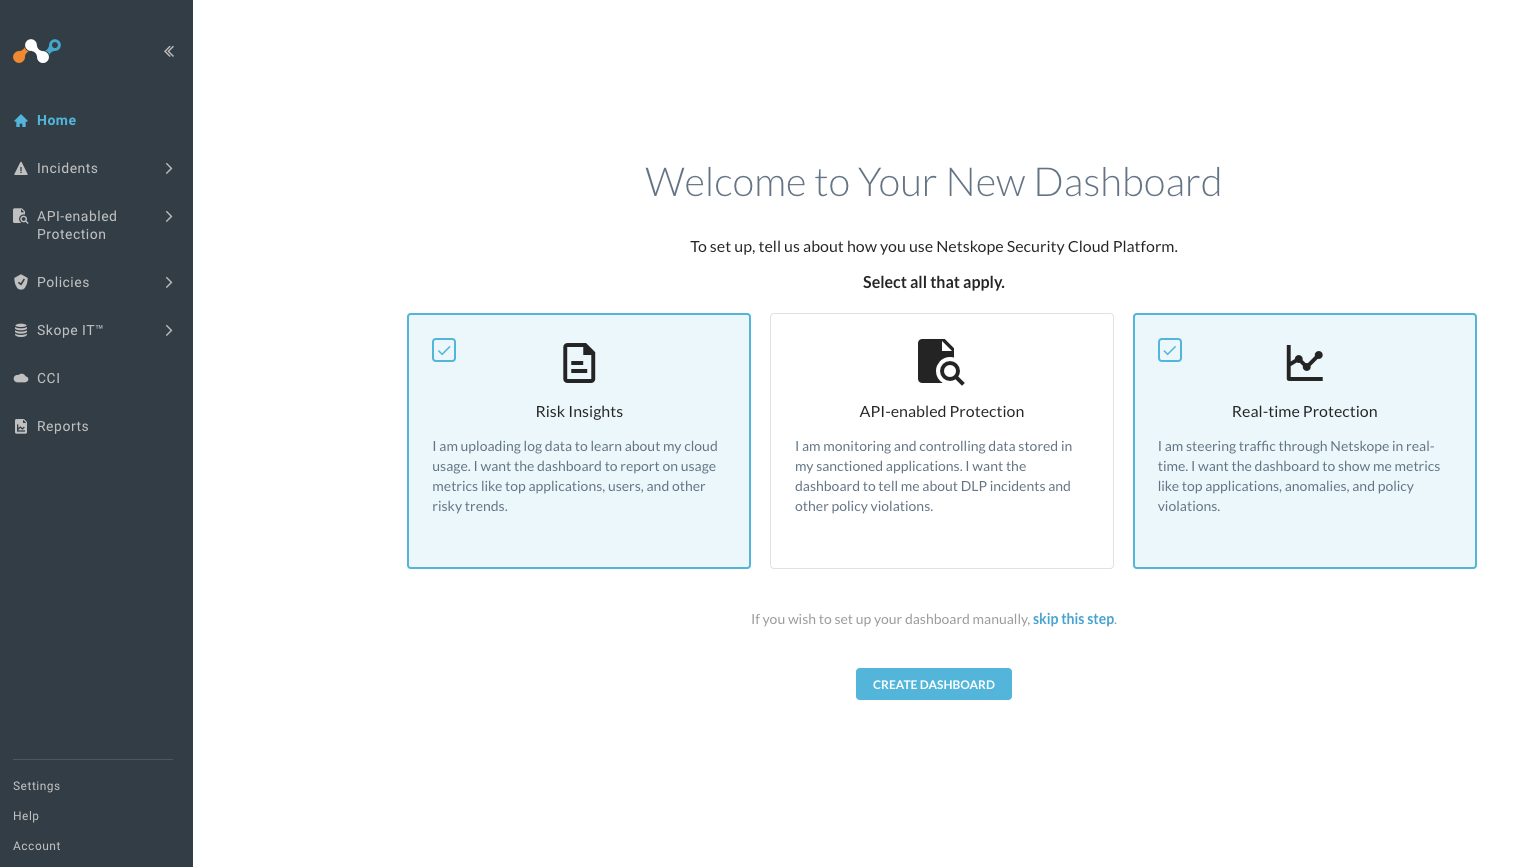
Step 2 If it was your first login, you (could) have the option to create your own dashboard. During this workshop we focus on Risk Insights and Real-Time Protection. If you have interests in Netskope's API-enabled Protection (CASB API, CSPM and more), just let us know... :)
NOTE
Data in this tenant comes from individual browsing -- and includes fictitious data that we have generated for this lab purpose, so expect some log entries to be already present in this lab instance.
Step 3 Make yourself familiar with the Netskope Security Cloud Platform. This is also commonly referred to as the customer tenant, representing the customer's instance of the Netskope Cloud Security Platform.
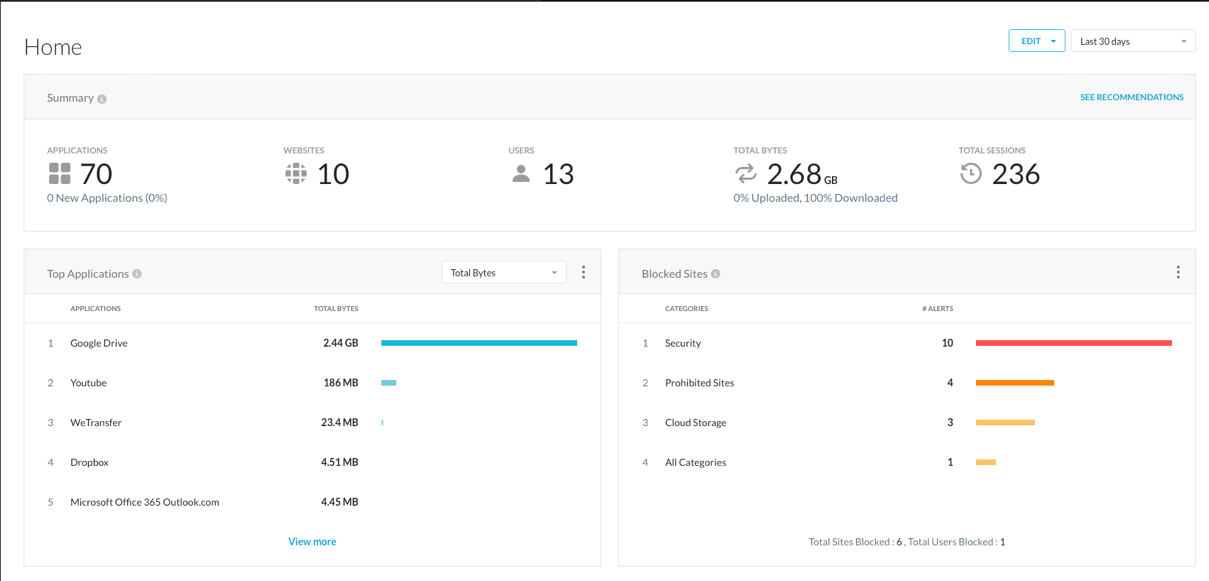
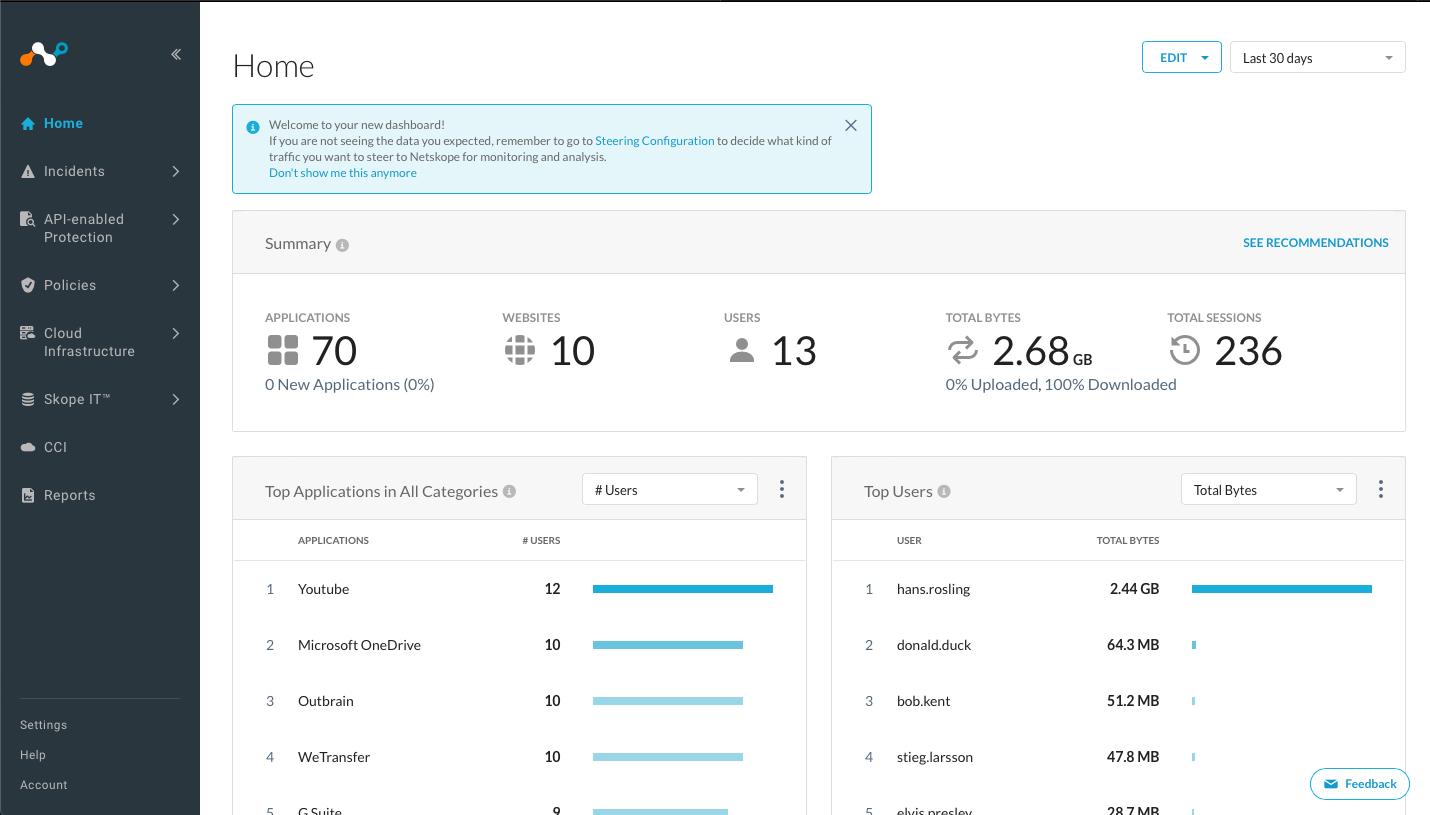
FEEL FREE TO NAVIGATE UI
- How many Apps are currently in use?
- How many Users?
- What are the Top Applications by Total Bytes?
Step 4 Switch the time frame from 7 days to 30 days, change the Top Application Widget on this dashboard from "Total Bytes" to "Bytes Uploaded".
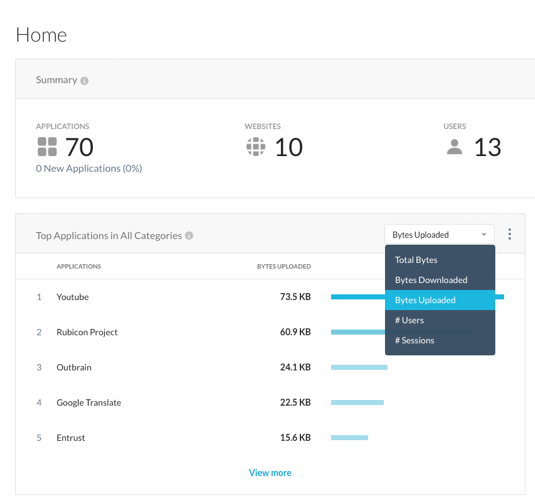
Looking at the "Bytes Uploaded", that is the amount of your corporate data that is going to the cloud.
NOTE
Netskope Next-Gen SWG can prevent unsanctionned exfiltration of data to the cloud. In addition, if data is already in the cloud, Netskope can also enable you to identify it, control it when possible or reduce data movements from cloud to cloud. (We will cover this later)
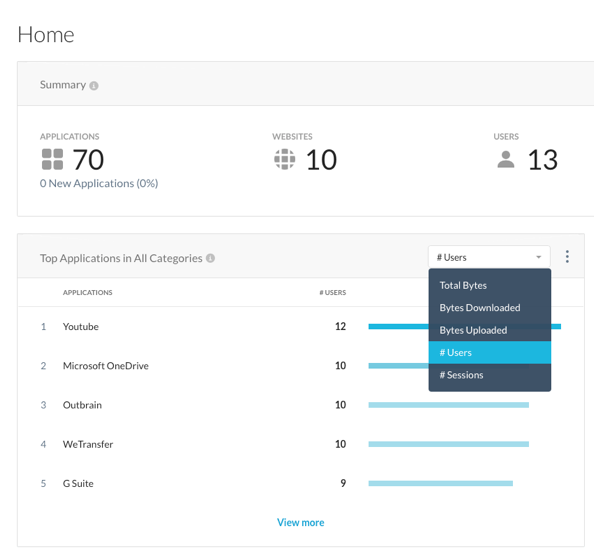
Step 5 Change the view to "# Users".
- Which are the top applications being used by the greatest number of your enterprise users?
Step 6 Add a new widget for "Top Users" and their Data Usage by clicking the Edit button in the top-right corner and selecting Add Widgets. When presented with the Widget Library, select Users tag and scroll down to the Top Users Widget, click and drag on the Home space (Note, this widget may already be available in your default view, if so remove it from the dashboard - click three vertical dots in the top right corner - and add again).
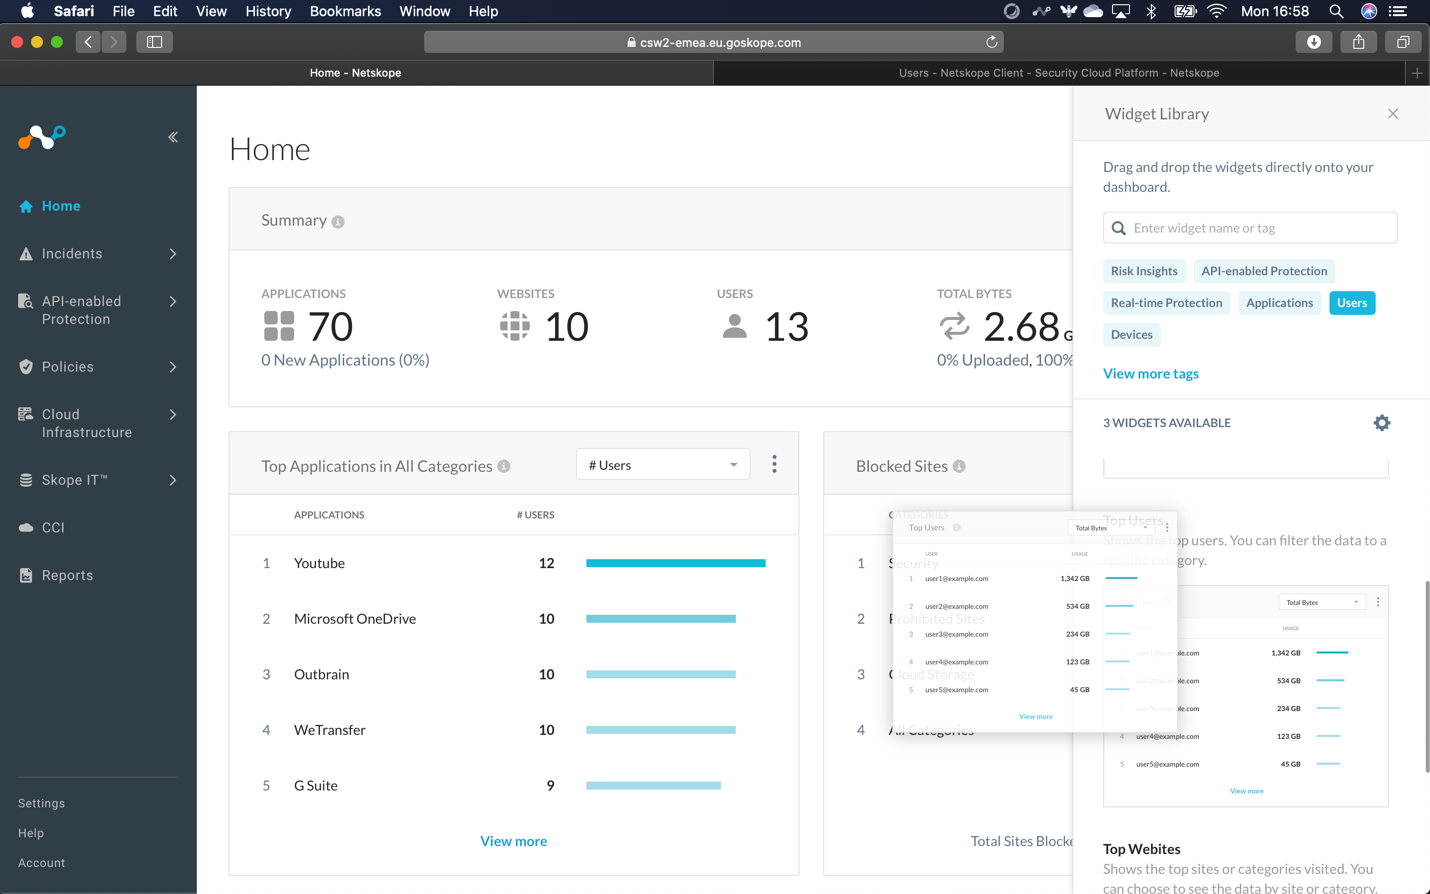
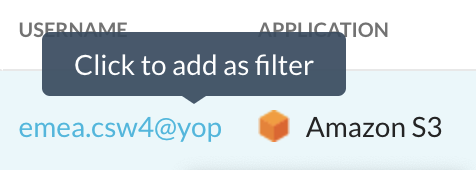
What happens when you click or hover over any of the top usernames? What area does the UI take you to if you click on the username?
Please continue onto the next section.
Lab 1b: Cloud Risk Insights (5min)
OVERVIEW
In this lab we are going to walk through the Netskope Cloud Confidence Index™ ("CCI") to see how Netskope provides risk insights for different cloud applications. After a quick walkthrough of the CCI, you will investigate several applications and determine the risk they pose to the enterprise based on the data available to you.
Applicable Use Cases
-
Cloud application discovery -- understand which apps the users use
-
Cloud application risk insight -- understand the risk level of those apps
Prerequisites
-
Access and credentials to the Netskope tenant https://csw2-emea.eu.goskope.com
-
Use the same admin credentials as the ones you changed before.
WALKTHROUGH
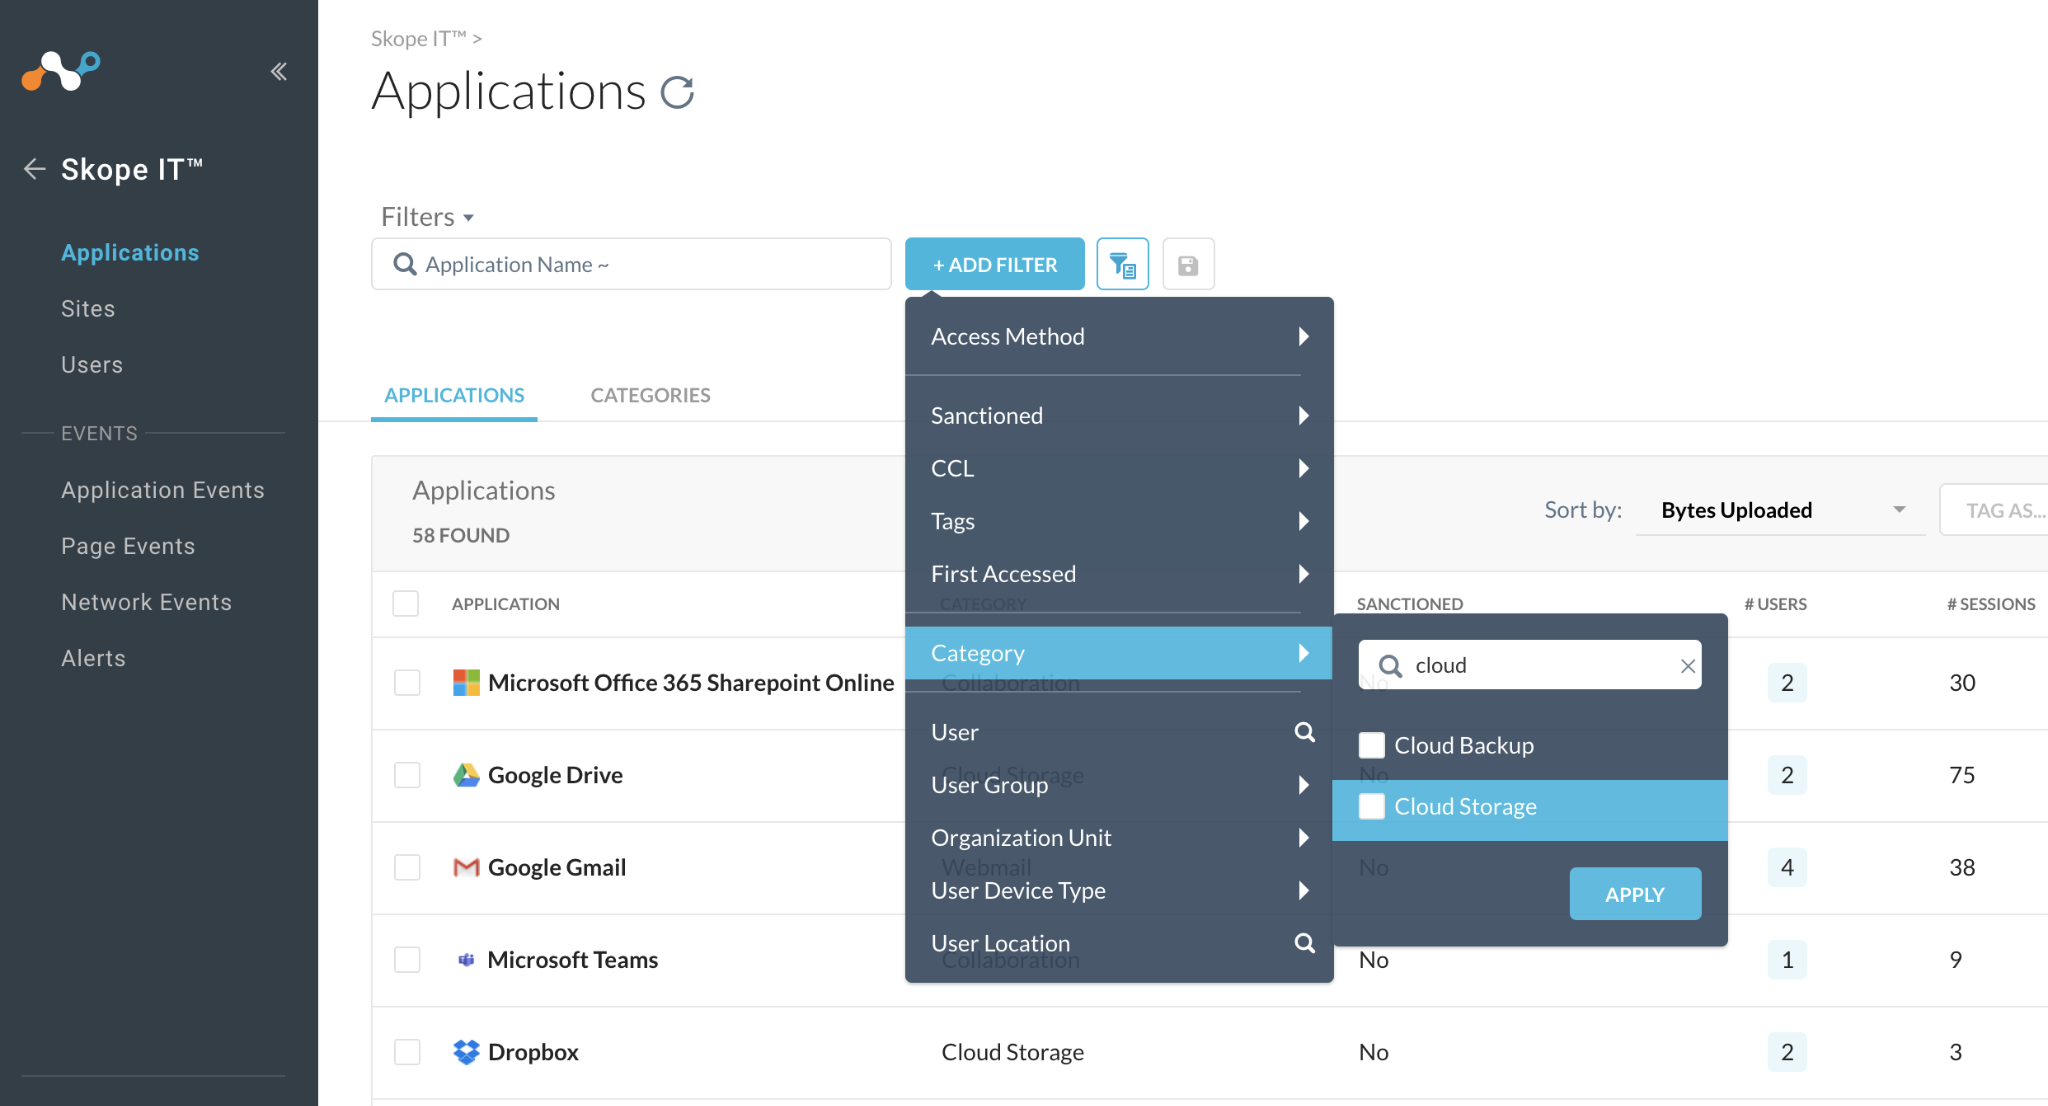
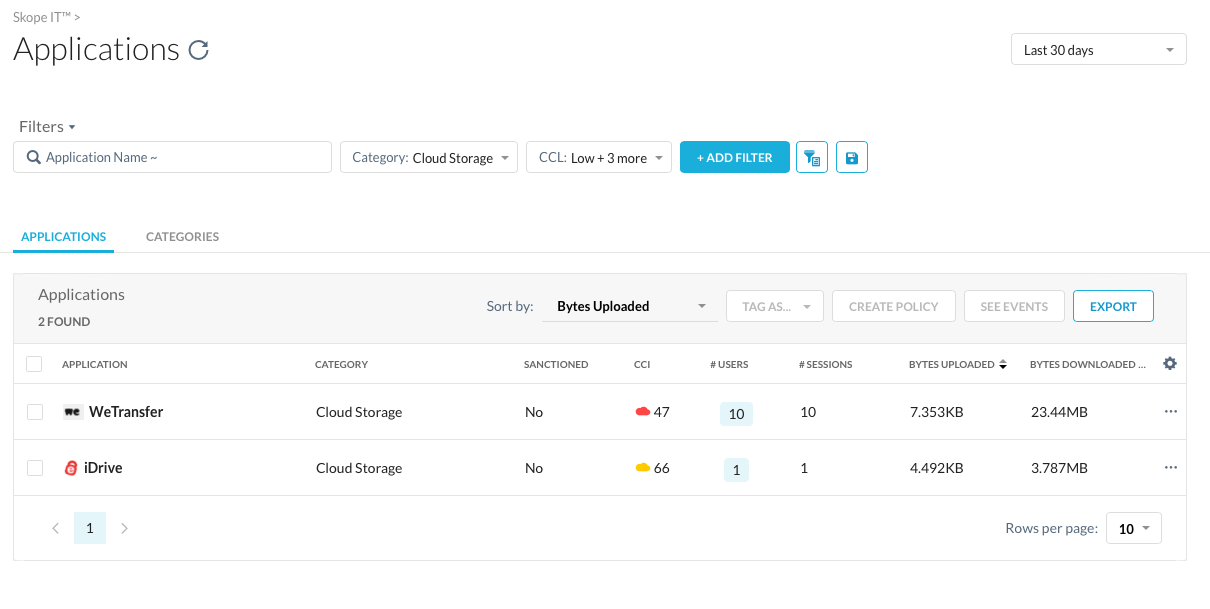
Step 1 Navigate to SkopeIT > Applications.
Make yourself familiar with the Apps that are used, from which Category, the appropriate "Enterprise Readiness" (CCI -- value) and more context about users, sessions and bytes transferred.
If the CCI column is not available click on the rack-wheel top right of the table and select CCI:

Step 2 Find applications in the Cloud Storage + Collaboration categories. (add the appropriate filter)
Step 3 Use the Sort By setting to see the list of applications sorted by the number of bytes uploaded to the internet.
- Are these sanctioned or unsanctioned apps? (if necessary, customize columns using rack-wheel icon)
- Are they part of specific tags (customize collumns using rack-wheel icon)
Step 4 Then select a corporate cloud app out of the most used apps and click on little dots on the right to Sanction it (otherwise, it shows Unsanction when already approved)
As we are sharing this tenant with many admins, you may have to try multiple apps to find one that hasn't already been flag by one of your colleagues.

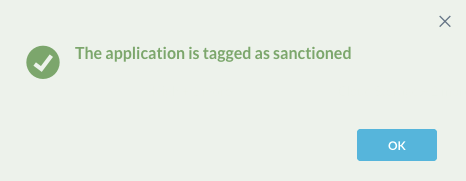
Wait a bit... it is processing...
NOTE
Sanctioned apps means managed Cloud Apps that are under Corporate-IT-team control. This flag can be used to identify them, create policies with this tag and simplify reporting.
Once processing it done, it will show this:
Step 5 Identify the Top "risky" applications (Hint: Add filter: CCL = medium, low, poor & under research)
Step 6 Click an application name in the "Low to Poor" category to see additional information about the service.
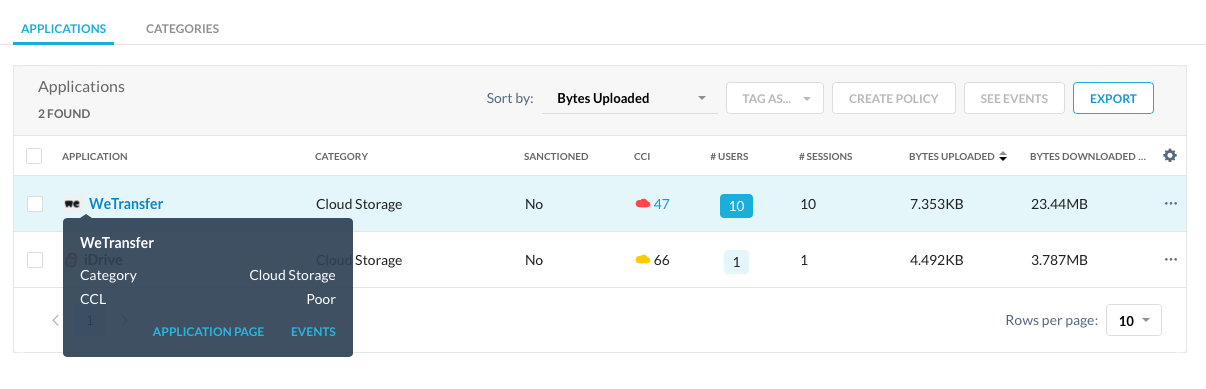
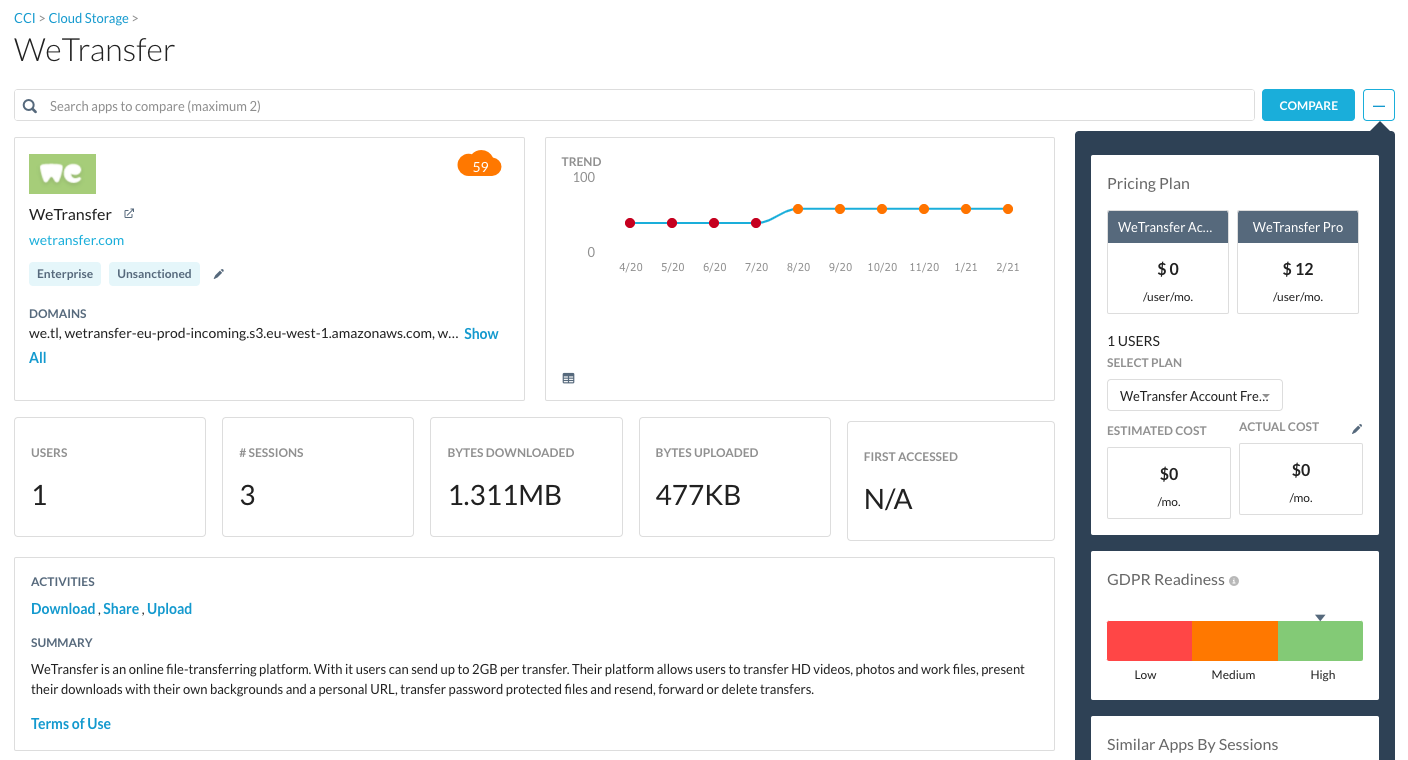
Step 7 Look at the applications page to find out additional information.

- Who has been using this application in the past (you better change time period to 90 days to find more)
SkopeIT displays only what has been seen in your organization.
Step 8 Click on the cloud icon below "CCI". Notice that you are now in the Cloud Confidence Index area. Let's learn more very soon !
Please continue onto the next section.
Lab 1c: Use Netskope to Research a Service (10min)
Unlike SkopeIT, CCI provides information about any apps in the cloud whether they are in use in your organization or not.
Step 1 Using the navigation menu on the left, select the "CCI".
CCI is like a big encyclopedia of cloud apps.
Step 2 In the main search bar, search for the application "Zippyshare". It should return a single result.
Step 3 Click on "Zippyshare" tile to drill down into the application itself. Here you will see an overview of the cloud application based on the results of our CCI.
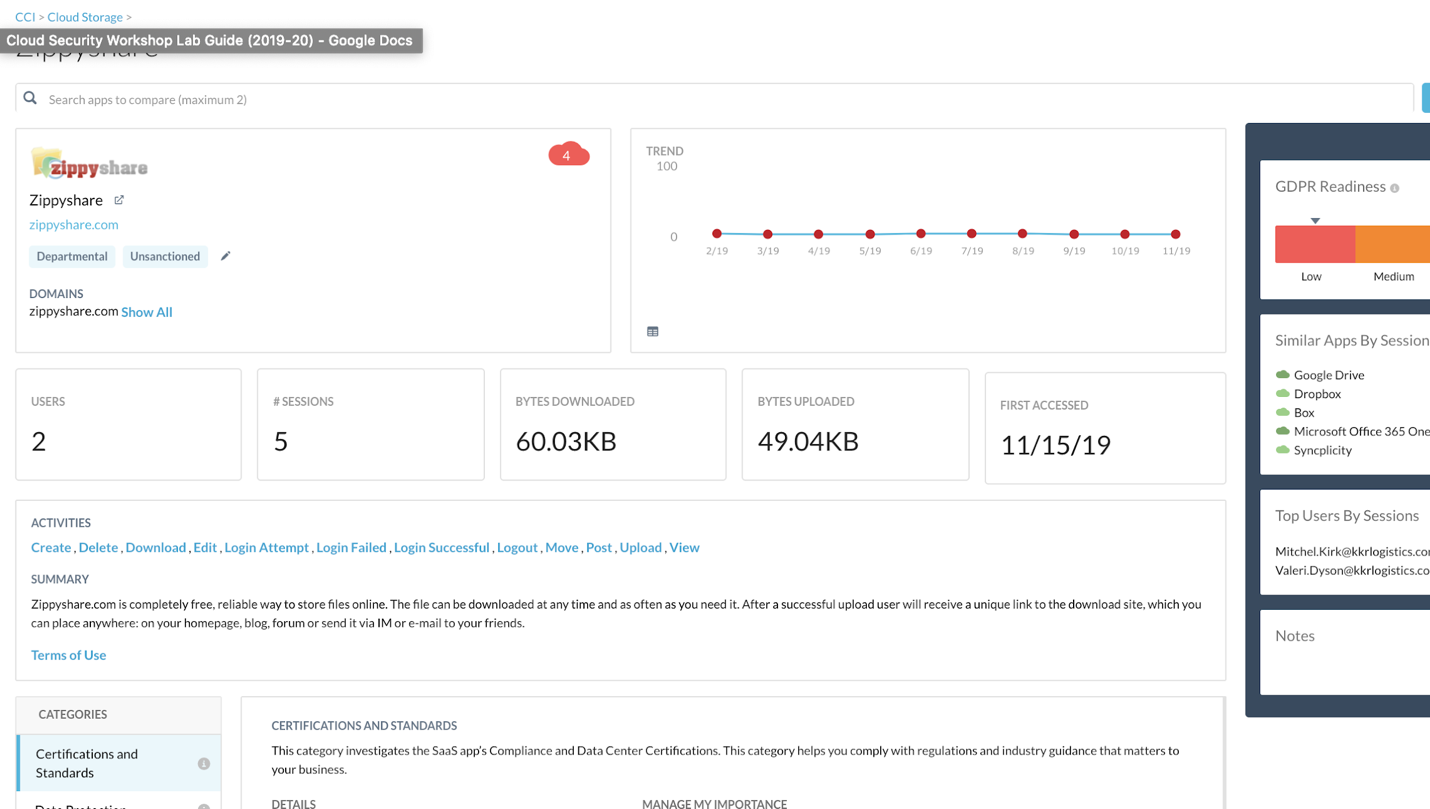
Let's be curious a little bit, and read inside different tiles to find:
- Does it have a great GDPR readiness score?
- What are the domains associated with this app?
- What are the potential user activites inside this app?
Step 4 Scroll down to the "categories" section in order to see criterias that Netskope uses to evaluate each application (based on the Cloud Security Alliance Cloud Control Matrix).
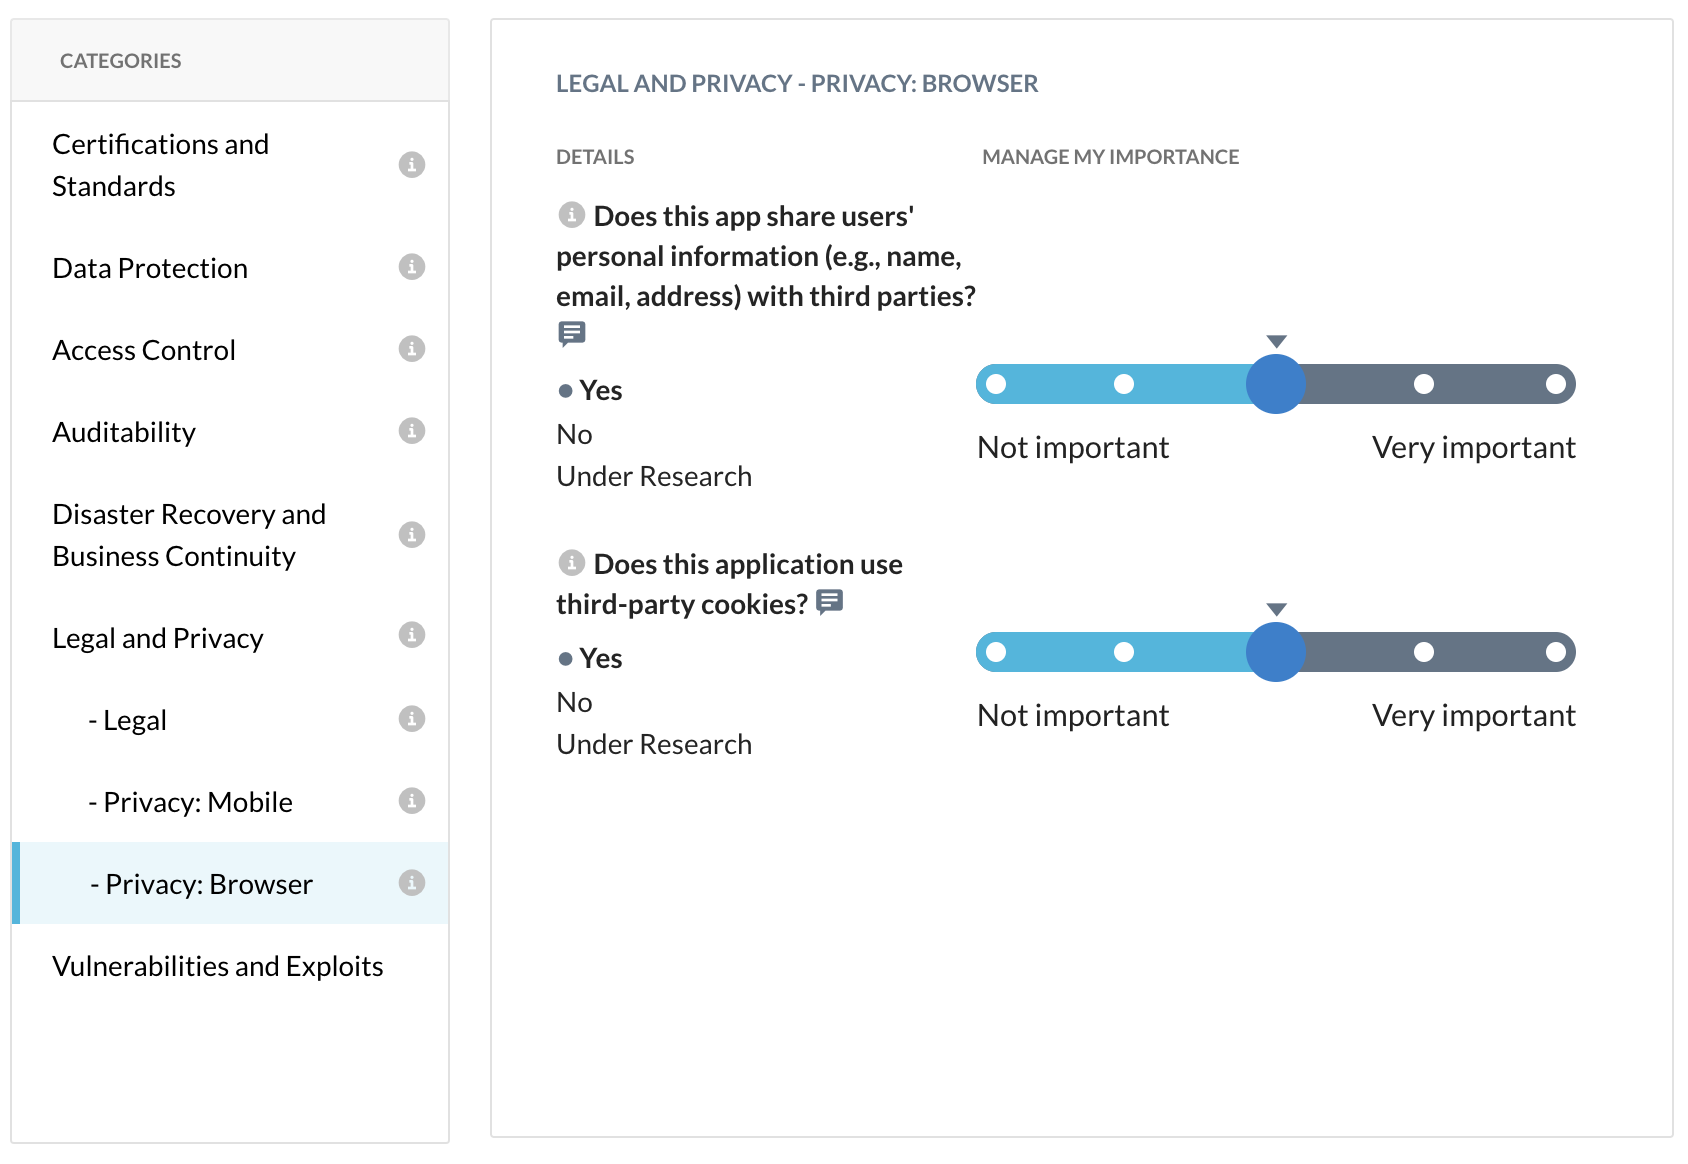
- What compliance certifications does this app have? HIPAA? PCI?
- Who owns the uploaded data?
- Do they support MFA or SSO ?
- Do they support IP-range fitering ?
NOTE It can be a little bit misleading sometimes. Details/answers to consider for each criteria are the ones starting by this little dot
and followed by a bolt word/item
Step 5 Now that we've walked through one application, familiarize yourself with a few more by searching for and reviewing the following cloud applications:
- Dropbox
- SmallPDF
- Microsoft Office 365 OneDrive for Business
For each application, make sure to look at the granular list of activities that Netskope solution can detect.

REAL WORLD TIP You can use CCI in the opposite way. The options on the left-hand side of the CCI allow you to also filter out the view when CISO are looking to buy a safer app for a specific need.
REVIEW QUESTIONS
- How many risk levels are there for the CCL?
- What standard does Netskope use to evaluate and rate applications?
- True or False -- you can only search for applications by name?

Please let your instructor know that you have completed this lab.
Lab 2: Safely Enable Cloud Applications
Steer traffic to Netskope, filter web usage, implement granular control of cloud apps, enable real-time user coaching
OVERVIEW
In addition to growing web usage, many enterprises have rolled out a variety of cloud storage applications for use such as OneDrive, Google Drive, or DropBox plus collaboration apps such as Teams and Slack. The steps you will walk through can be used to secure web traffic and also both managed + unmanaged cloud apps.
Applicable Use Cases
-
Standard Acceptable Use Policy (AUP)
- define your URL filter
-
Advanced Acceptable Use Policy (AUP)
- Create category and context-based policies (Risk based with CCI)
-
Control access to specific sanctioned applications
-
Data Protection (various use cases)
Prerequisites
-
Access and credentials to the Netskope tenant ([https://csw2-emea.eu.goskope.com/])
-
Use the same admin credentials as before.
-
Ability to install the Netskope client on AWS Workspaces or your local machine
WALKTHROUGH
In this part of the lab, you act as an administrator, enrolling a new user in Netskope, and installing the Netskope Steering Client onto your machine. Once installed, this application will forward your http and https traffic to Netskope cloud servers for inspection. You will attempt to access webmail after installation then control access to the cloud storage service OneDrive.
NOTE By utilizing deployment software (SCCM, JAMF, Airwatch, etc.), you can deploy the agent on every computer/device of your domain automatically. In this exercise, you will install the endpoint application manually via email.
Lab 2a: Add Your User, Install and Verify Netskope Client
Estimated Time: 10 minutes
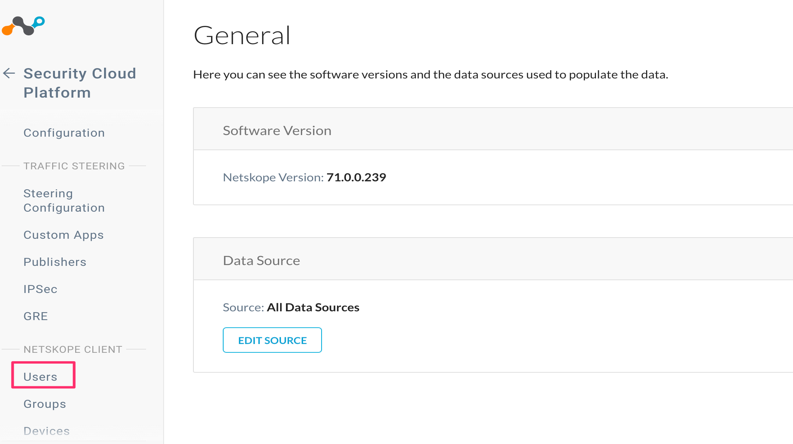
Step 1 Navigate to the "Home" page of your Netskope tenant and click "Settings" in the lower left-hand corner.
Step 2 Navigate to Security Cloud Platform > Netskope Client > Users.
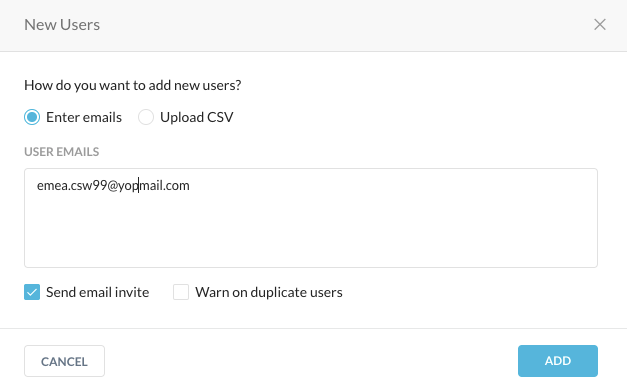
Step 3 Click New Users in the upper left.
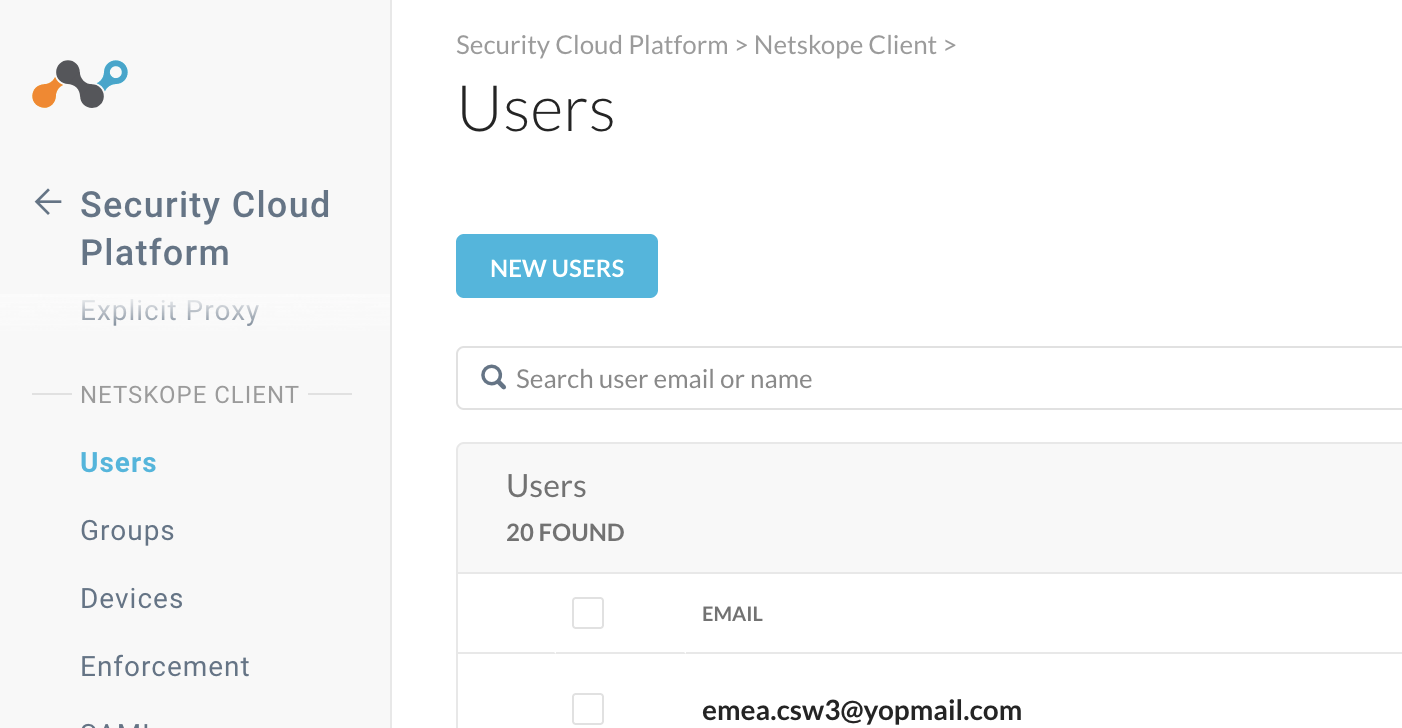
Step 4 Enter the following emea.csw[x]@yopmail.com email address you have been assigned in your workshop confirmation and click the Add button.
Step 5 Check your trashable email account on [https://www.yopmail.com] for the enrollment email from Netskope Onboarding <onboarding@netskope.com>.
Step 6 Open the enrollment email and click the appropriate OS client link for your computer to download the client and then "Download".
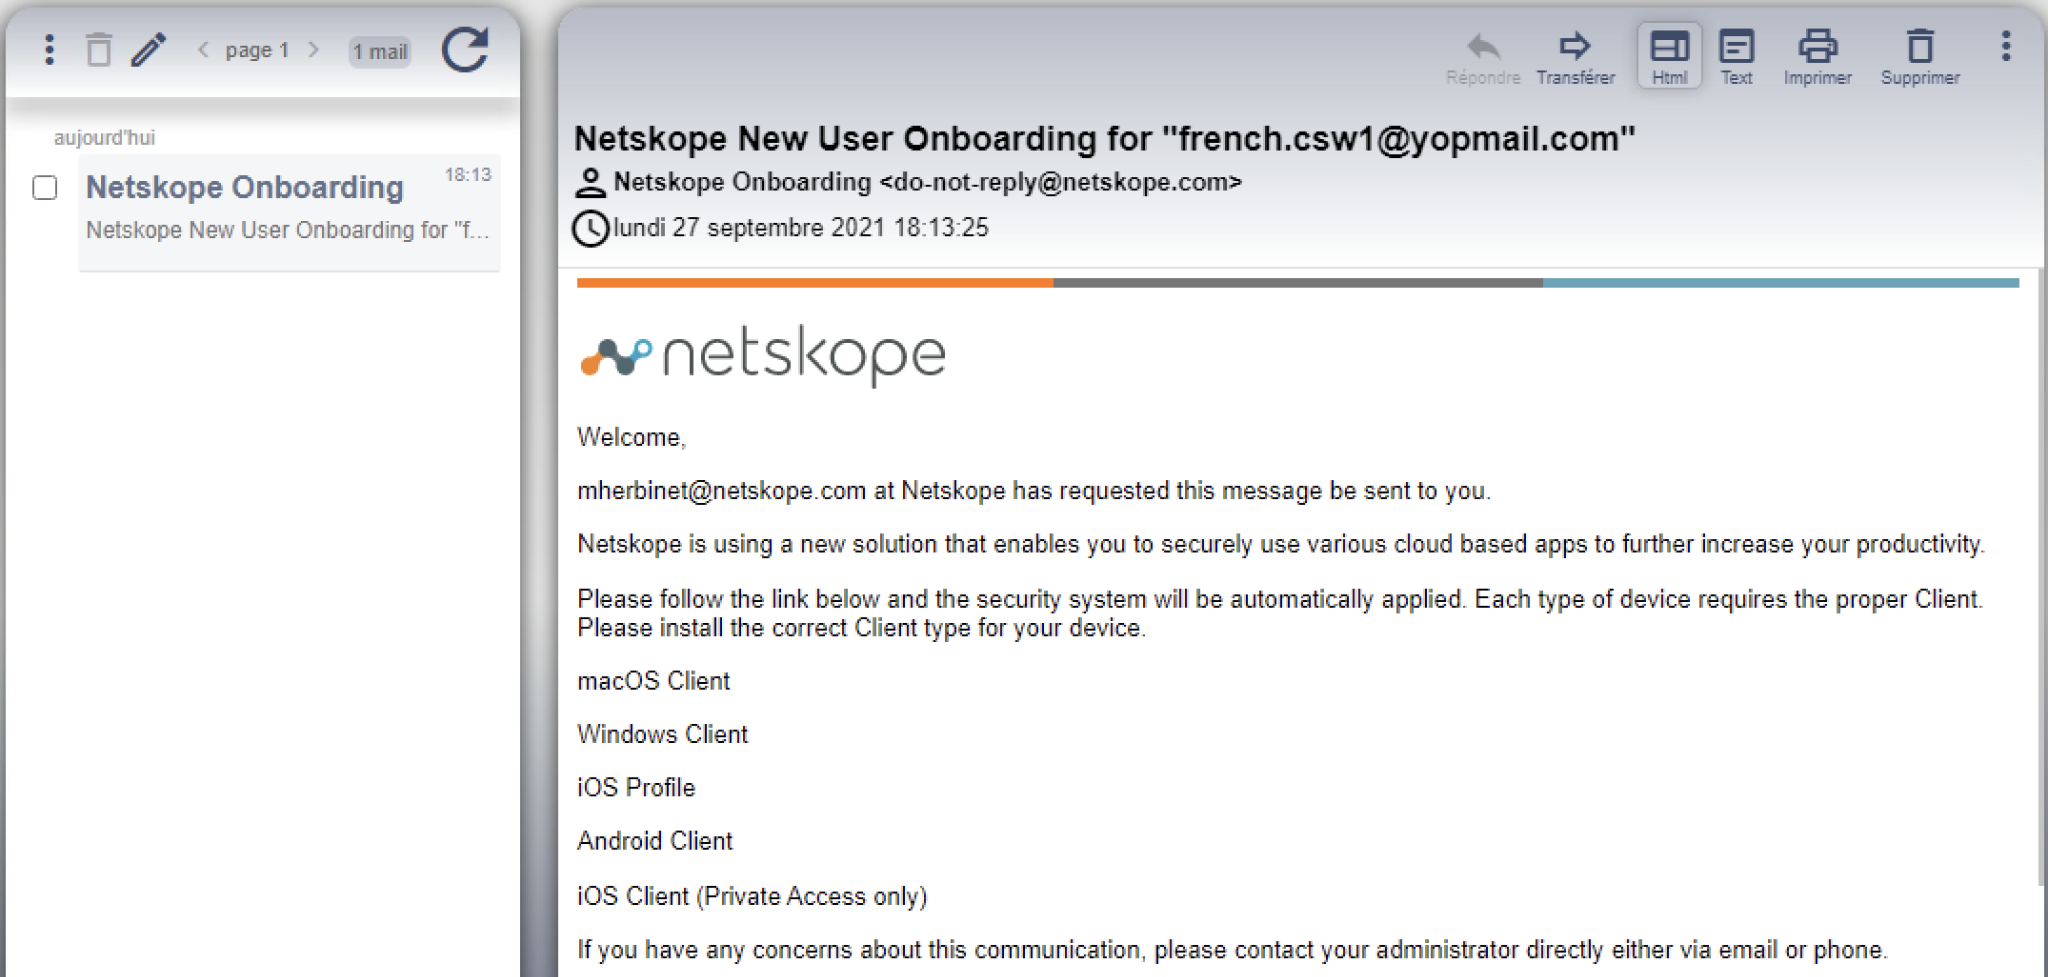
and PLEASE DELETE this email from yopmail (even though there is no real security concern).
Step 7 Follow the on-screen instructions to run the client installation. Click Run to approve.
It is NOT necessary to reboot the computer after installation completes.
However, Firefox may require to be restarted.
Step 8 You can close this browser tab.
Step 9 Using your web browser access [https://www.netskope.com]
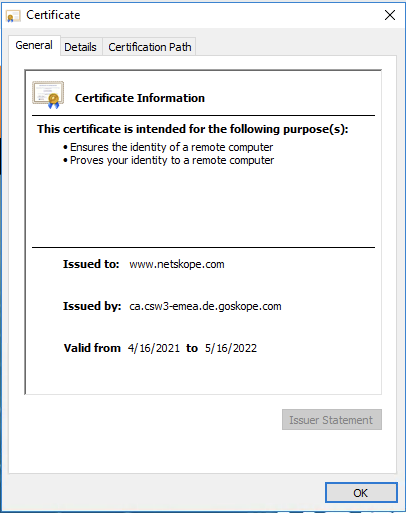
Step 10 Click the lock icon in the URL field to see if the certificate actually came from *.goskope.com. This means the traffic is decrypted by Netskope, secured and then re-encrypted to the final destination server.
Step 11 Try [https://notskope.com] to verify which Netskope DC you are connected to. It may not be the same as in the screenshot below, but it must point to somewhere close to you.
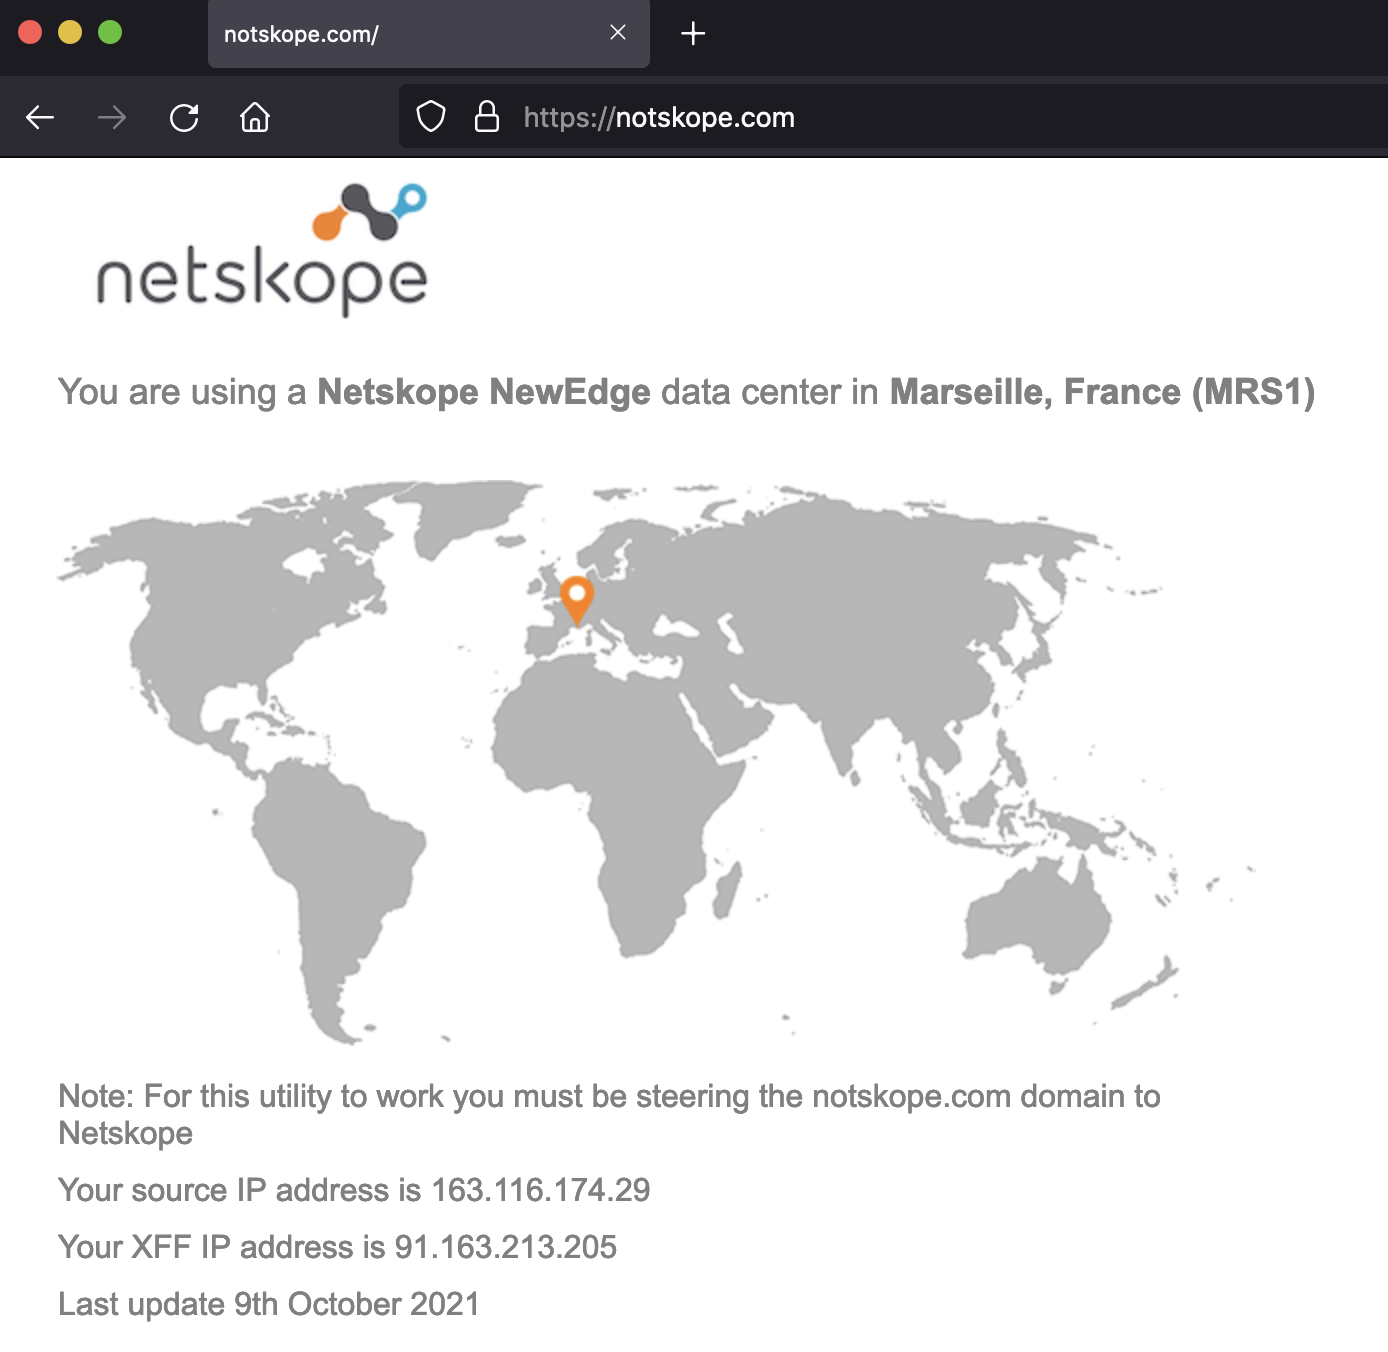
Have a look at your XFF IP address at the bottom. This has been added by Netskope proxy in your HTTP headers and indicates your originating IP address, while source IP indicates Netskope POP egress IP.
Please continue onto the next section.
Lab 2b: Build your URL filter with Allow and Block lists (ca. 10min)
Step 1 Try access [https://www.heineken.com] and [https://www.samueladams.com]
That should work, as no URL filter (for those sites) is defined so far.
Step 2 Create your URL filter policy
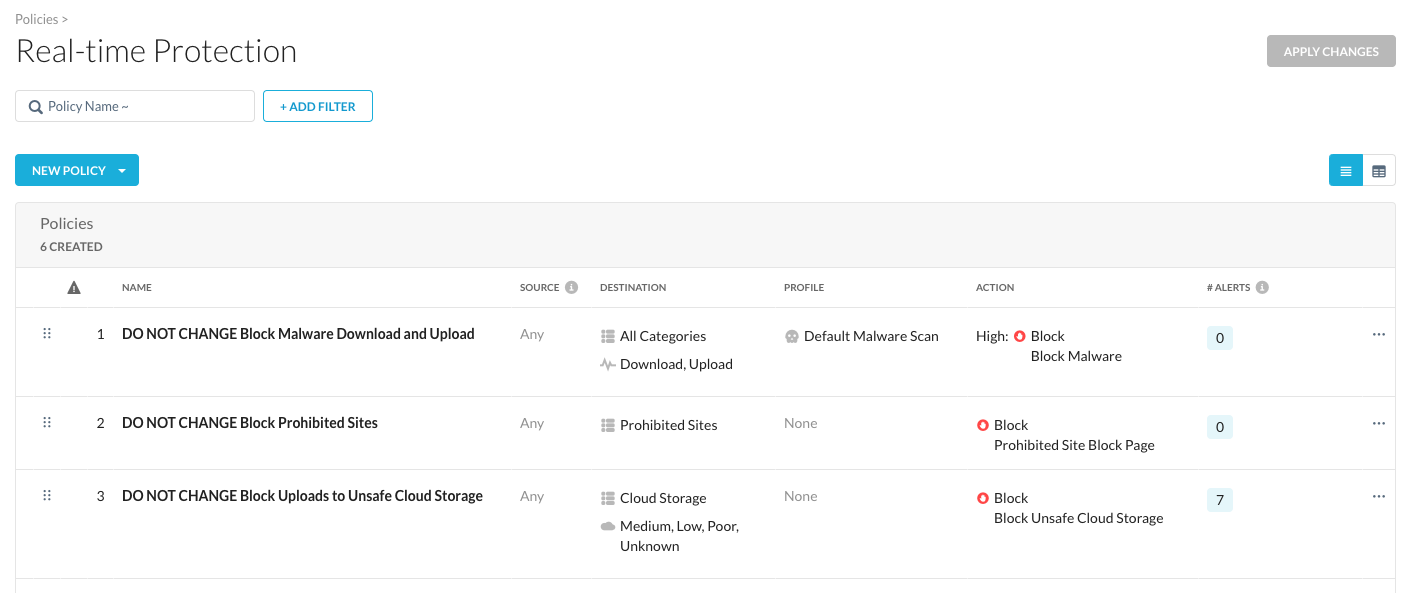
In your Netskope tenant, return to Home then navigate to Policies > Real-Time Protection. There should be some policies already (DO NOT CHANGE). Please leave those unchanged. ;-)
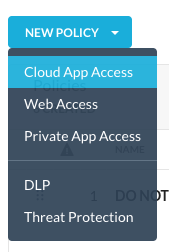
Step 3 Click "New Policy", "Web Access" Policy
Step 4 As a source, select your assigned user (emea.csw[X]@yopmail.com).
As we are sharing this tenant with many admins, PLEASE double check each policy so it only applies to your lab user.
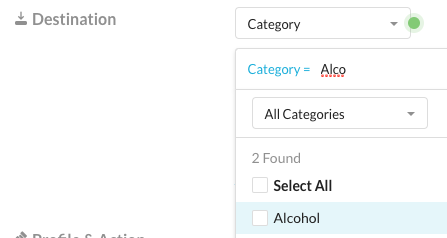
Step 5 As destination, select "Category"
Step 6 Start typing "Alcohol" and select the predefined URL category for Alcohol.
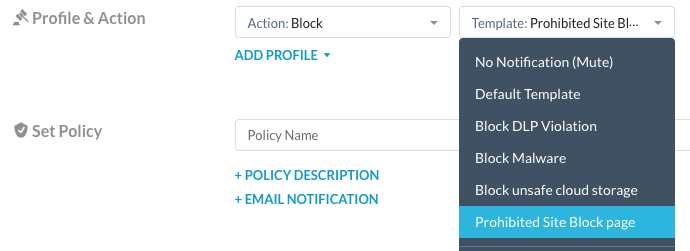
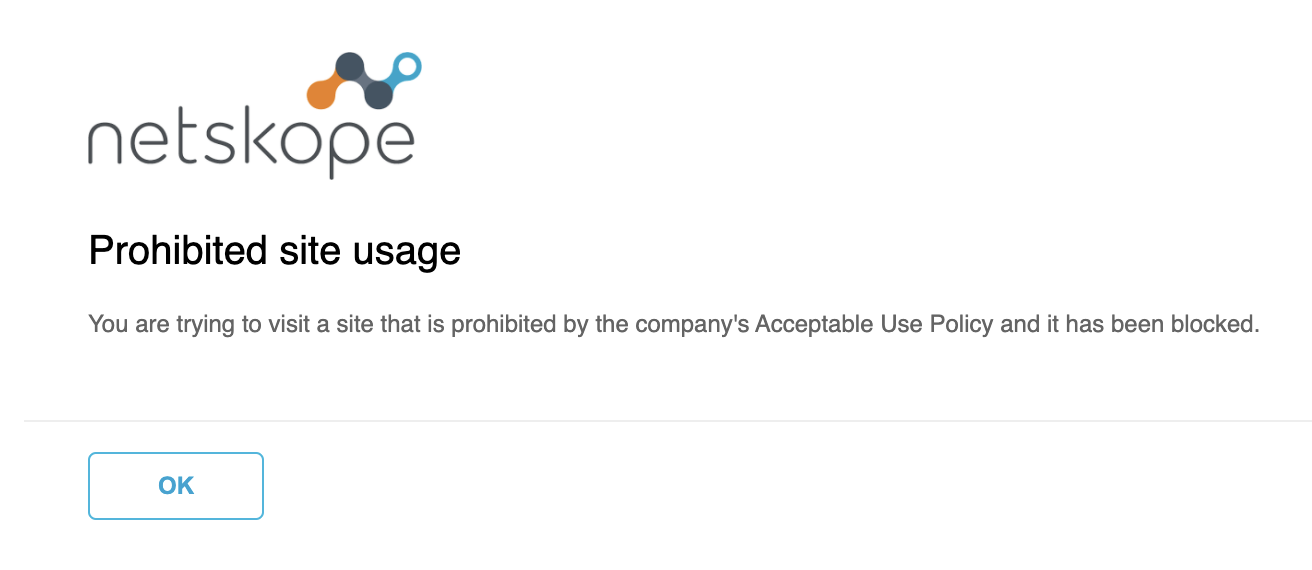
Step 7 Define the "Action" as "Block" and choose the notification "Prohibited Site Block page"
Step 8 Give your policy a name
As we are sharing this tenant with many admins, PLEASE start the name of your policy with your assigned CSW[X] number (e.g. CSW1).

Save it and move it to the top.

Step 9 to activate that policy change -- "Apply Change"

NOTE As of today, it takes between 10 and 40 seconds to apply changes to all 50+ datacenters globally.
Step 10 Visit Heineken and Samuel Adams site and find them blocked now.
Step 11 Make yourself familiar with the concept of Categories with Block and Allow lists.
Navigate to Policies > Web > Custom Categories and URL Lists
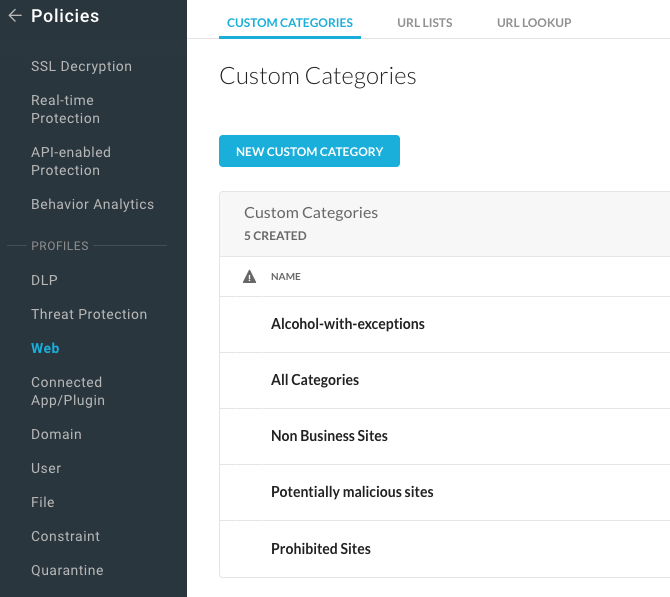
Step 12 Have a closer look into the category "Alcohol-with-exceptions".
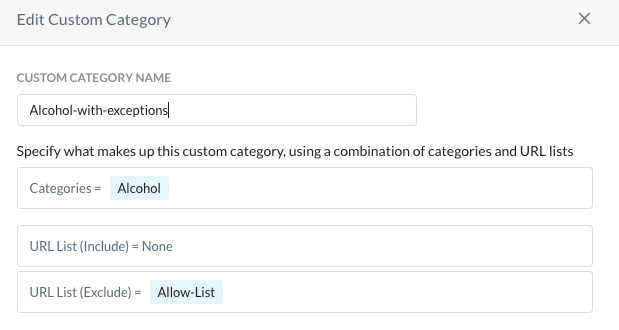
Step 13 Find the Add Samuel Adams site within the existing Allow list.

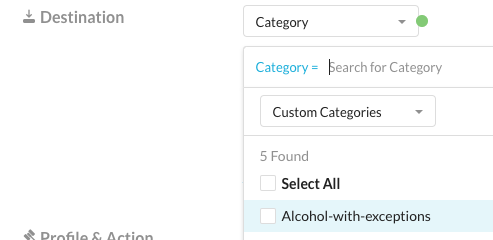
Step 14 Go back to Policies > Real-Time Protection, click on your Alcohol policy now and change the category to allow exceptions.
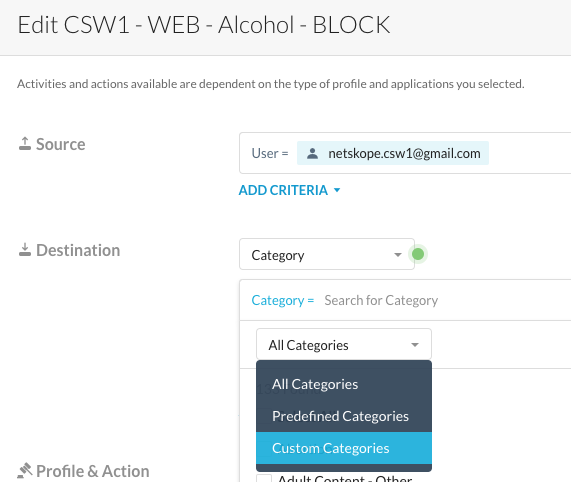
Step 15 Replace the predefined Alcohol category and choose from the list of "Custom Categories" the one named "Alcohol-with-exceptions".
Step 16 Save your policy change and "Apply Changes".
Step 17 Access Sam Adams website again and find it working now, while the Heineken site still gets blocked.
NOTE If you don't see the expected results (e.g. website is loading while you just activated a block policy), it could be that the content was cached in your browser. For testing it is often useful to use incognito or private browser windows.
Step 18 Navigate to Policies > Web > URL Lookup
Check any other website (e.g. [https://www.molson.ca]) to verify into which categories that site would fall, which inline policies would trigger and if traffic for that site would be steered to Netskope.
Please continue onto the next section.
Lab 2c: Prevent usage of Cloud Storage Apps with bad reputation (ca. 10min)
OVERVIEW
There is usually no good reason to allow users to access cloud apps with bad reputation at work! Potentially users could inadvertently expose enterprise data. As an example in this lab we prevent usage of any cloud storage app which has a low or poor Cloud Confidence Level (CCL).
We have prepared a policy that combines web categories with reputation score from CCI. It will block access from the first transaction. Later we will bring more granularity.
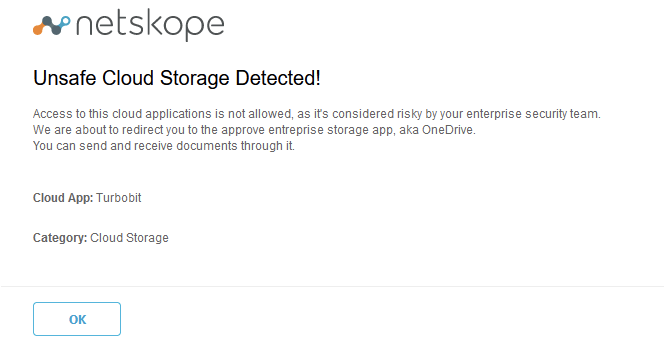
Step 1 Use your web browser to access e.g. [https://www.zippyshare.com], [https://www.turbobit.net], or [https://www.uptobox.com], your access should be blocked, you should be redirected to OneDrive.
This is a good way to reduce helpdesk tickets by providing some guidance to users that have improper habits.
To get more ideas about cloud storage apps with low or poor CCL, look at Netskope's UI under CCI. Select "Cloud Storage" and the appropriate CCL and find hundreds of those apps.
Step 2 In your Netskope tenant, navigate to SkopeIT > Application
Events and select "Last 24 hours". There should be several entries
listed. If needed, click the
 query mode icon and enter the query app
eq 'Zippyshare' and user eq 'emea.csw**[X]**@yopmail.com' in the
search field and hit enter. Suggestions ease up valid filter definitions
(application names are case sensitive).
query mode icon and enter the query app
eq 'Zippyshare' and user eq 'emea.csw**[X]**@yopmail.com' in the
search field and hit enter. Suggestions ease up valid filter definitions
(application names are case sensitive).
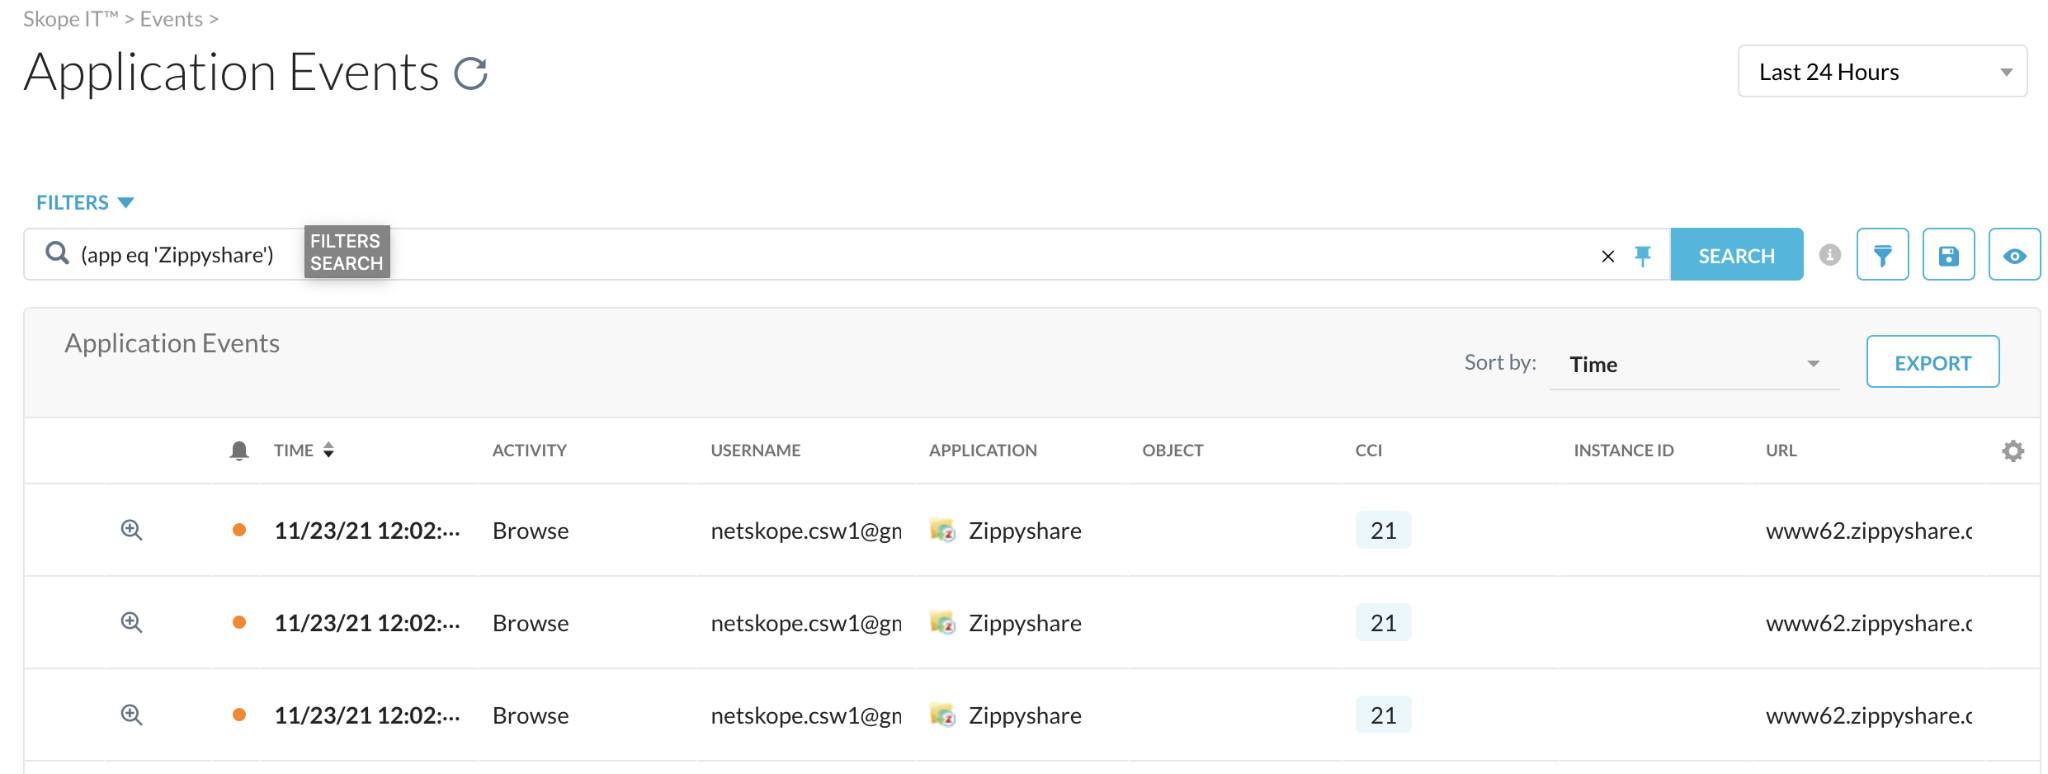
Step 3 Look for a Zippyshare (or similar) entry for your user regarding your activity. Expand by using the spyglass icon to see what details are available.
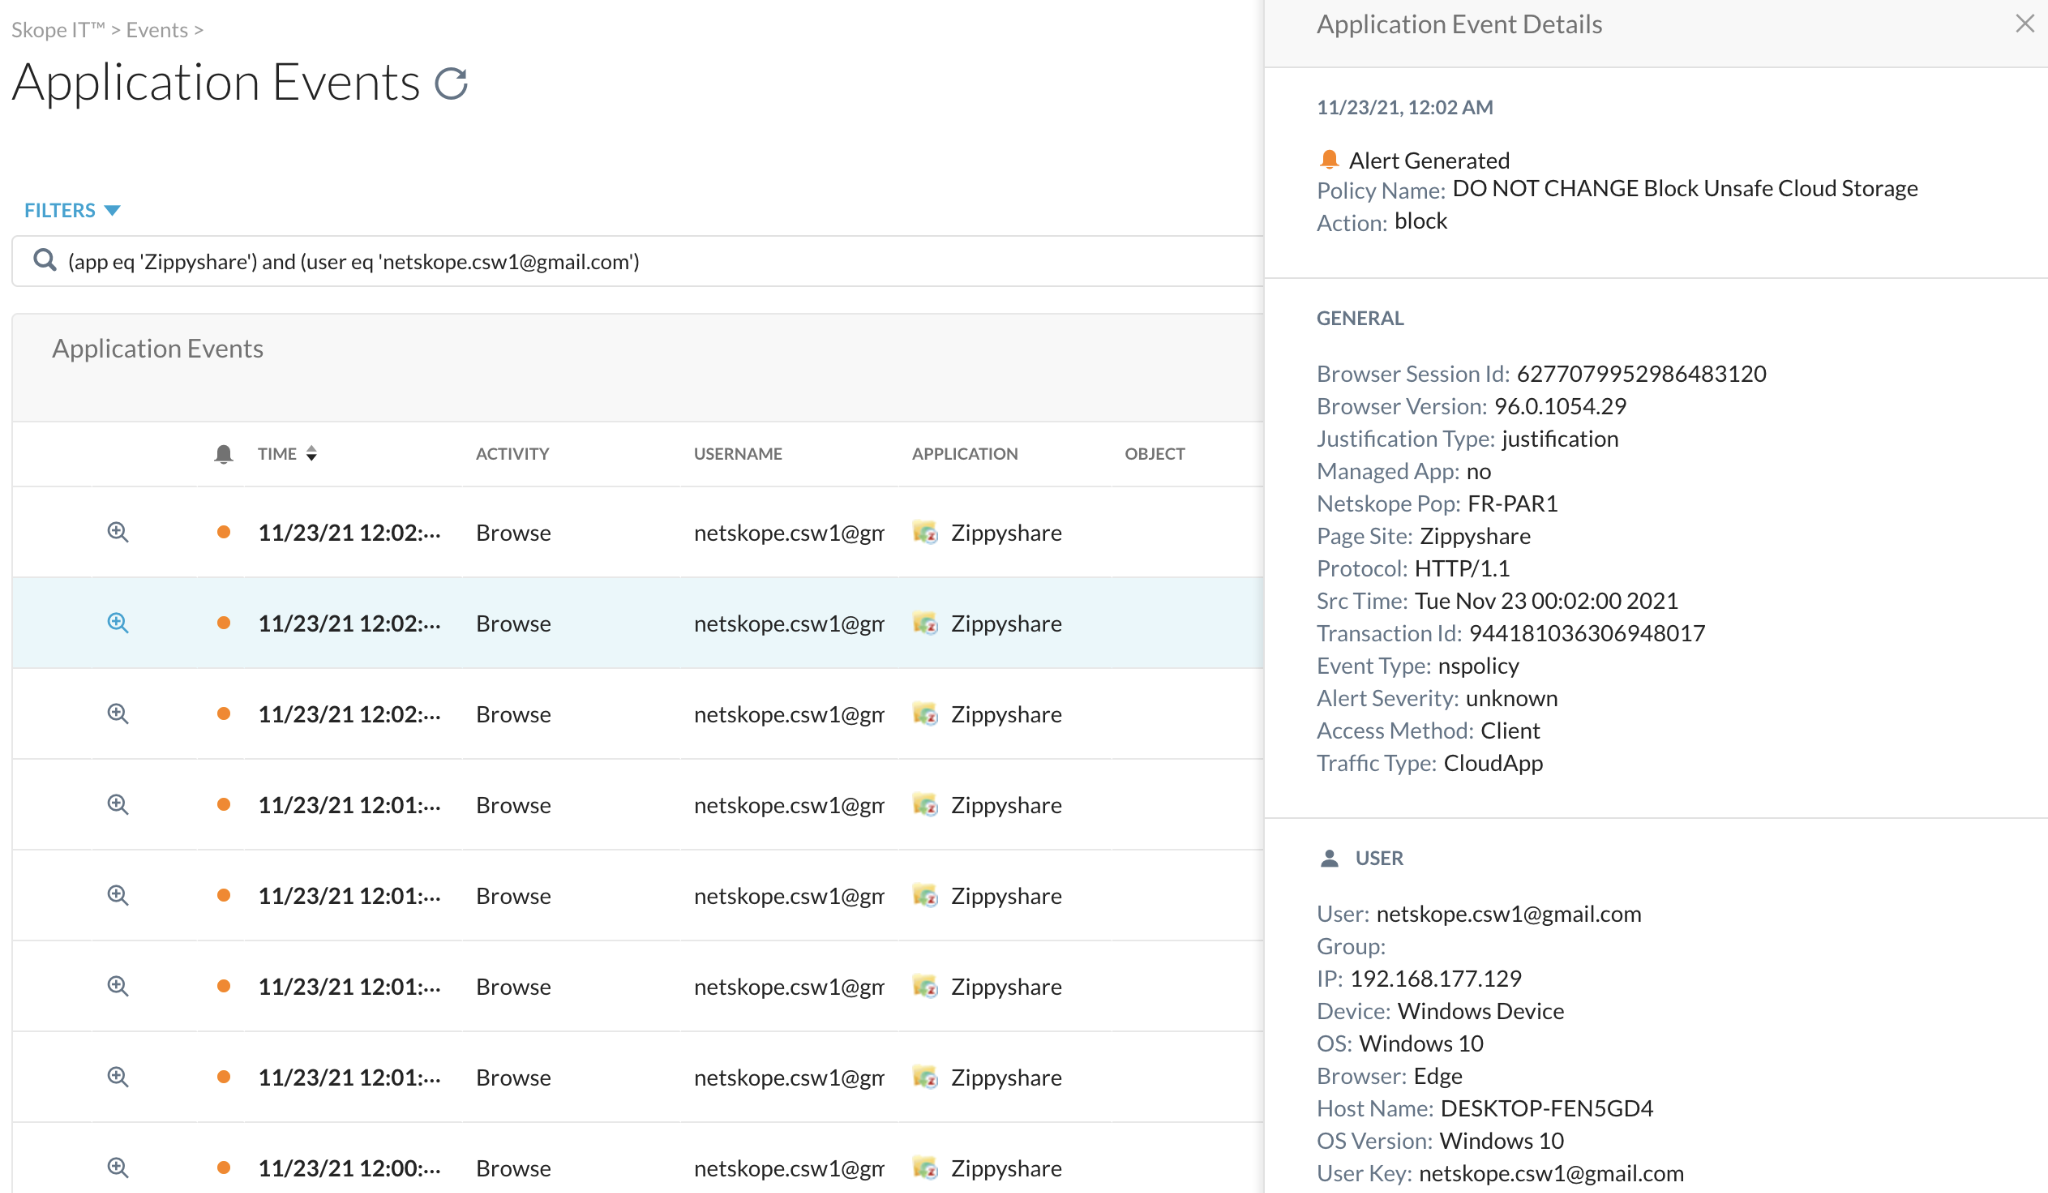
- What is the policy that triggered?
- From what device, browser and identity ?
- What is the traffic type?
NOTE CloudApp means it uses modern overlays over https like JSON/API
Step 4 Have a look (but do not change) to the appropriate policy under Policies > Real-Time Protection. (the policy number (9 in this screenshot) is likely to change)

Step 5 Return to the application events page and select the "Page Events" option for the user as opposed to "Application Events".
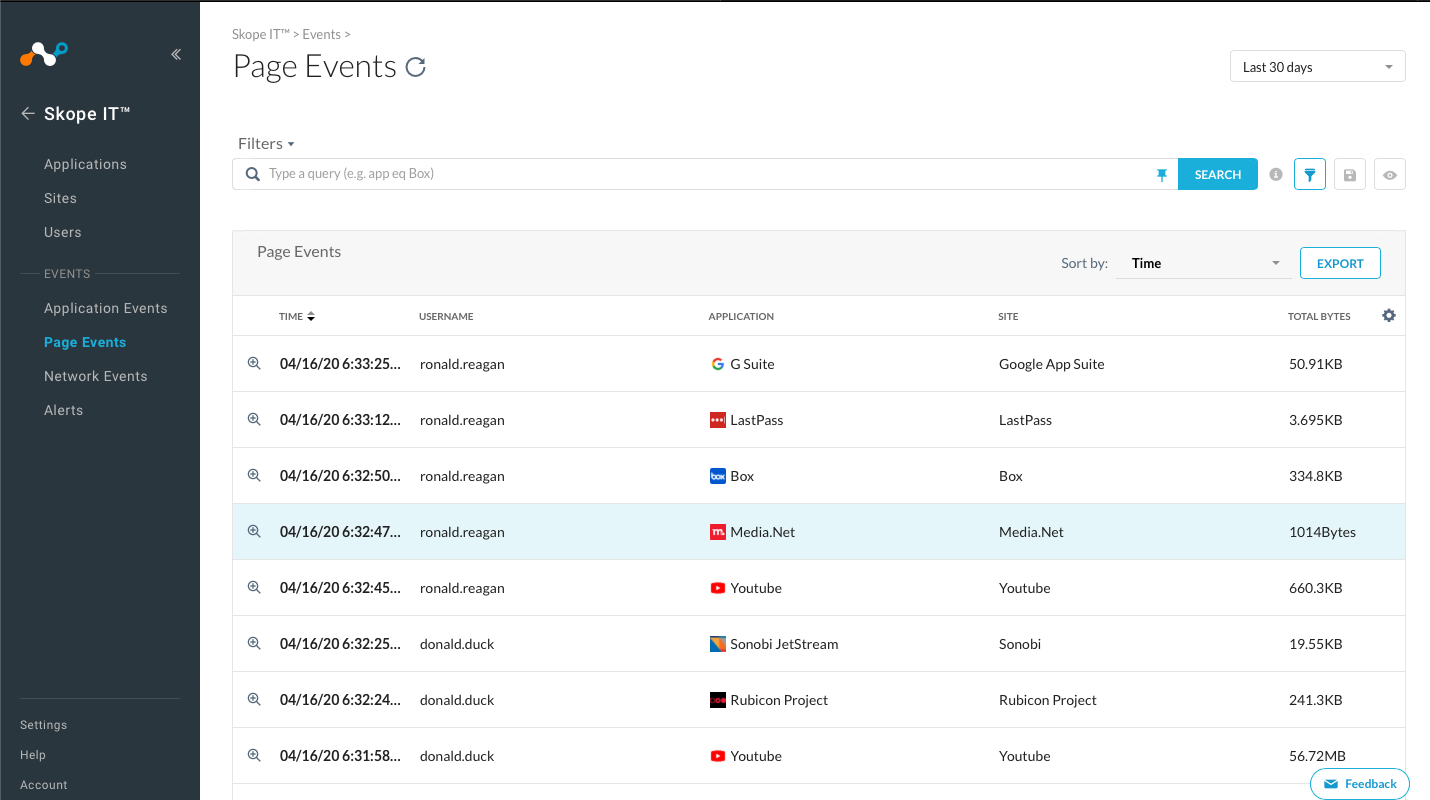
Page Events are similar to a traditional Web Proxy view and render information that is more specific to the HTTP level activity of the user.
Notice that if you select the spyglass and scroll further down in the window that opens to the right, the details page shows more session information.
- How many total transactions are listed?
- How many bytes were uploaded?
Please continue onto the next section.
Lab 2d: Prevent uploads to non-corporate cloud services
Estimated Time: 10 minutes
OVERVIEW
Modern enterprise companies typically want users to benefit from cloud services, e.g. having better collaboration, working more efficiently and achieving faster time to market. Therefore, users can often use cloud storage applications, which comply with companies "enterprise-readiness" criteria.
However, it is essential that companies' intellectual properties remain inside companies' own or IT-controlled environment. One relatively easy way to achieve this is to prevent uploads to unmanaged cloud storage apps and instances. This is achieved with three (3) policies:
-
Coach users that upload files to cloud storage to differentiate between company and private content (this lab, Lab 2d)
-
Allow corporate cloud storage (next lab, Lab 2e)
-
Ensure that company confidential files stay "inside" (Lab 2f)
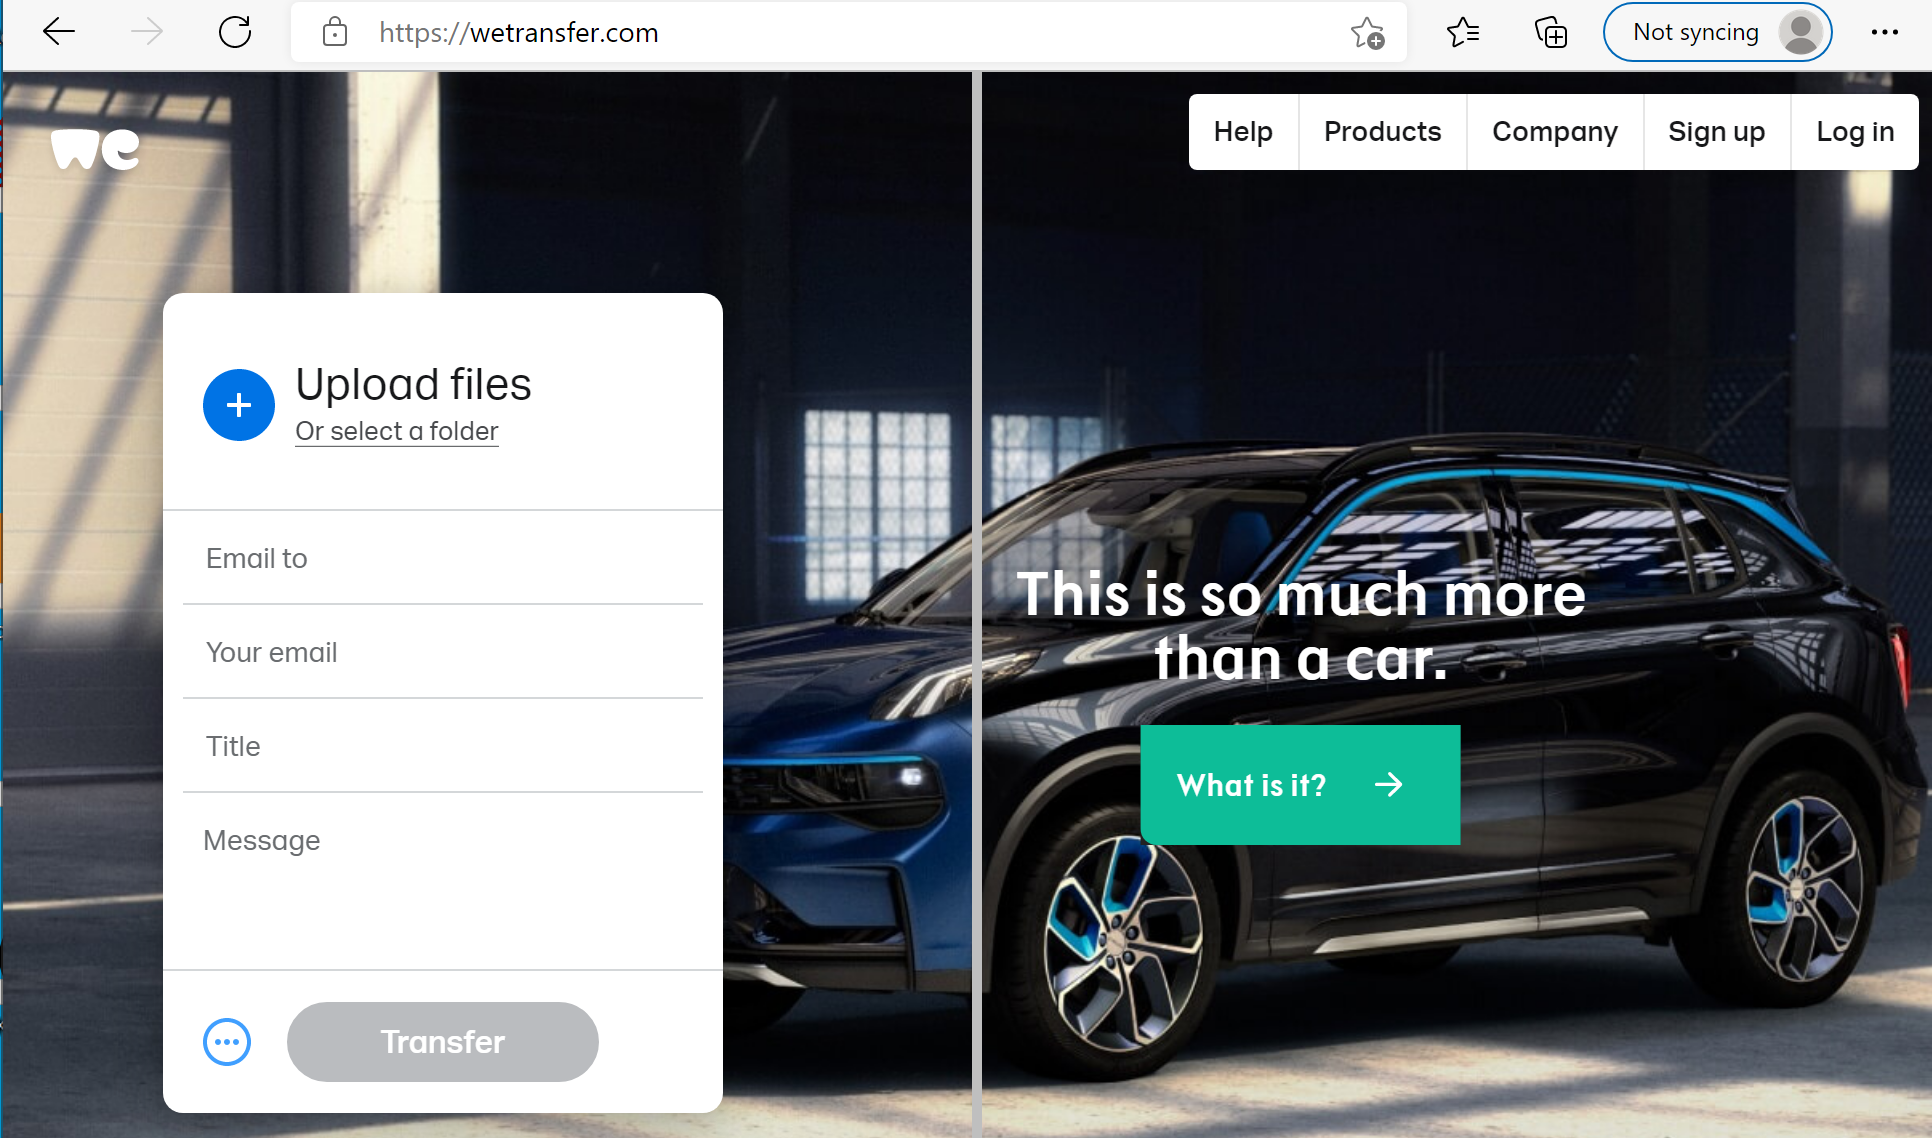
Step 1 Using your web browser, go to this awesome Shadow-IT cloud storage named WeTransfer: [https://wetransfer.com]
Because it is often used by 3rd party or partners to workaround size limitations in email, you cannot really block it without creating business or user friction.
Thus, login, browsing and download should be ok.
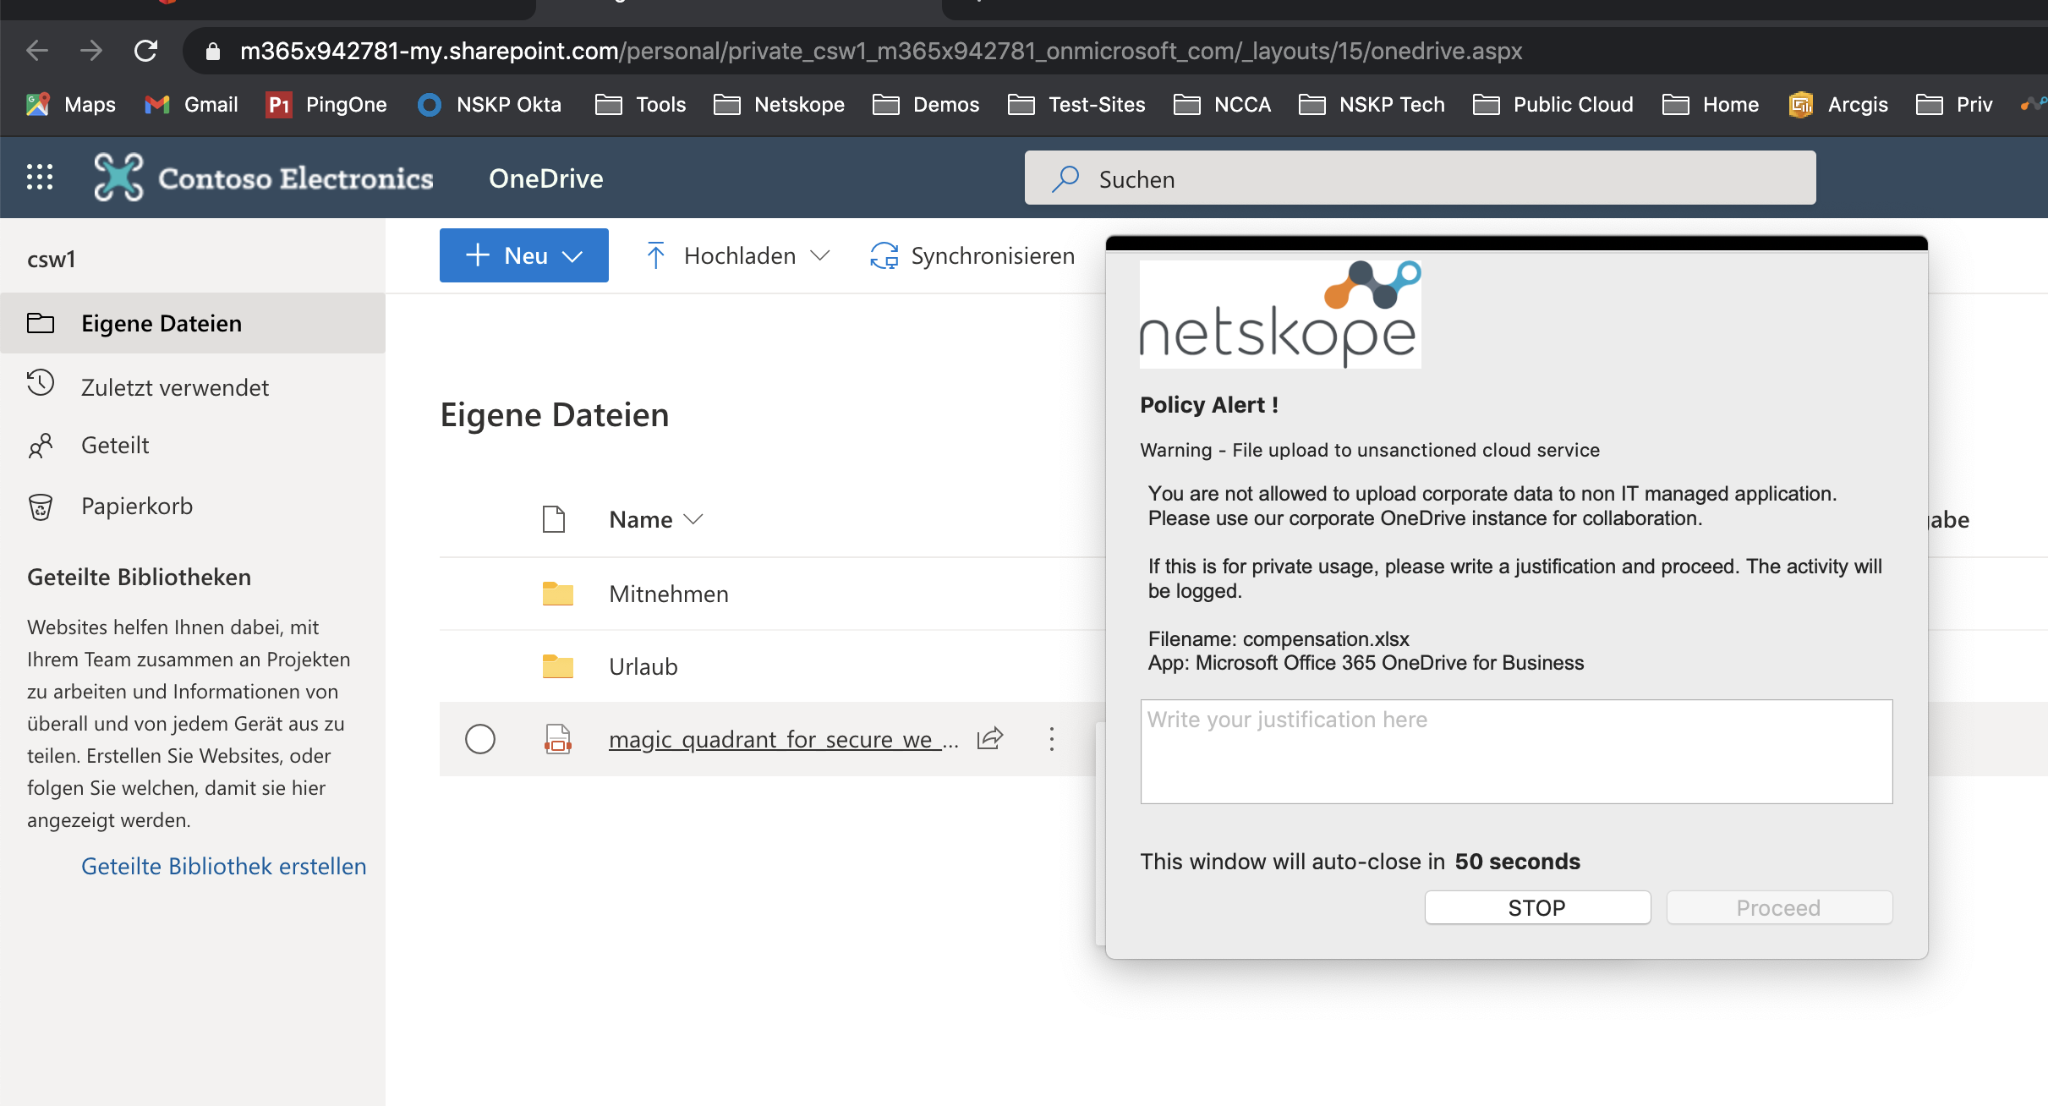
Step 2 However, try to upload any file from your computer and you should get coached not to do so.
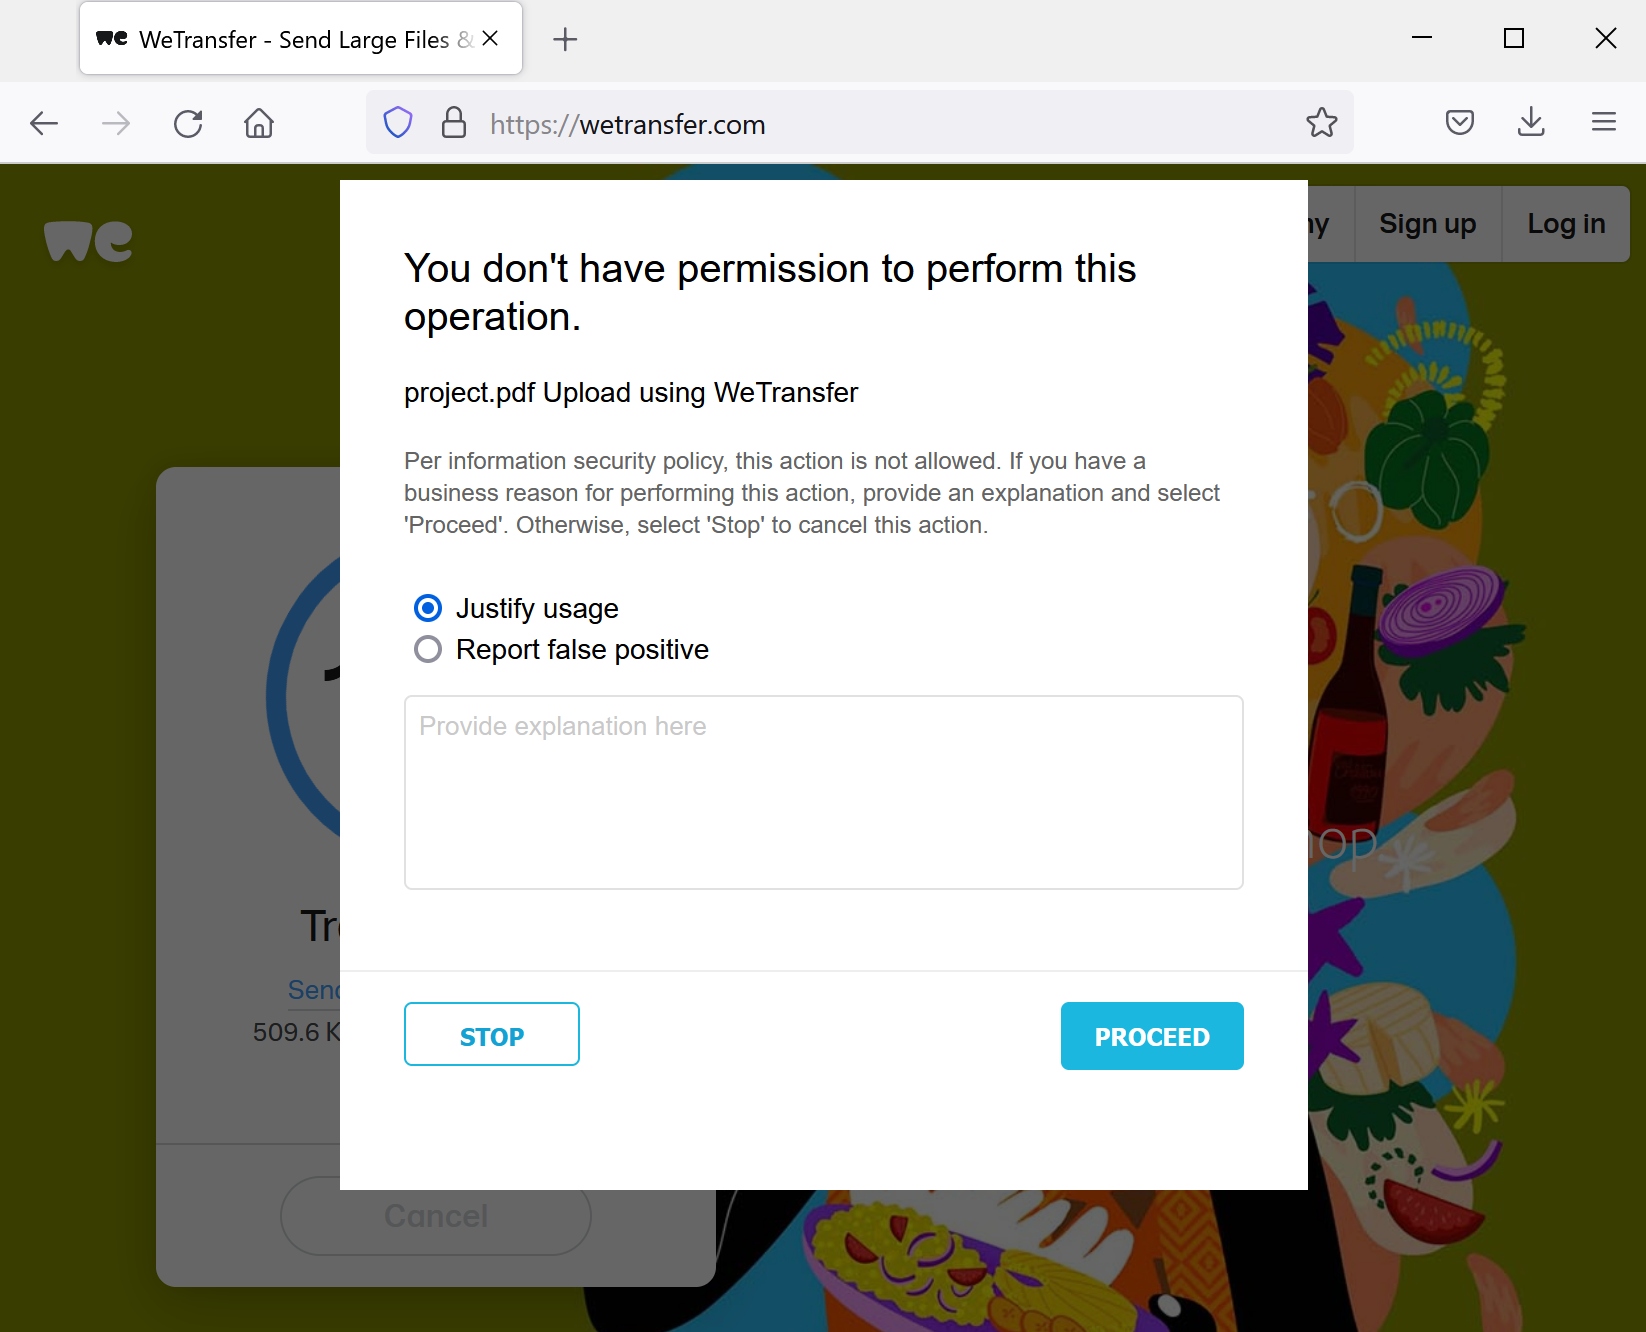
These kinds of user notifications train the individuals in companies and greatly reduce the amount of helpdesk calls.
Remember, the files which we have a look at in this scenario, are either private or normal company files. Corporate confidential files will be handled differentially and covered in the next lab.
Step 3 In your Netskope tenant, navigate to SkopeIT > Application
Events and select "Last 24 hours". There should be several entries
listed. If needed, click the
query mode icon and enter the query app
eq 'WeTransfer' and user eq 'emea.csw[X]@yopmail.com' in the
search field and enter. Replace [X] with your pod number.
Step 4 Look for a WeTransfer entry for your user regarding your activity. Expand by using the spyglass icon to see what details are available. Find out which policy triggered here and have a closer look at what is configured in that policy.
AGAIN, please do not change it.
NOTE You should find a single policy ; applicable to hundreds of cloud storage apps.
Some NGFW or UTM vendors claim they can do Application Control instead. Think about the number of policy you would have to write. Netskope policies are way more efficient.
In addition, competitors usually cannot handle cloud-to-cloud
Please continue onto the next section.
Lab 2e: Allow usage (incl. uploads) of [corporate] O365 instance
Estimated Time: 15 minutes
OVERVIEW
In this lab, you will explore how to allow sanctioned instances of applications that are being used on your network. You will also provide security coaching to users who are attempting to perform risky activities. You can use these steps on your own network to prevent users from engaging in risky behaviors in the cloud. You will also draw up reports for analysis of activity in the network.
Applicable Use Cases
-
Identify and grant access to specific (corporate) application instance
-
Block risky activities
Prerequisites
-
Access and credentials to the Netskope tenant ([https://csw2-emea.eu.goskope.com/])
-
Use the same admin credentials like before.
-
Netskope Steering Client installed (requires local admin rights)
WALKTHROUGH
In this lab you act as an administrator allowing only access to a corporate sanctioned version of the collaboration application Microsoft / Office 365 (including OneDrive). You will first identify that all uploads to your corporate O365 OneDrive is working with the user alert we saw in Lab 2. Then you create a policy on the Netskope Security Cloud to allow uploads for your user to only the NetskopeCSW instance of Microsoft / Office 365.
Our corporate Microsoft / Office 365 tenant for this lab: M365x04829816.onmicrosoft.com
Step 1 Verify first that you can not upload files to your corporate OneDrive. Navigate to [https://www.office.com] and click Sign in, located at the left of the page.
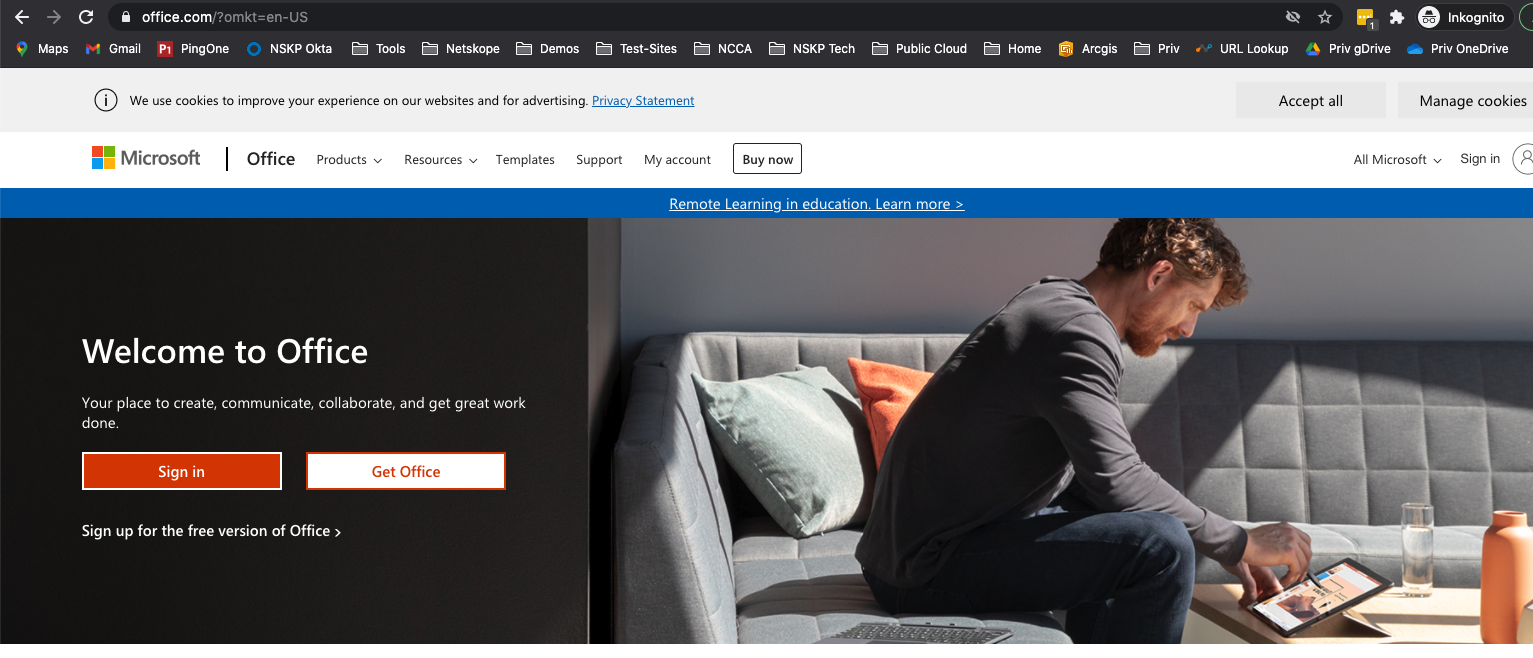
Step 2 Enter your individual corporate Microsoft / Office 365 user login you received in your workshop preparation email:
login: corporate.csw[X]@M365x04829816.onmicrosoft.com
Pa$$w0rd: Netskope_14-04
Sign in works fine...
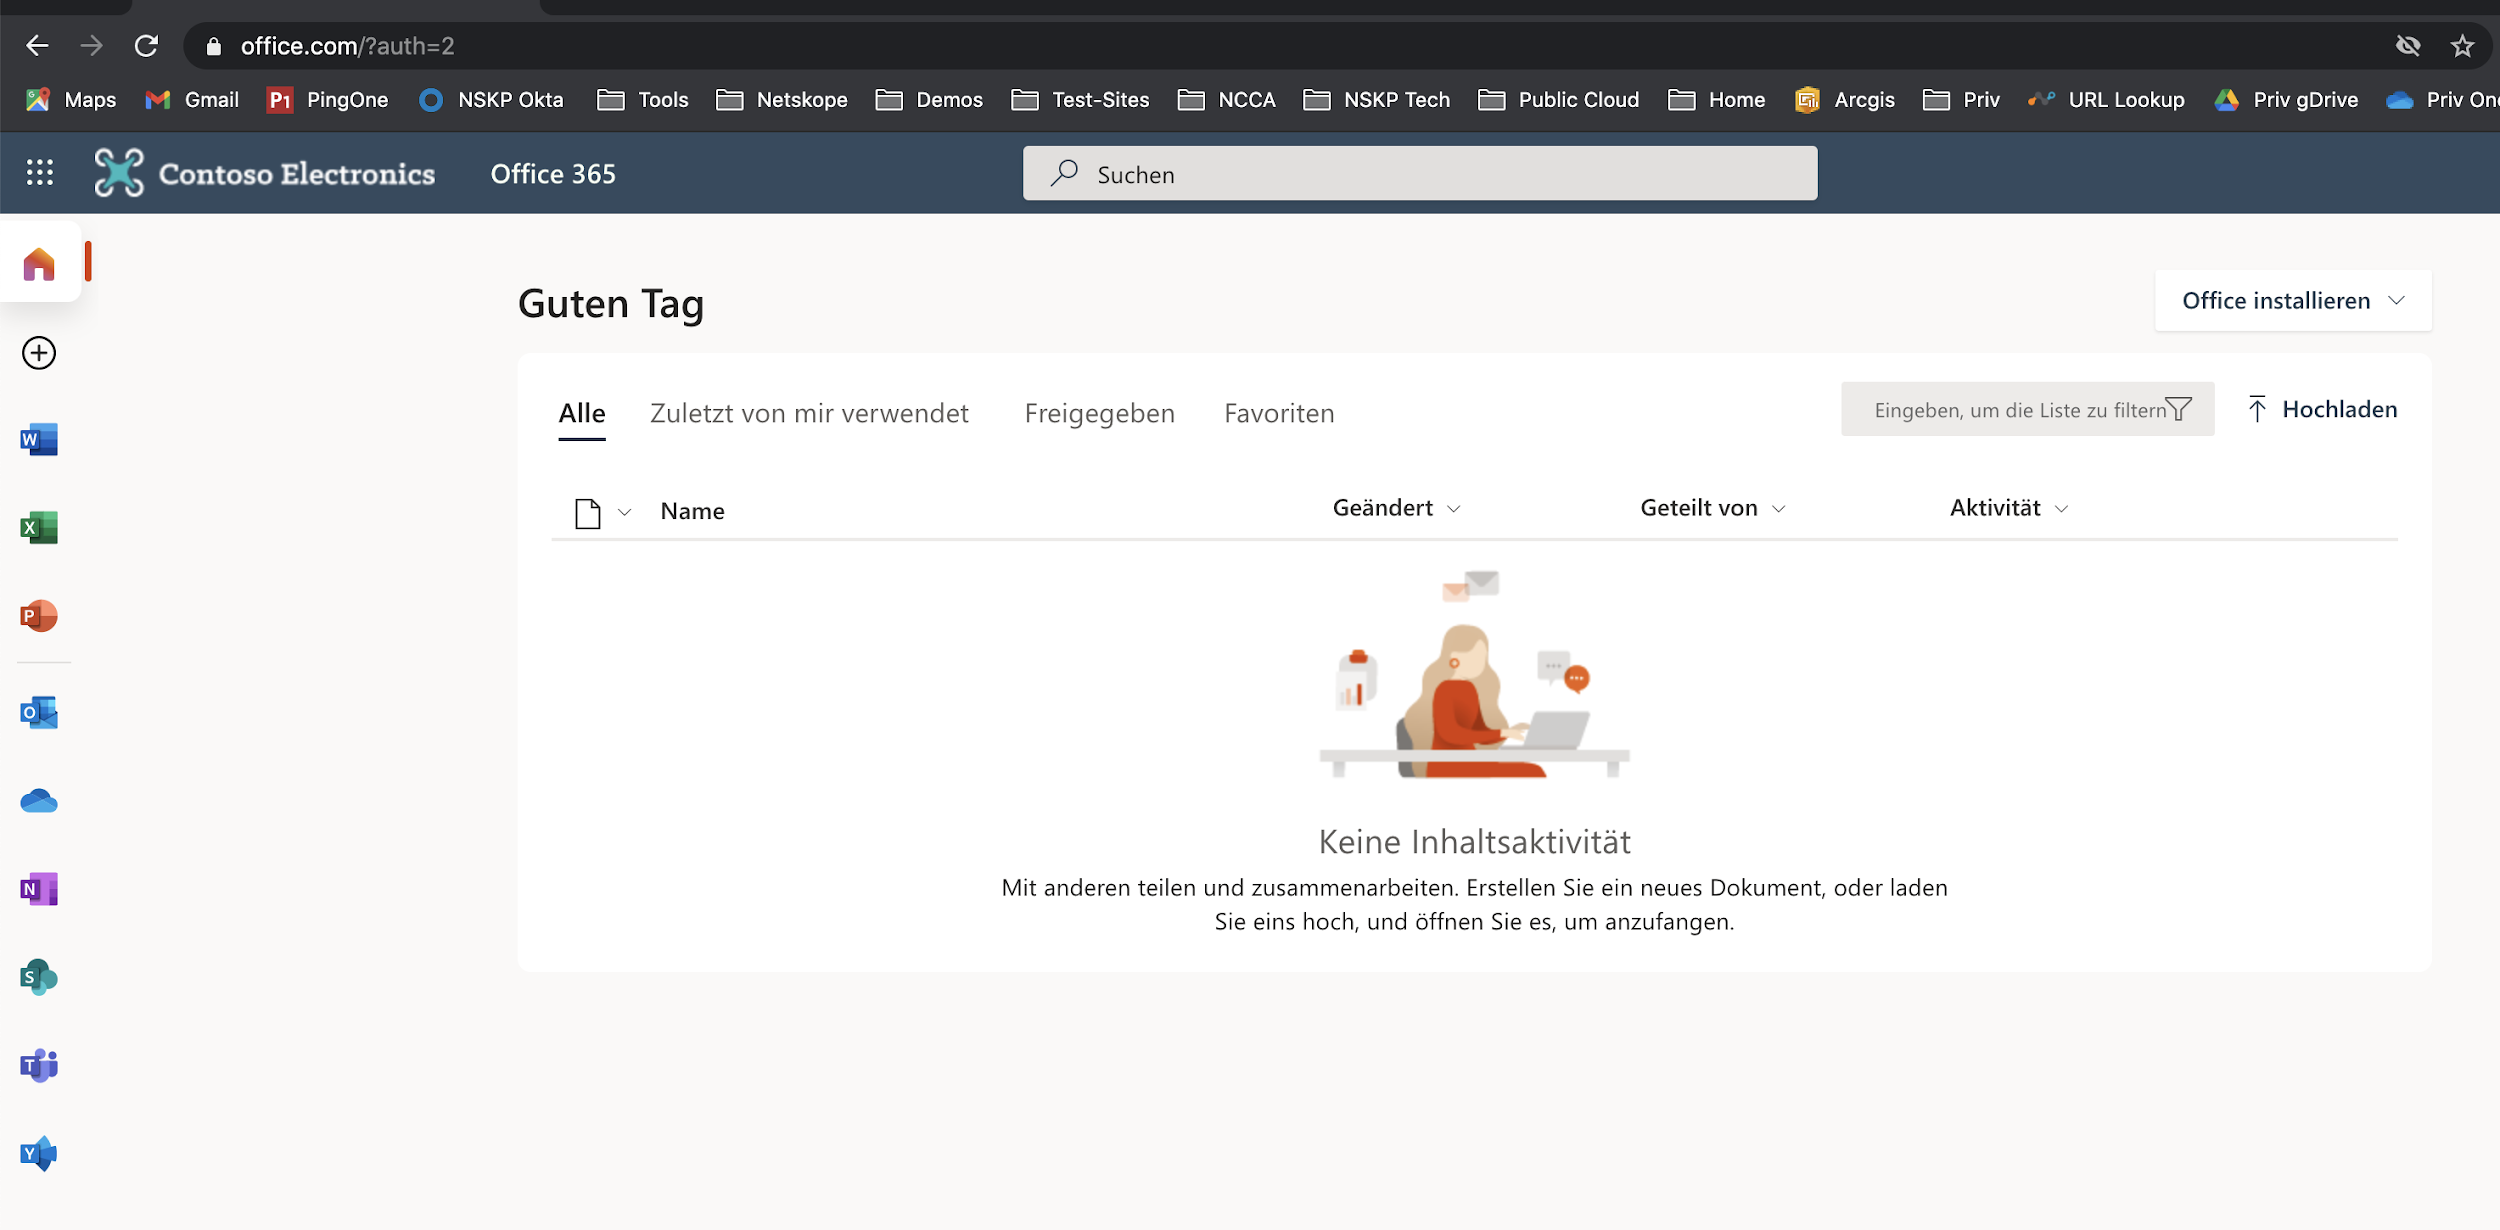
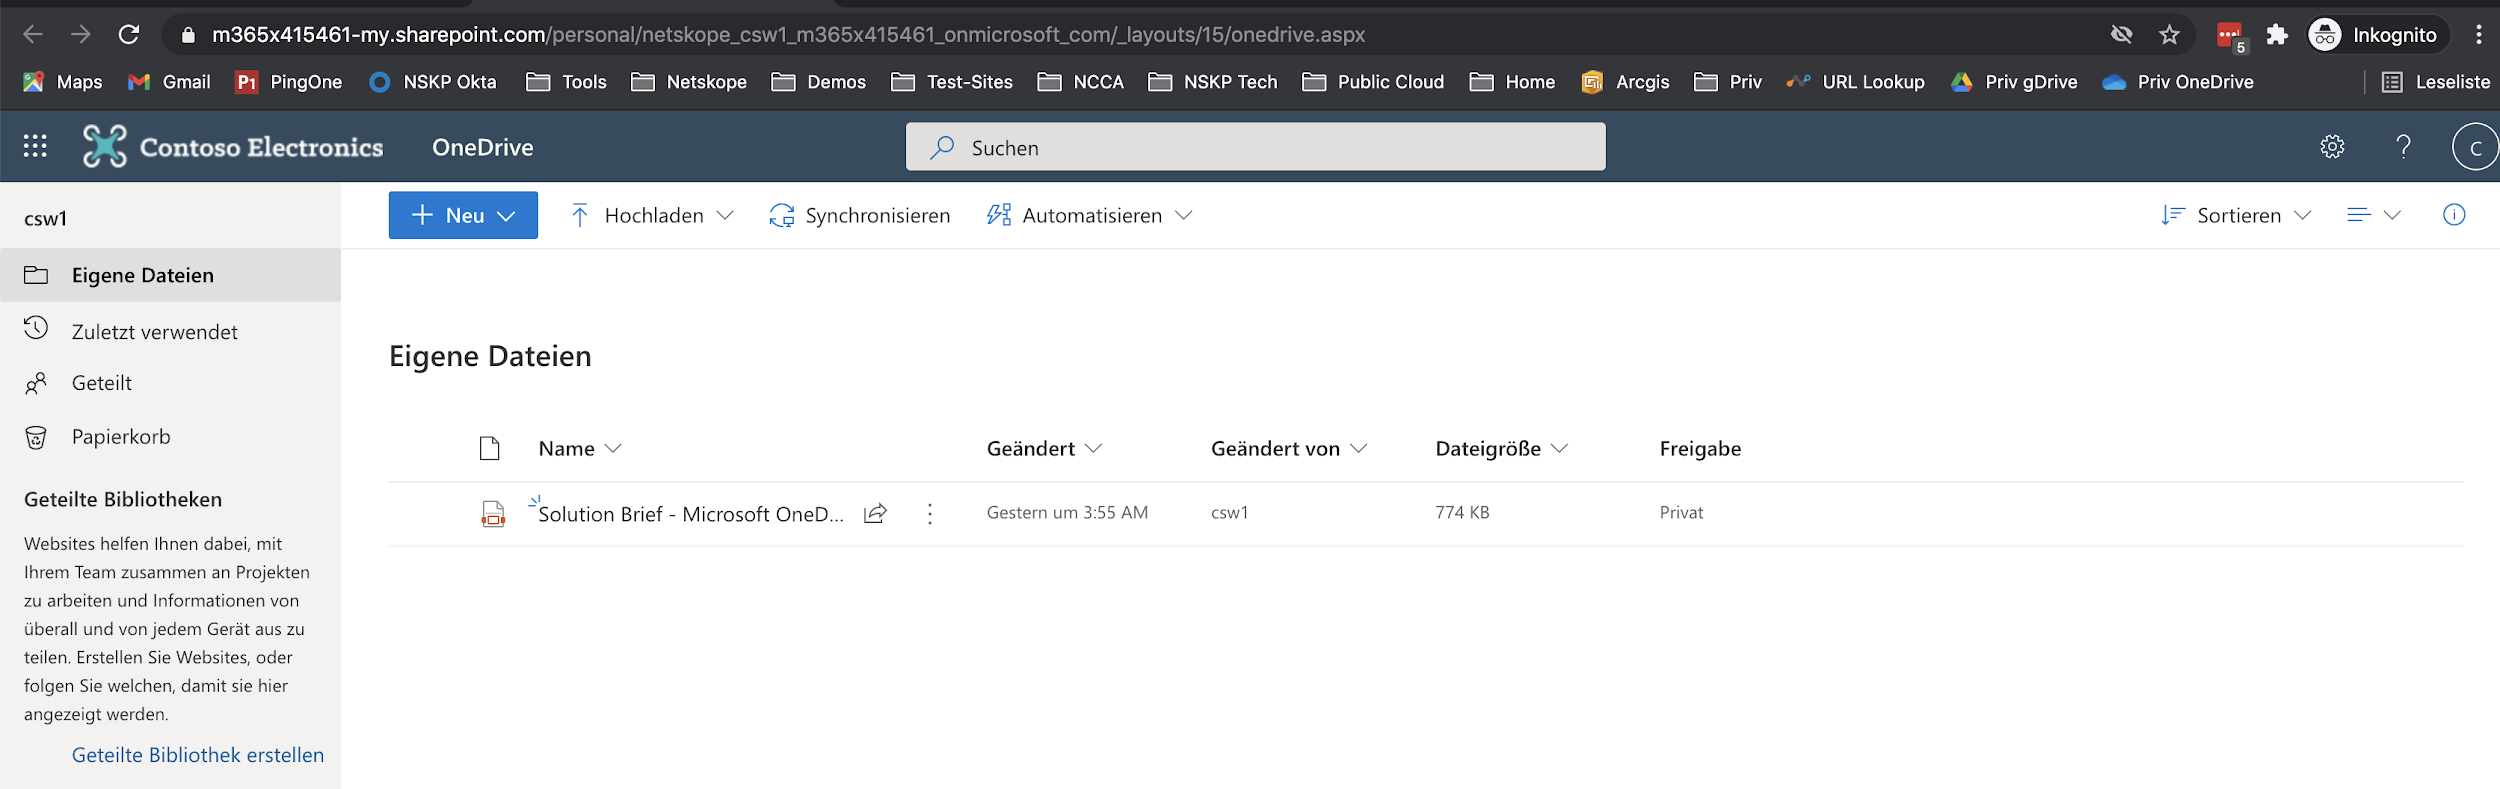
Step 3 Open OneDrive...
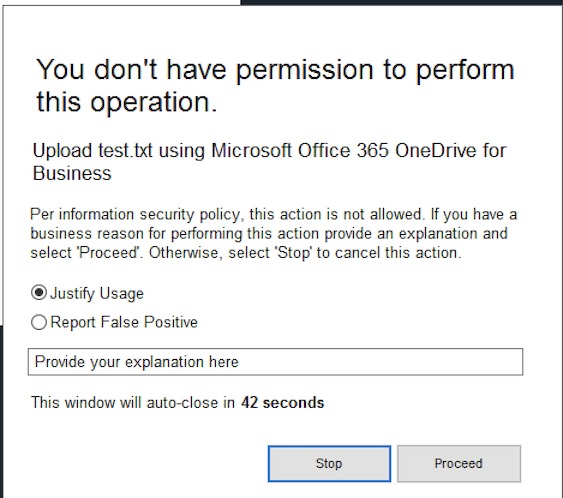
Step 4 Now, please try to upload any file from your local computer. You should receive a coaching user notification to explain that it is not allowed to upload company files to non-corporate cloud storage applications. If other than the corporate use of that upload (e.g. private files), it might be ok to do so (like in the lab before).
Step 5 Goal now is to allow all file uploads without coaching user notifications for the corporate OneDrive instance.
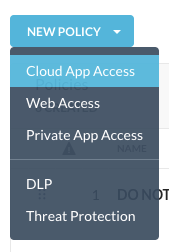
From the home screen of your Netskope tenant, Navigate to Policies > Real-time Protection, click new policy, "Cloud App Access".
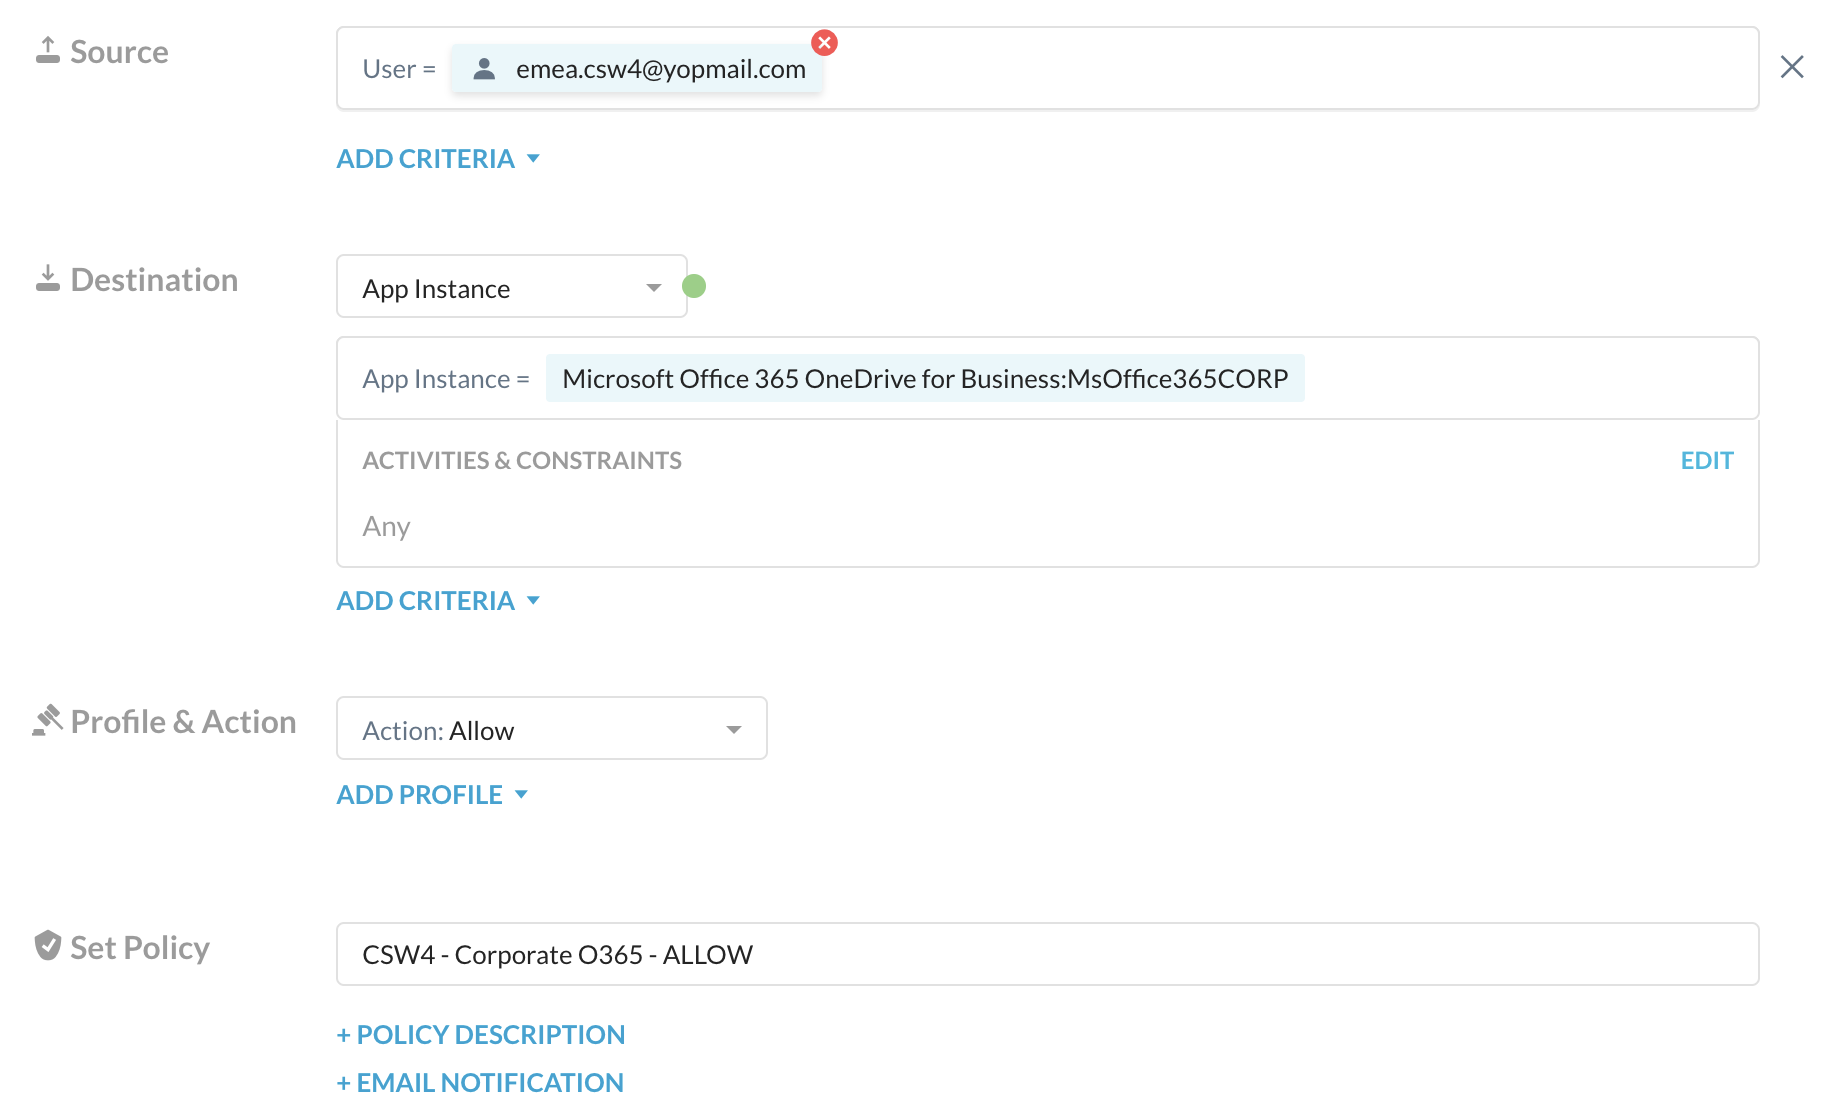
Step 6 Select:
- your username in the users section,
- Destination: select the App Instance from the drop-down menu
- then "Microsoft Office 365 OneDrive for Business: MsOffice365CORP" from the list
- Action: select Allow
- Set Policy name: CSW[X] - Corporate O365 - Allow
It should look like this:
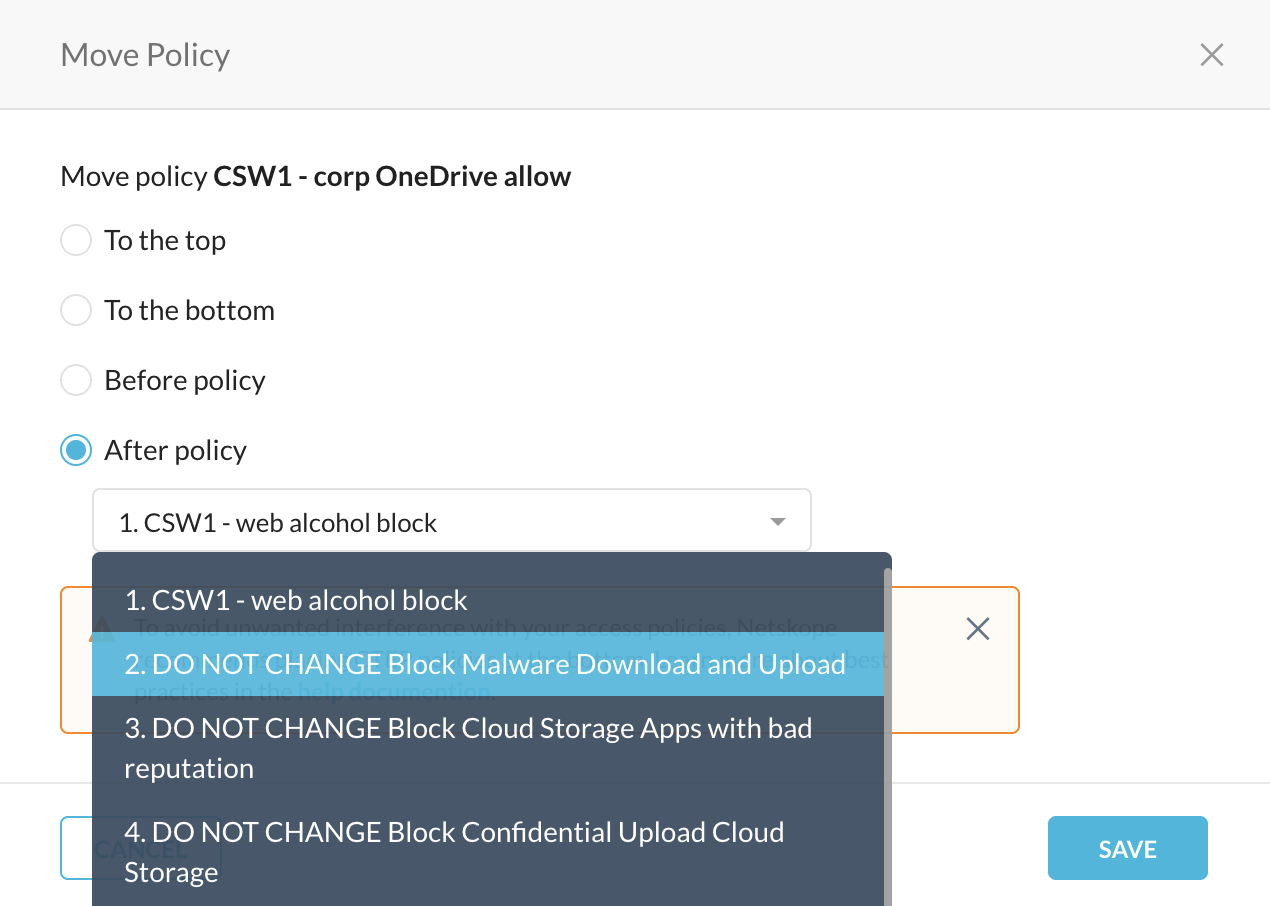
Step 6 Click Save and select After policy "DO NOT CHANGE Block Malware Download and Upload".
Step 7 Don't forget to apply changes (and wait about 30 seconds).
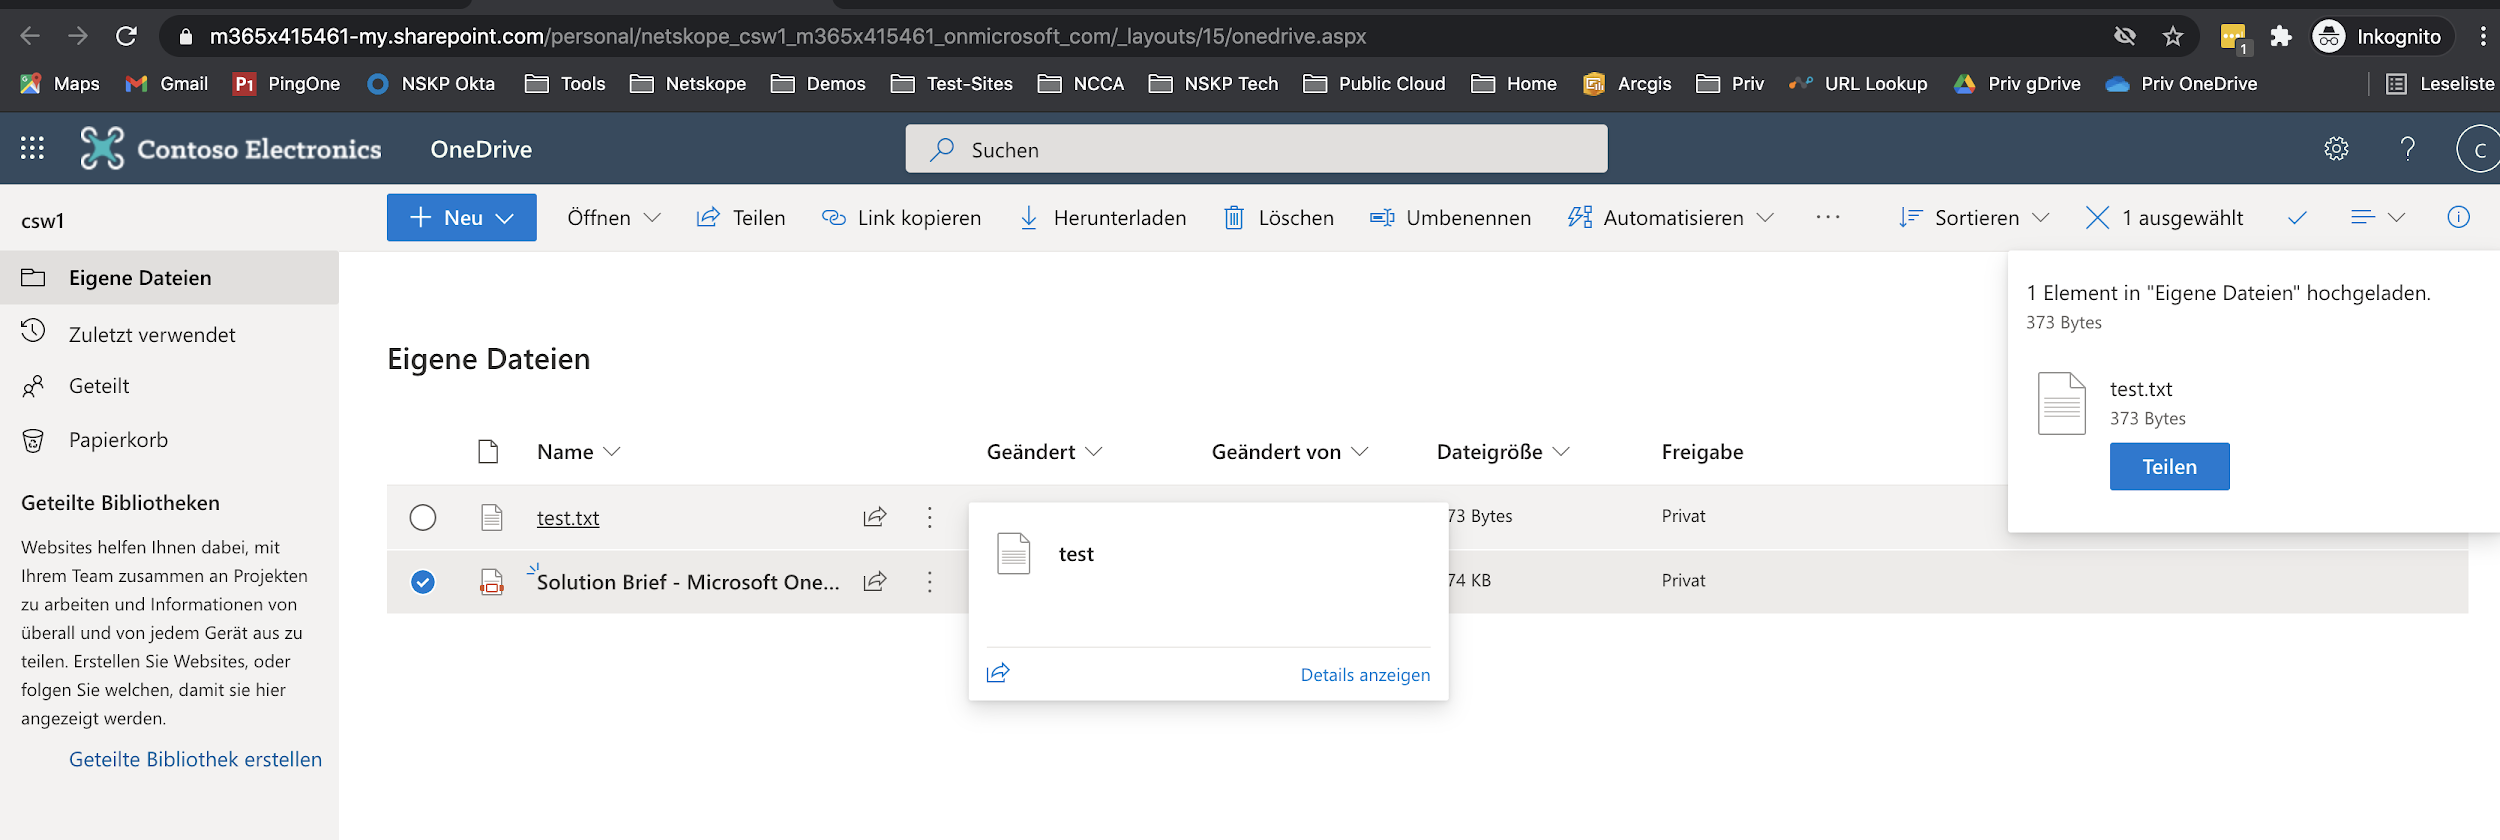
Step 8 Now, go back to your corporate OneDrive and try to upload a file again. That should work now without user coaching, as you upload files to the corporate cloud storage.
Step 10 What about other OneDrive instances (one from an attacker for example) ?
File upload to any other instance (from private/personal to contractors, partners, or other unmanaged subsidiaries) should not be allowed directly BUT should be coached.
Go back AGAIN to [https://portal.office.com] (use a new incognito / private browser window) and login with a "shadow-it" Microsoft / Office 365 account:
login: private.csw[X]@M365x85864118.onmicrosoft.com
Pa$$w0rd: Netskope_14-04
Step 11 Login works fine, and if you try to upload files, you still receive the coaching user notification - like in Lab 2d.
That's OK, but it could be improved as we don't want people to click "proceed anyway" and sensitive files to be uploaded to this place.
This will be solved in the next lab.
Please continue onto the next section.
Lab 3: Prevent Corporate Confidential files leaving towards unmanaged Cloud Apps
Lab 3a: Use DLP engine along Instance Awareness on [corporate] O365 instance
Estimated Time: 15 minutes
OVERVIEW
In this lab, you will explore how to ensure that company confidential data is only uploaded to [the] corporate OneDrive instance. Uploads to unmanaged cloud storage or to non-corporate OneDrive instances (intentional or unintentional) should be prevented.
Applicable Use Cases
-
Identify company confidential files and grant access to specific (corporate) application instance
-
Block any other upload to unmanaged or non-corporate cloud apps
Step 1 Retrieve sensitive file for this test
For this lab we will use a Microsoft Word file which was tagged with Azure Information Protected (AIP) labels (23-AIPLabel.docx). You will find this file here:
[https://app.box.com/s/jpvnd61i9piluld0chh4v6wu00685nz1]
Please download it.
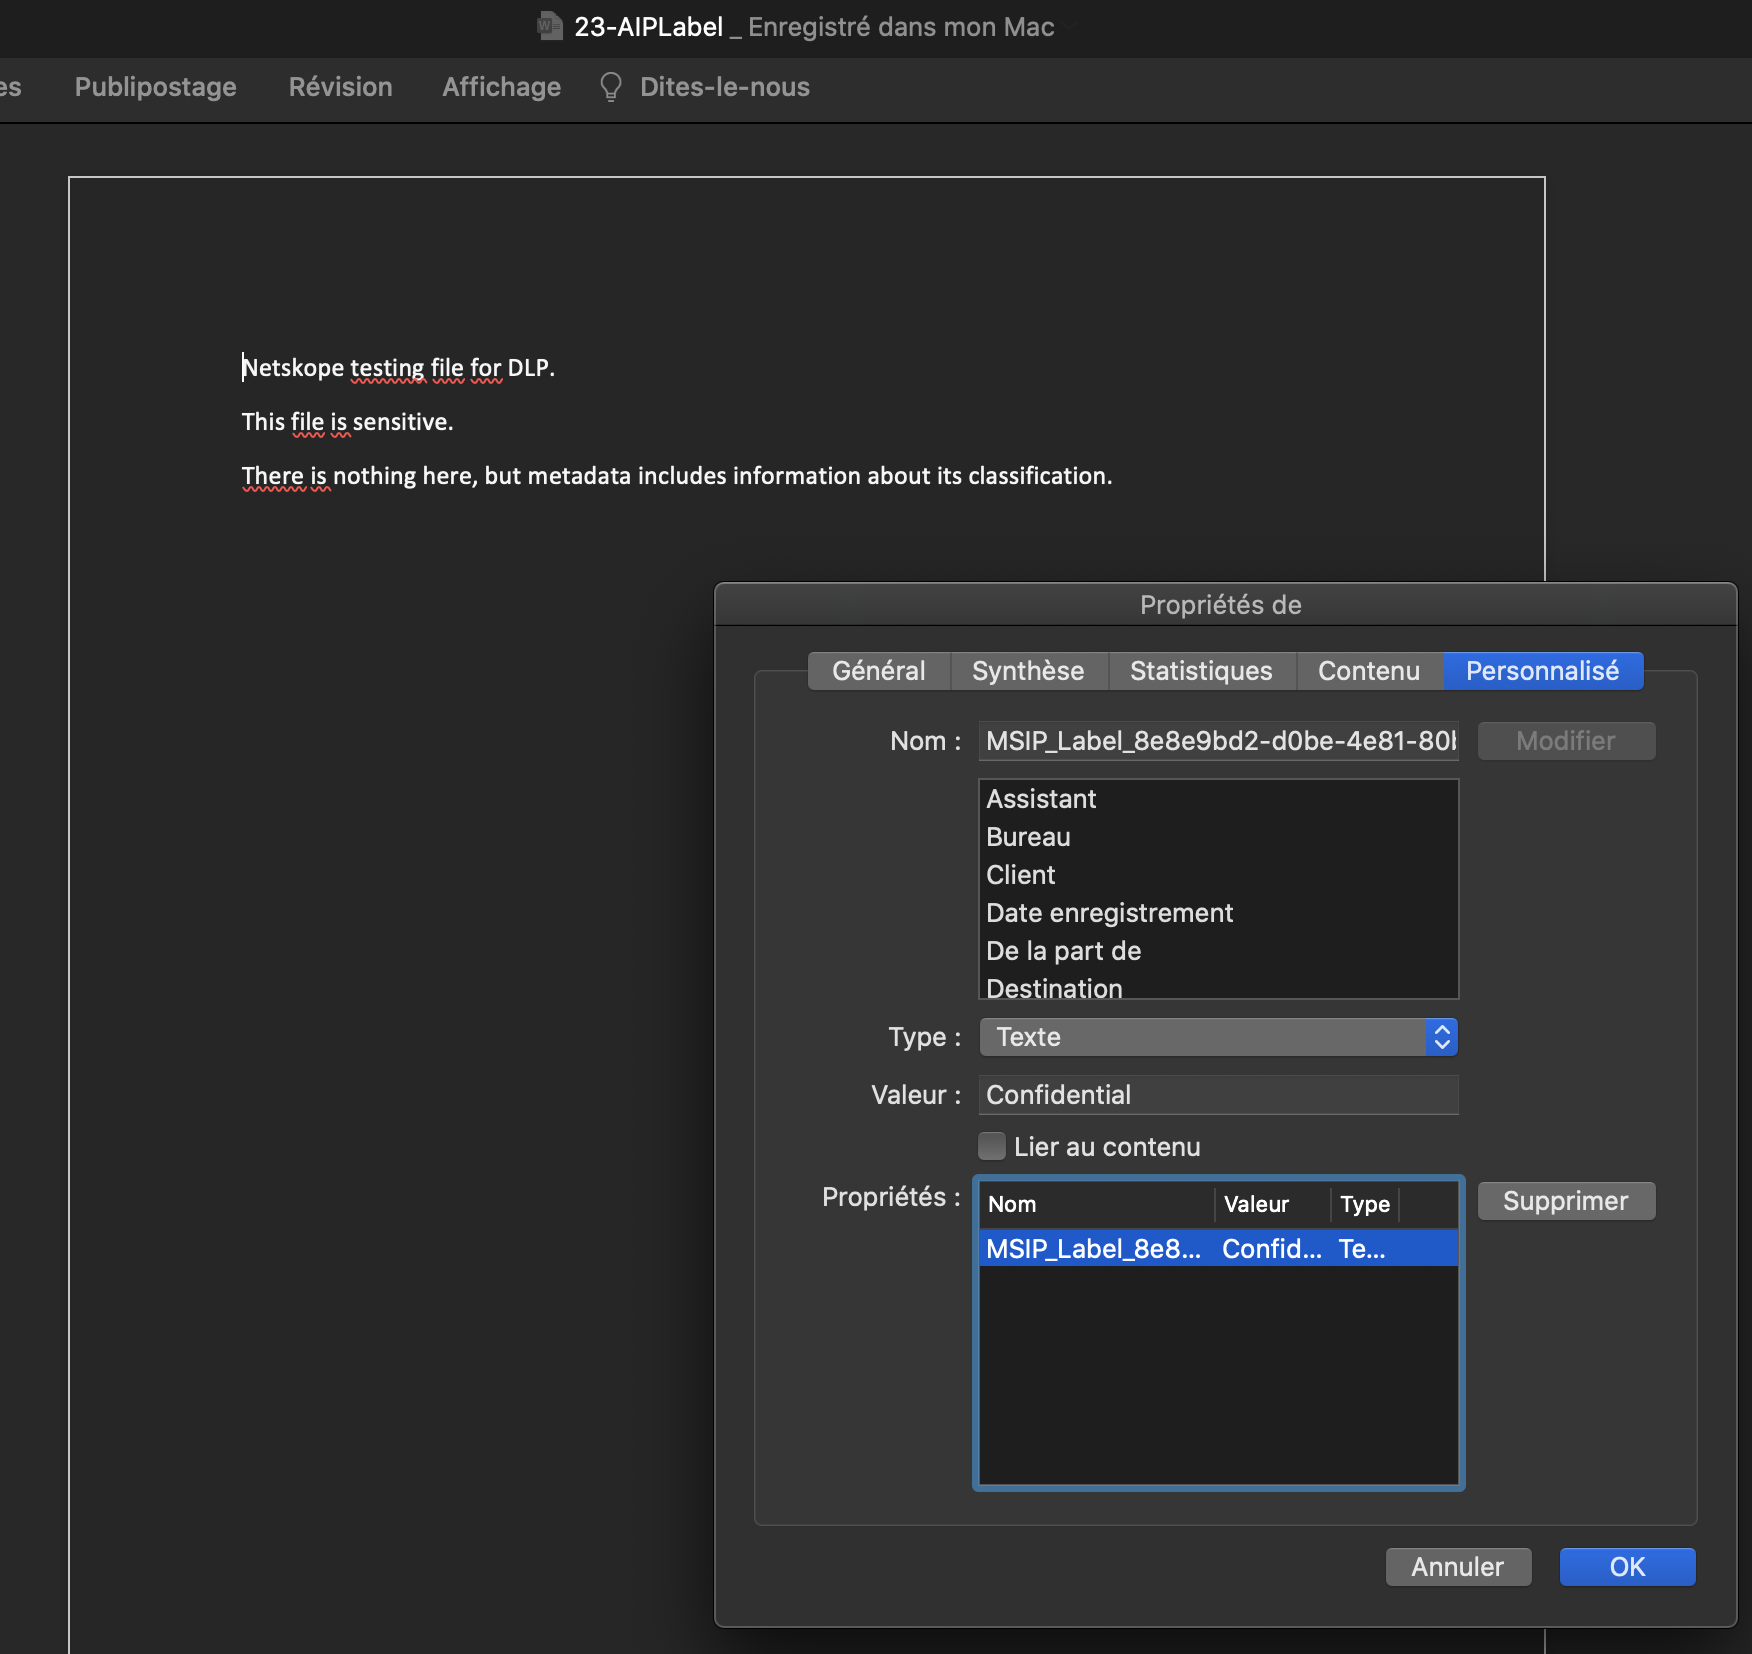
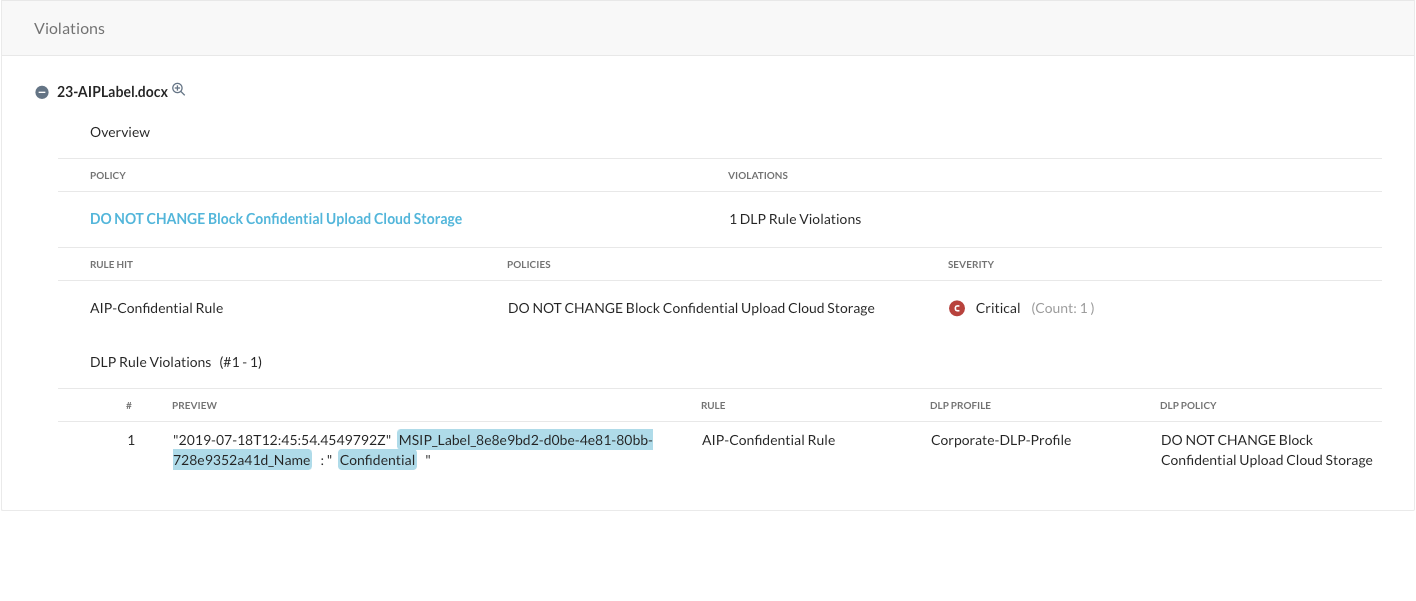
To detect that document we are looking for the following label / value:
- MSIP_Label_8e8e9bd2-d0be-4e81-80bb-728e9352a41d_Name: Confidential
You will be able to upload this file to corporate OneDrive, but should be blocked trying to upload to any other cloud storage app or private OneDrive instance.
Step 2 Login to your corporate OneDrive with the following professional user account
URL: [https://portal.office.com]
login: corporate.csw[X]@M365x04829816.onmicrosoft.com
Pa$$w0rd: Netskope_14-04
Make sure to use incognito mode (to avoid cache and re-authentication from a previous account with cookies)

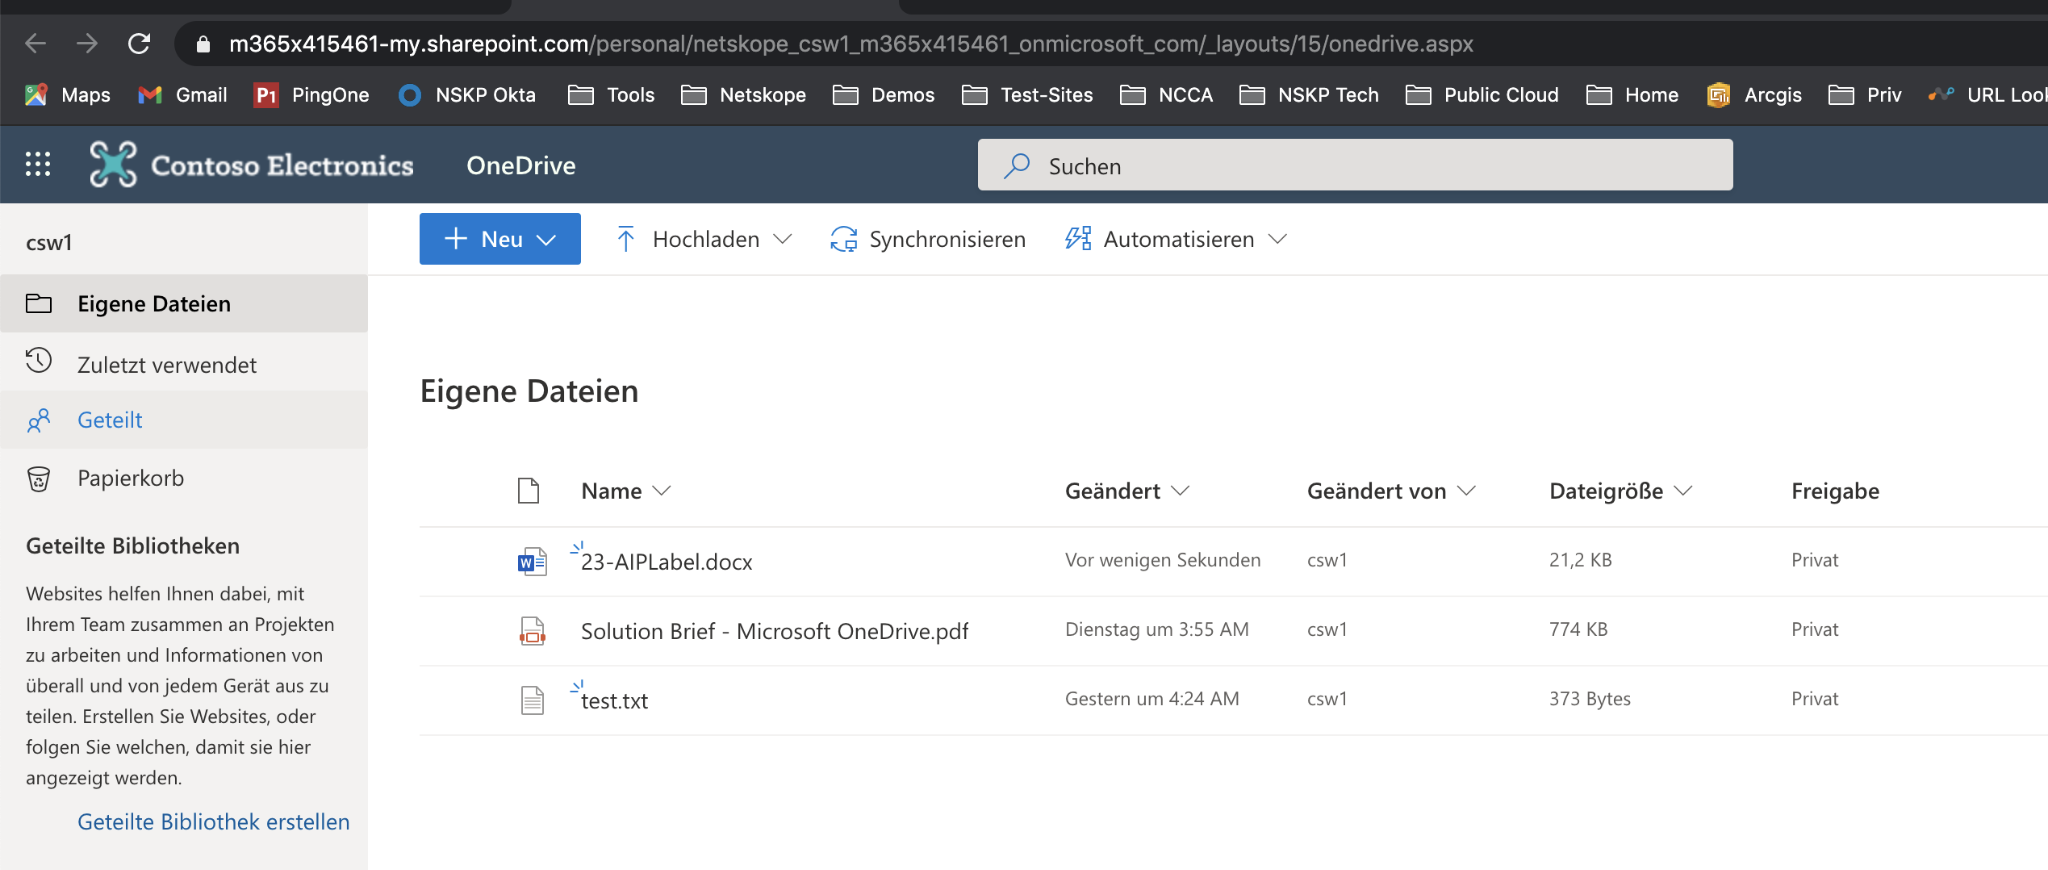
Step 3 Upload the AIPLabel file to your corporate OneDrive - that works fine.
(If the APILabel file is already there, you can delete it first.)
Step 4 Close all tabs in incognito window and open a new one - login into your "shadow-it" private / OneDrive account
login: private.csw[X]@M365x85864118.onmicrosoft.com
Pa$$w0rd: Netskope_14-04
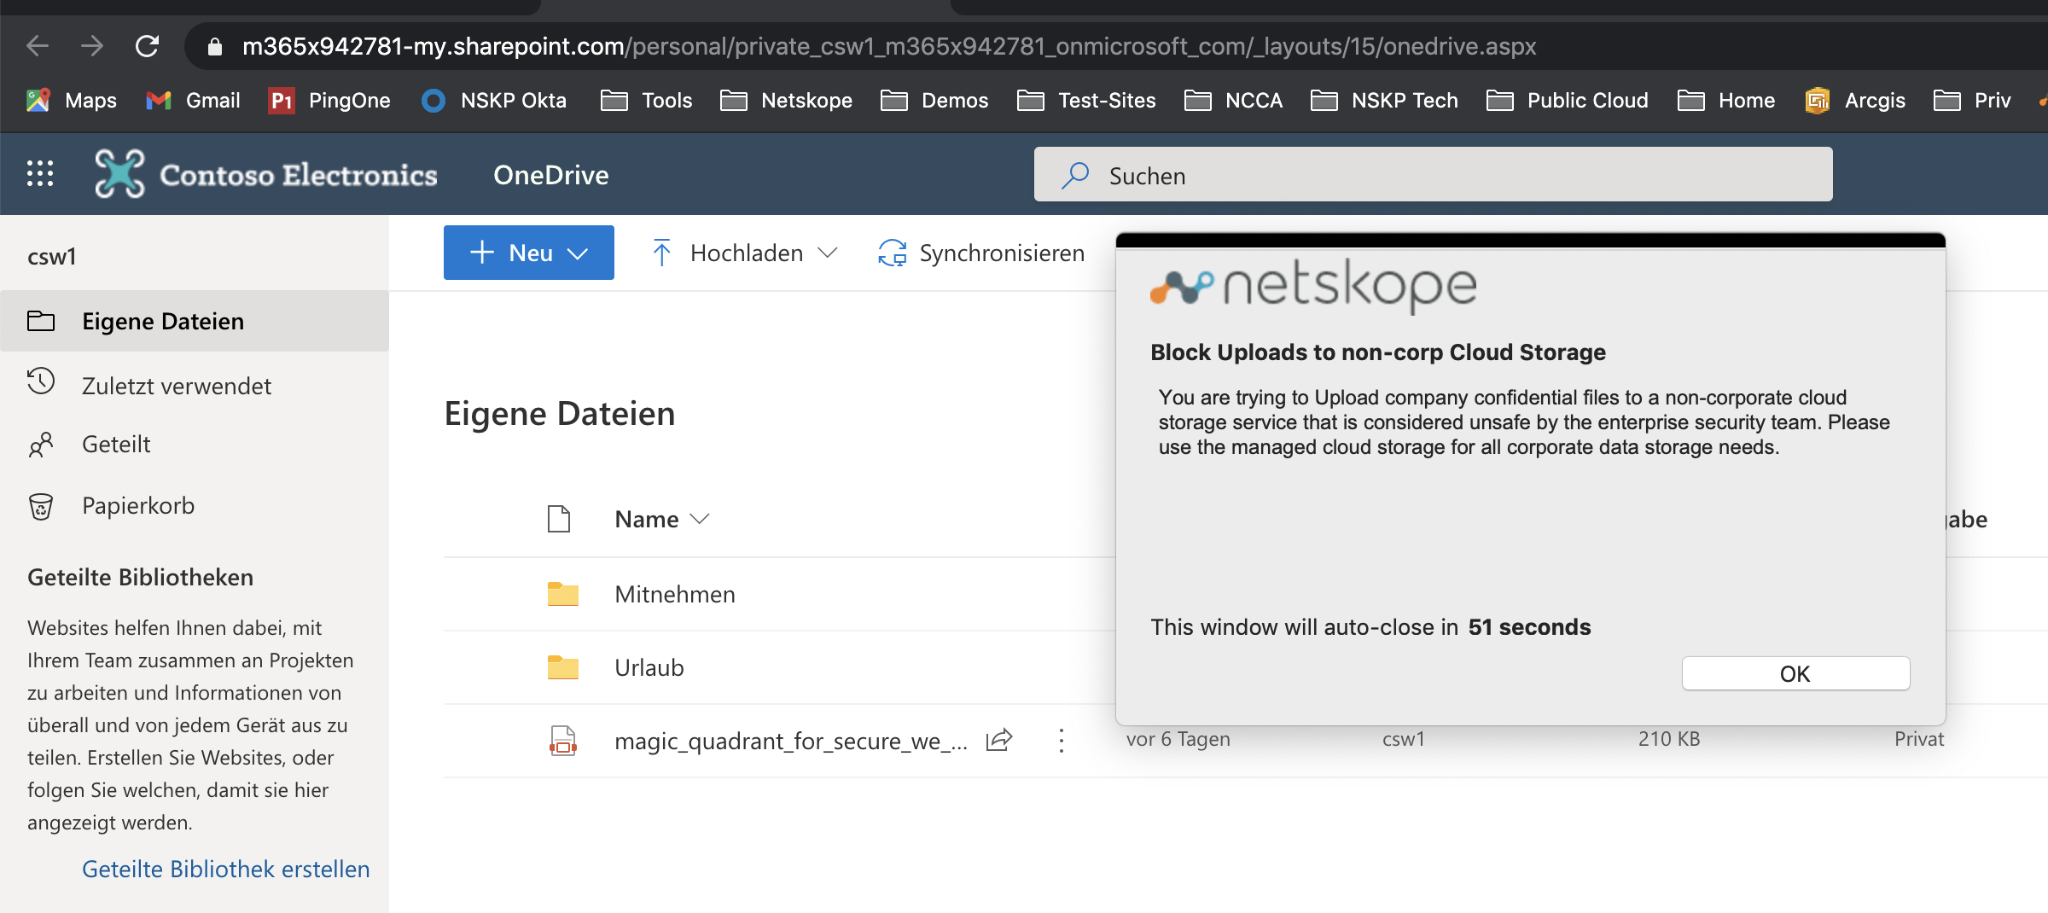
Step 4 Try upload AIPLabel file - this should be blocked
Step 5 Check Skope IT / Application Events to find the last two (2) logins, the one with corporate and short after the login with the private OneDrive account into the different instances and the appropriate actions.

Click on the spyglass again to find the policy which triggered here, as well as other details.

Within the DLP section of
Step 6 Verify the policy including the used DLP profile and DLP rule. Go find the policy under Policies > Real-Time Protection:

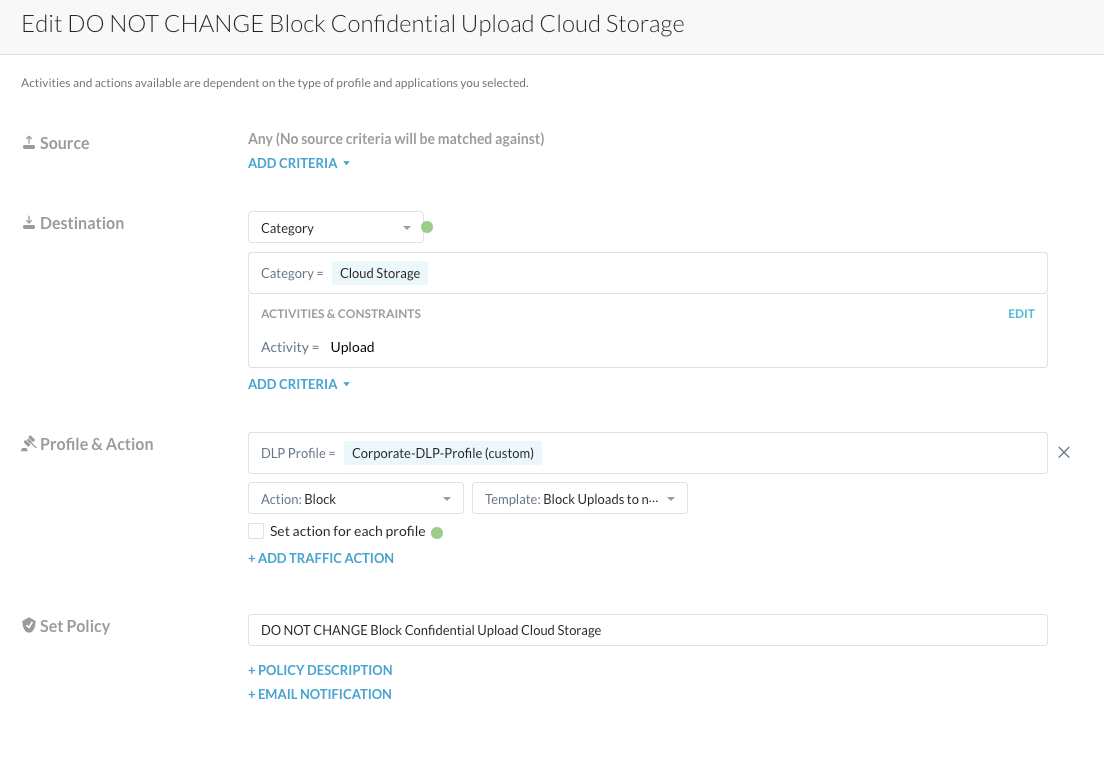
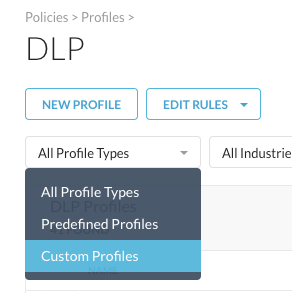
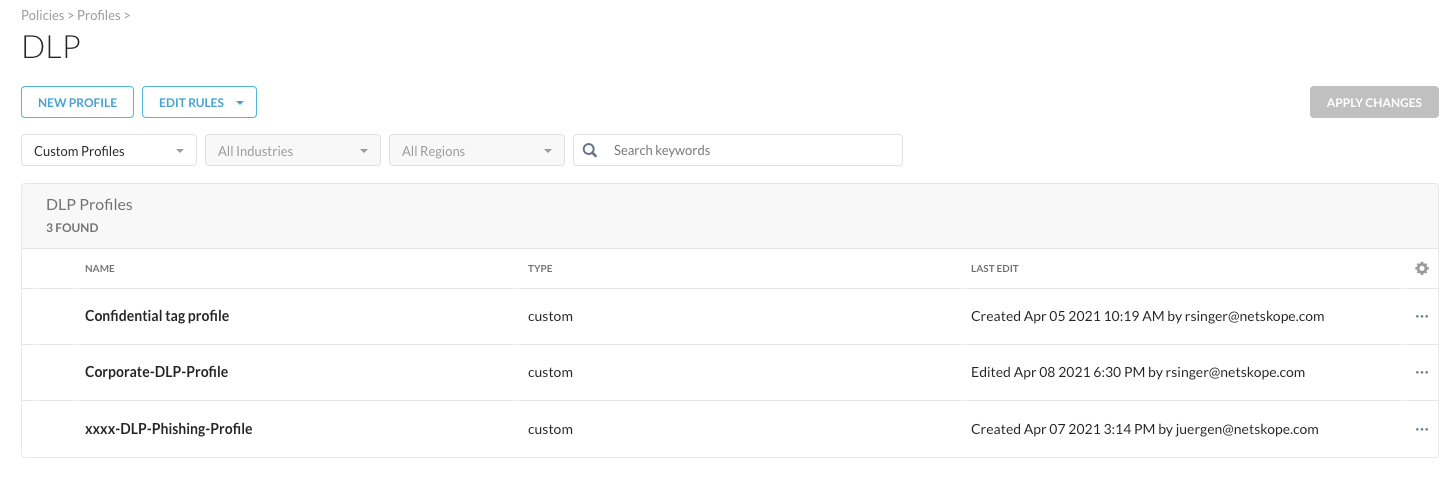
Step 7 From the Skope IT details and the policy configuration, you see that the used DLP Profile is called "Corporate-DLP-Profile". You will find that profile under Policies > Profiles > DLP.
Easiest way to access that one, is to filter for "Custom Profiles":
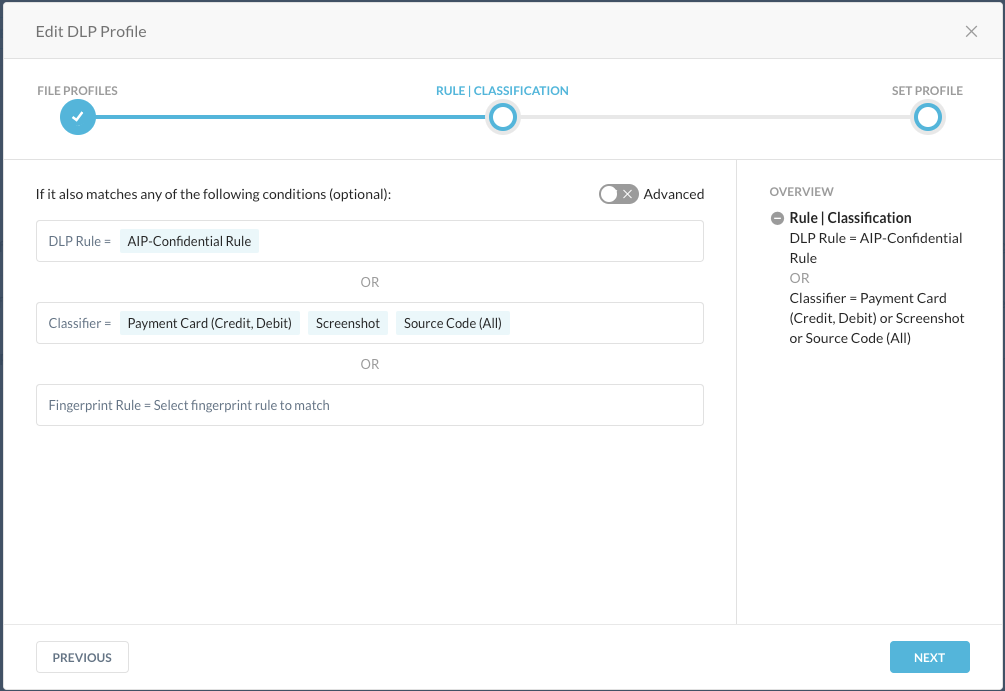
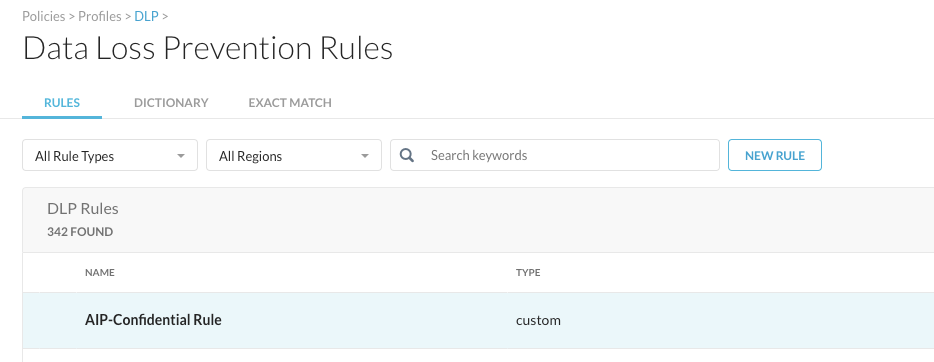
And finally, the DLP rule that was used here (API-Confidential Rule) can be found under Edit Rules > Data Loss Prevention:

Click on the rule and walk through the rule to find the details about identifiers we look for:
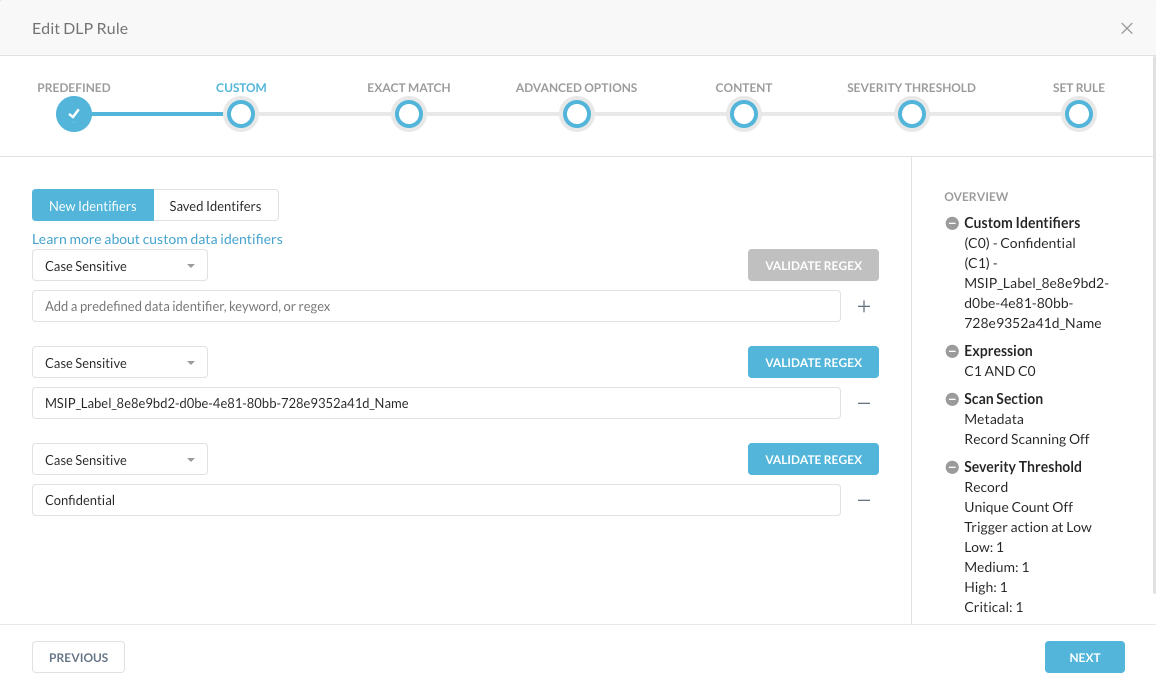
... together with all other details (on the right side), like the Expression, the Scan Selection and the Security Thresholds when that rule triggers.
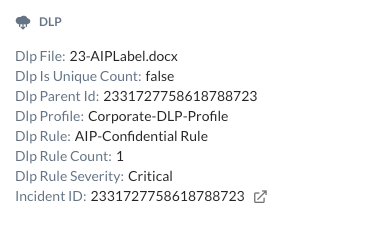
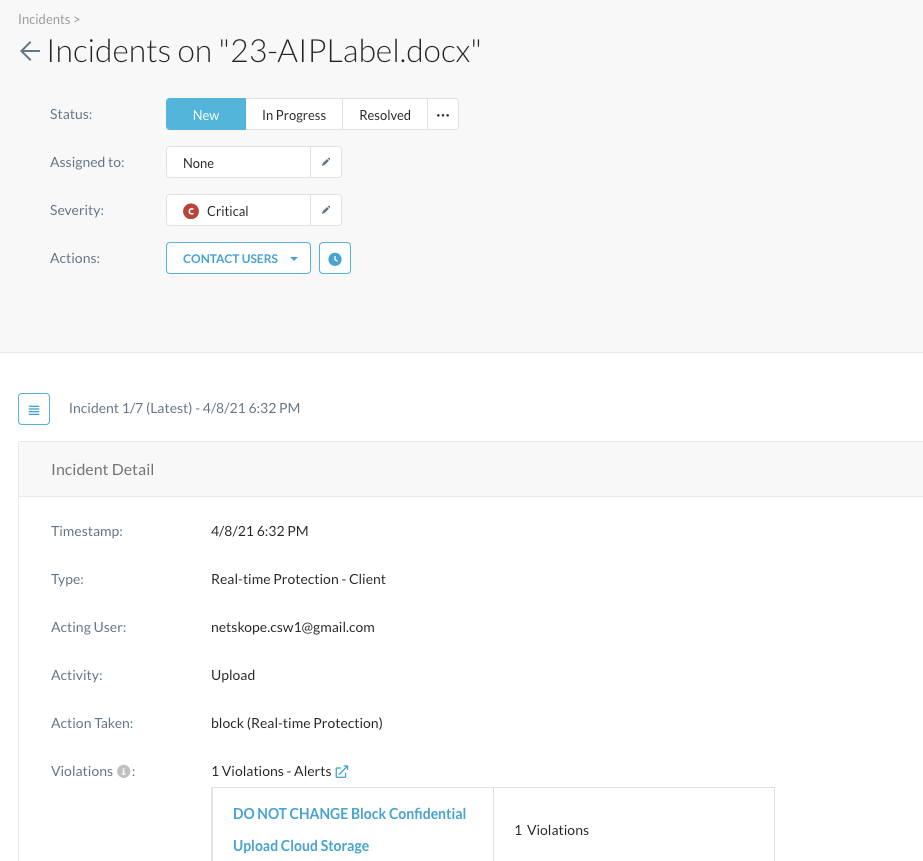
Step 8 Verify the forensic details of that incident. After the AIP file has been detected and blocked, you can have a closer look into details and forensics under Incidents > DLP:
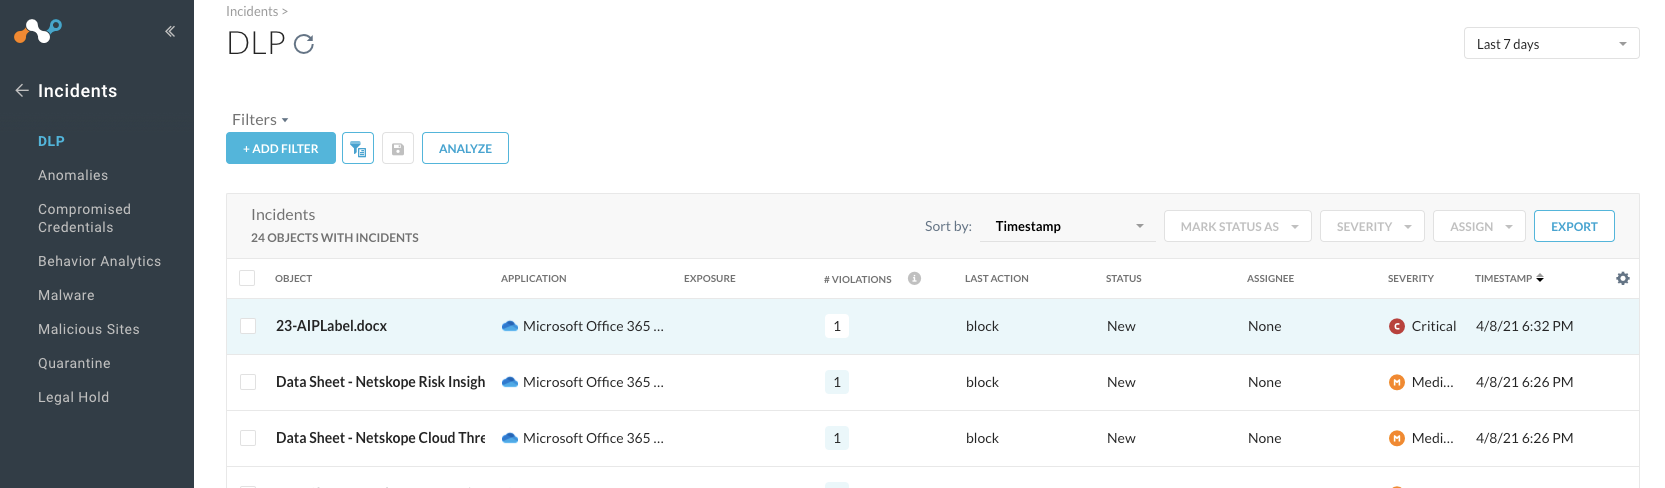
After you click on the appropriate filename, you can kick off a workflow on how to handle that incident, see more details...
... all the way down, you can also find the forensics why this is a violation when you scroll down:
Lab 3b: Use Machine-Learning DLP (optional - if you have time)
OVERVIEW
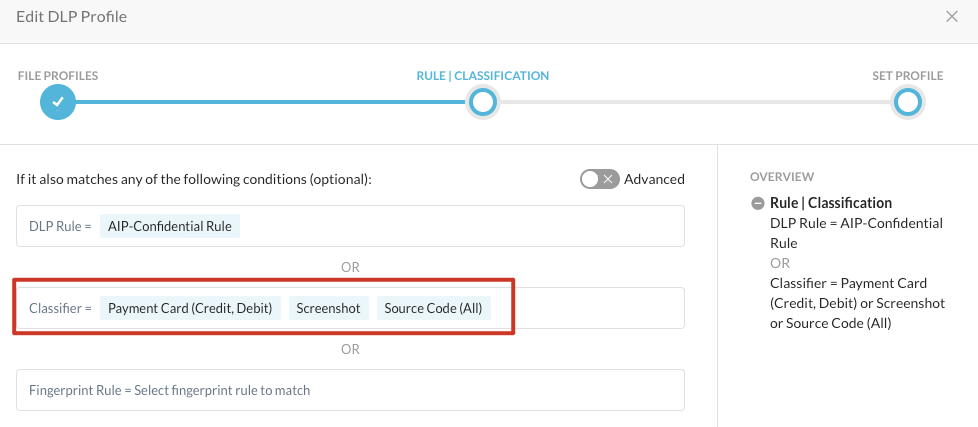
For this lab we will use public available files to prove the ML-based DLP features in certain categories (Payment Cards, Source Code, Screenshots)
Step 1 Review the existing DLP Profile "Corporate-DLP-Profile" and check the below classifiers. Please DO NOT CHANGE the profile.
Step 2 Test the policy by uploading following documents to private OneDrive.
- Payment Card: Search the Internet for "Credit Card" -> Bilder/Picture and save a picture to your PC.
- Source Code: Search the Internet for "source code example","python script" or copy Perl example "test.pl" which is available in Box folder: [https://app.box.com/s/jpvnd61i9piluld0chh4v6wu00685nz1]
- Screenshot: Generate a Screenshot from your PC
- Then, upload them all to private OneDrive.
Step 3 Review the associated SkopeIT alerts and the forensic data under Incidents > DLP. Review the details of the alert with the type = DLP. Check the DLP section to understand why the DLP profile has triggered. Click on the link in the "Incident ID" field. The related DLP incident has more details about the trigger reason.
Check the "Violations" section:

Please continue onto the next section.
Lab 4: Verify Threat Protection
Lab 4a: Verify anti-malware real-time engine is preventing download
Links have been removed and you need to manually fix spacing for malware downloads.
Step 1 Back on your jumpbox or VM system, browse to the site
https://secure. eicar. org/eicar.com
this is a good test to prove that your Threat Protection solution has the ability to prevent 'drive-by Malware downloads'.
When browsing to the site an attempt will be made to download a test file, this test file has been provided by EICAR for distribution as the „EICAR Standard Anti-Virus Test File", and it satisfies the criteria for a virus. It is safe because it is not a virus, and does not include any fragments of viral code. The Threat Protection platform reacts to it as if it were a virus.
Step 2 Click Stop.
Step 3 Now attempt to download the following mimikatz file
https:// netskopelabfiles-cloudworkshop-downloads.s3-us-west-1.amazonaws.com/mimikatz_trunk .zip
Mimikatz is a well-known utility for pass-the-hash, pass-the-ticket, and golden ticket in Windows. It doesn't do anything malicious on its own, so there is no risk in executing it. It is password protected so that none of your security software blocks the download.
Step 4 Click Stop.
WARNING, below is real malware: Double check you are in your jumpbox environment.
Step 5 Now attempt to download Ardamax.Keylogger.zip
https:// app. box. com/s/jpvnd61i9piluld0chh4v6wu00685nz1
Step 6 Click Stop.
Viewing the Alert on the Netskope Tenant
Step 7 Returning to the Home Screen, navigate to SkopeIT >
Alerts.
Step 8 On the Alerts page, add the following filter:
And then select or filter your user entry:
Step 9 Expand the event with Malware from the page and view the details as you did before.
œ
Step 10 Returning to the Home Screen, navigate to Incidents > Malware
Please let your instructor know that you have completed this
lab.
Lab 4a: Verify anti-malware real-time engine
Links have been removed and you need to manually fix spacing for malware downloads.
Step 1 Back on your jumpbox or VM system, browse to the site
https://secure.eicar. org/eicar.com
this is a good test to prove that your Threat Protection solution has the ability to prevent 'drive-by Malware downloads'.
When browsing to the site an attempt will be made to download a test file, this test file has been provided by EICAR for distribution as the „EICAR Standard Anti-Virus Test File", and it satisfies the criteria for a virus. It is safe because it is not a virus, and does not include any fragments of viral code. The Threat Protection platform reacts to it as if it were a virus.
Step 2 Click Stop.
Step 3 Now attempt to download the following mimikatz file
https:// netskopelabfiles-cloudworkshop-downloads.s3-us-west-1.amazonaws.com/mimikatz_trunk .zip
Mimikatz is a well-known utility for pass-the-hash, pass-the-ticket, and golden ticket in Windows. It doesn't do anything malicious on its own, so there is no risk in executing it. It is password protected so that none of your security software blocks the download.
Step 4 Click Stop.
WARNING, below is real malware: Double check you are in your jumpbox environment.
Step 5 Now attempt to download Ardamax.Keylogger.zip
https:// app. box. com/s/jpvnd61i9piluld0chh4v6wu00685nz1
Step 6 Click Stop.
Viewing the Alert on the Netskope Tenant
Step 7 Returning to the Home Screen, navigate to SkopeIT >
Alerts.
Step 8 On the Alerts page, add the following filter:
And then select or filter your user entry:
Step 9 Expand the event with Malware from the page and view the details as you did before.
Step 10 Returning to the Home Screen, navigate to Incidents > Malware
Please let your instructor know that you have completed this
lab.
**Lab 4b: Preventing Cloud Phishing **
Estimated Time: 15 minutes
Create a DLP rule for Phishing on G.Forms
Step 1 Navigate to Policy > DLP > Edit Rules > Data Loss Prevention Rules. Now we will build a DLP rule to trigger on a corporate email address (@dummy.com) + Password. Click New Rule
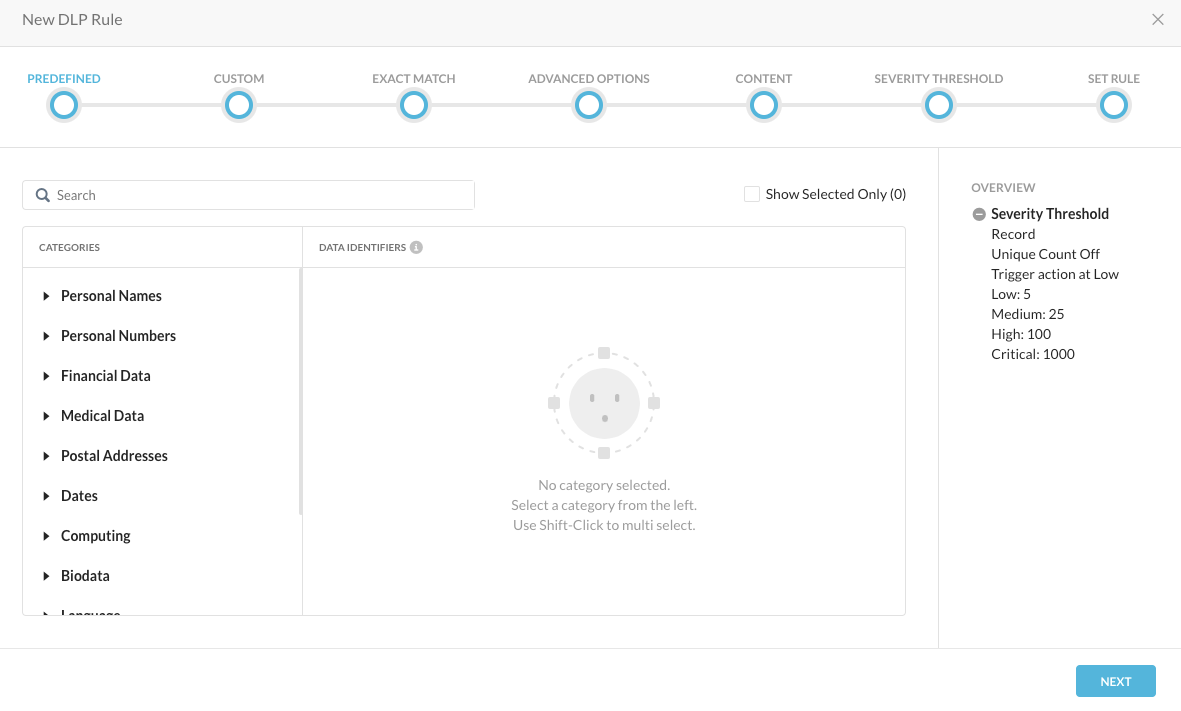
Step 2 Search for "password" and press Enter
Step 3 Select "Passwords (Common) and Passwords (Secure) and click NEXT
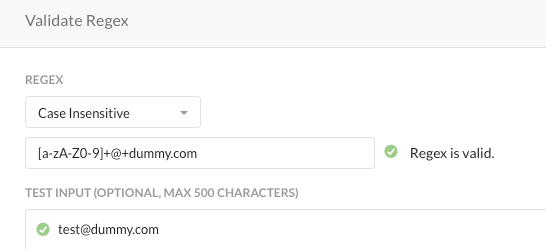
Step 4 Change the drop-down-list to "Case Insensitive"
Step 5 C/P this regex "[a-zA-Z0-9]+@+dummy.com" into the custom identifier and press the "+" button.
Step 6 Click VALIDATE REGEX and enter "[test@dummy.com]" as a test input and click TEST INPUT. Close the window with Save or Cancel and click NEXT twice.
Step 7 Remove the default rule expression and build the below expression.
( C0 AND P0 ) OR ( C0 AND P1 )
Please build the expression by clicking the data identifiers and the Operators. Typing the rule expression will fail.
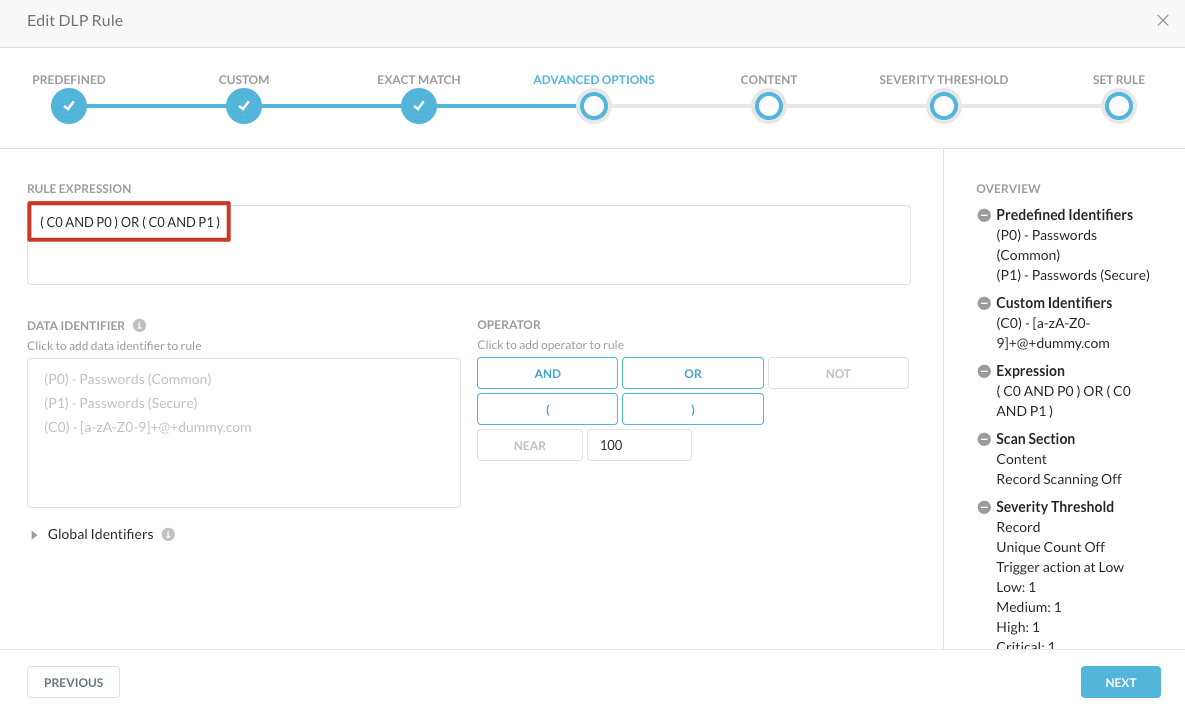
This combines the email address with both types of password types. Click NEXT
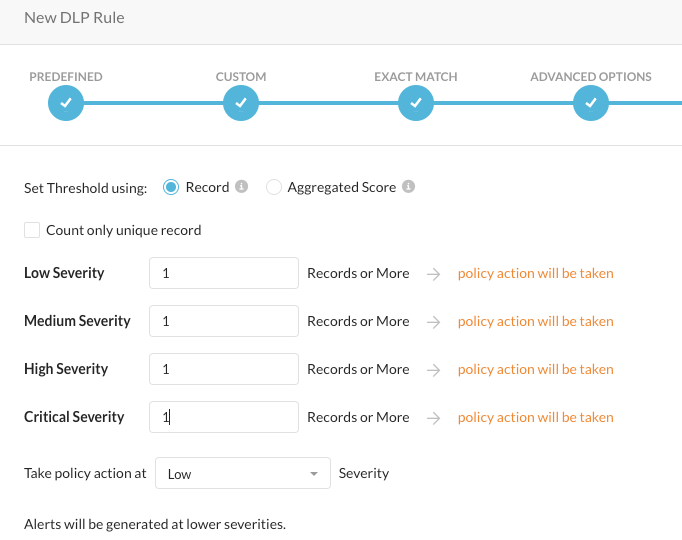
Step 8 Switch the drop-down-list to "Content". Metadata is only used when files are investigated. Click NEXT
Step 9 Set all thresholds to "1", as we would like to set the severity for this rule to "Critical". Click NEXT
Step 9 Name the rule "CSW[X]-DLP-Phishing-Rule", click SAVE and APPLY CHANGES
##DLP Profile Creation
Step 1 Jump one menu level back by clicking on DLP in the page header or in the left menu. Click NEW PROFILE
Step 2 Click NEXT. Start typing your DLP rule name in the first field and select your rule. Click NEXT
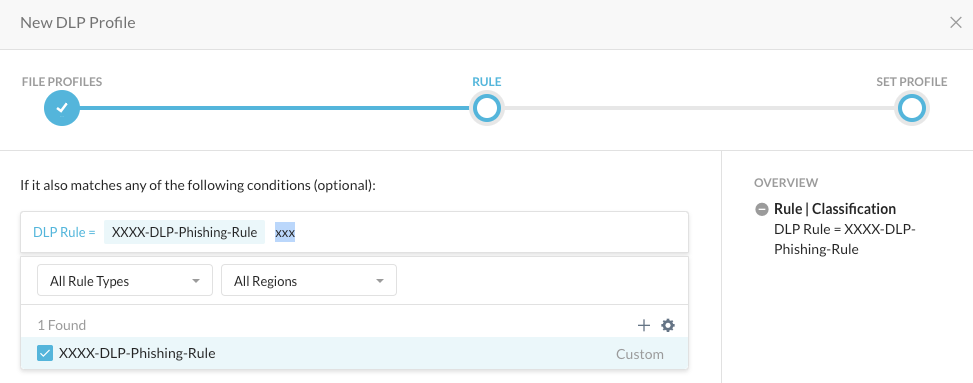
Step 3 Name the profile "CSW[X]-DLP-Phishing-Profile", click SAVE and APPLY CHANGES
##Inline Policy Creation
Step 1 Please build a new inline policy for your user:
-
the custom app [Google Forms]
-
Profile : select the new DLP profile, CSW[X]-DLP-Phishing-Rule
-
Activity = "FormPost"
-
Action = block
-
Use the Policy Template= "DATA - Sensitive Data Detected".
-
Give it a name which starts with your CSW[X] number
-
Save and think about a good order where to place the policy!
Step 2 Test the policy with this sample form:
Use any email address with @dummy.com and a common (like "passw0rd1") or secure password. If you have a password generator tool like Lastpass, use it or use one from the internet: https://passwordsgenerator.net/
Step 3 Review the associated SkopeIT alerts and the forensic data under Incidents > DLP
Please let your instructor know that you have completed this
lab.
Conclusion
Congratulations in completing these lab exercises. We hope you now have better understanding of what Netskope is capable of. Netskope Security Cloud, a single platform and a single UI to is to control and secure access to cloud applications.